Porsche G935 - 012 - 2nd Skins Layer-Splitters


Co-Hog Porsche G935 - Update 012

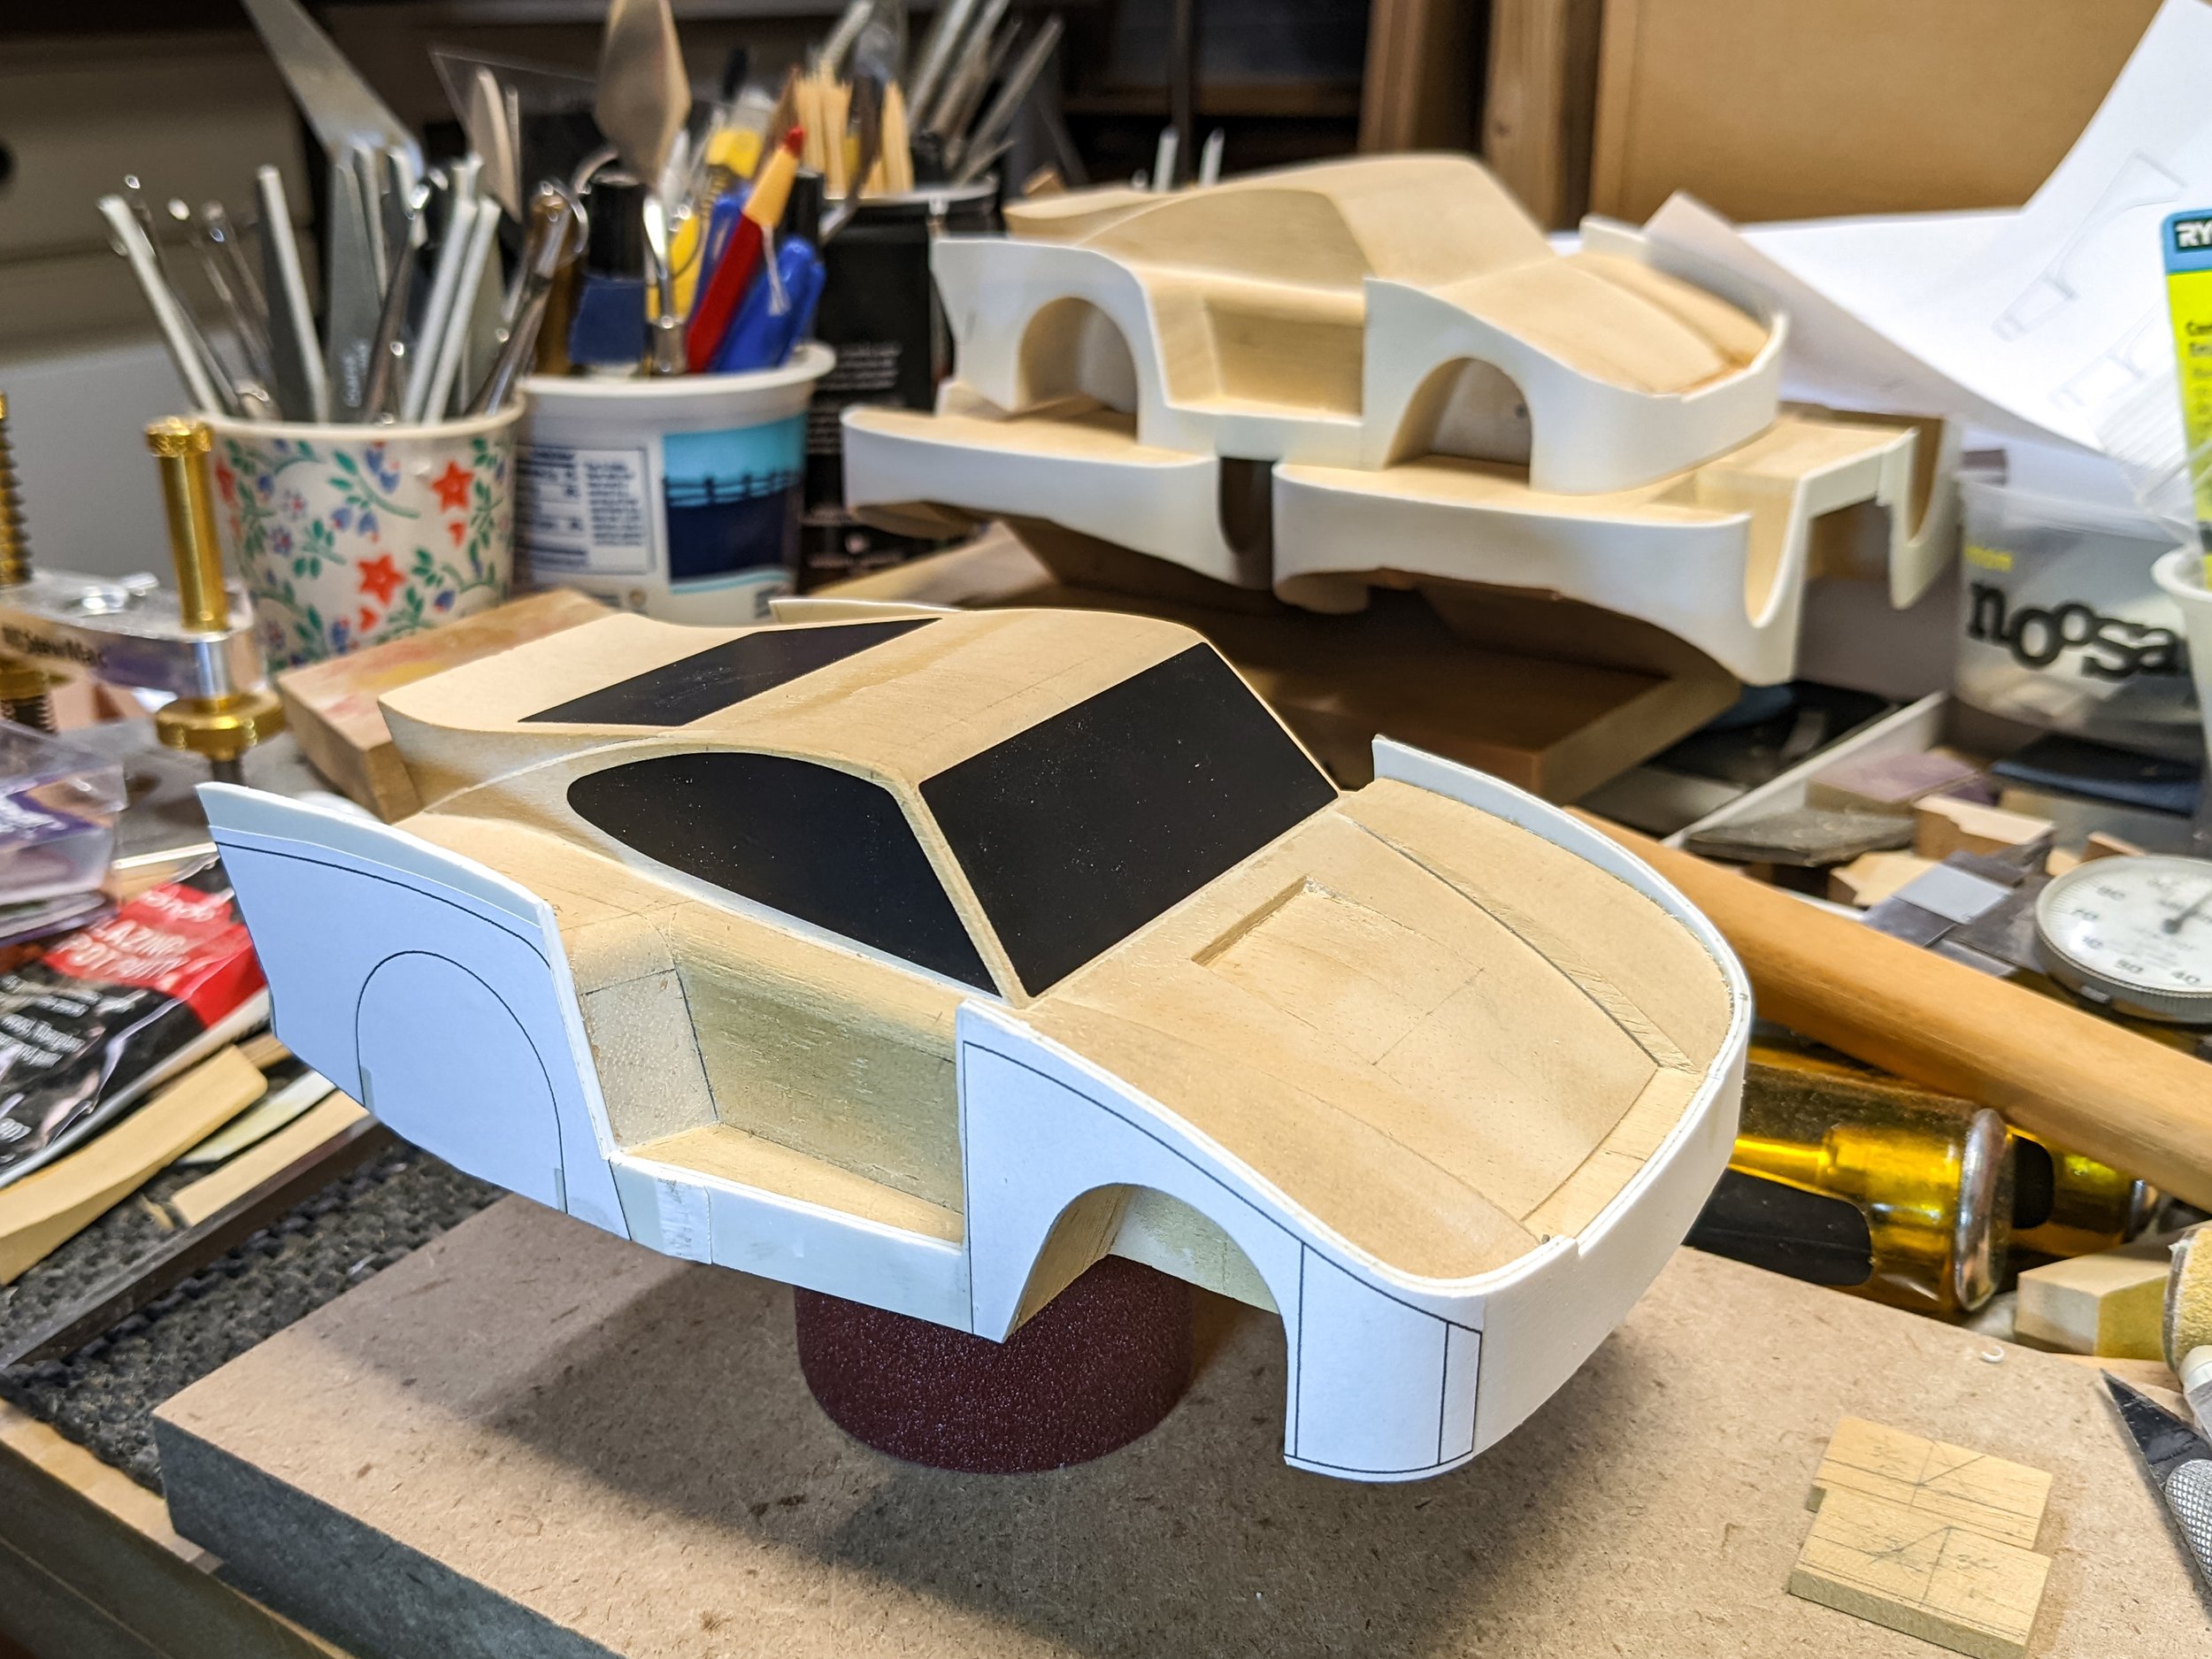
It's looking a lot more like a race car now. I added some preliminary graphics to get a better feel for overall progress.

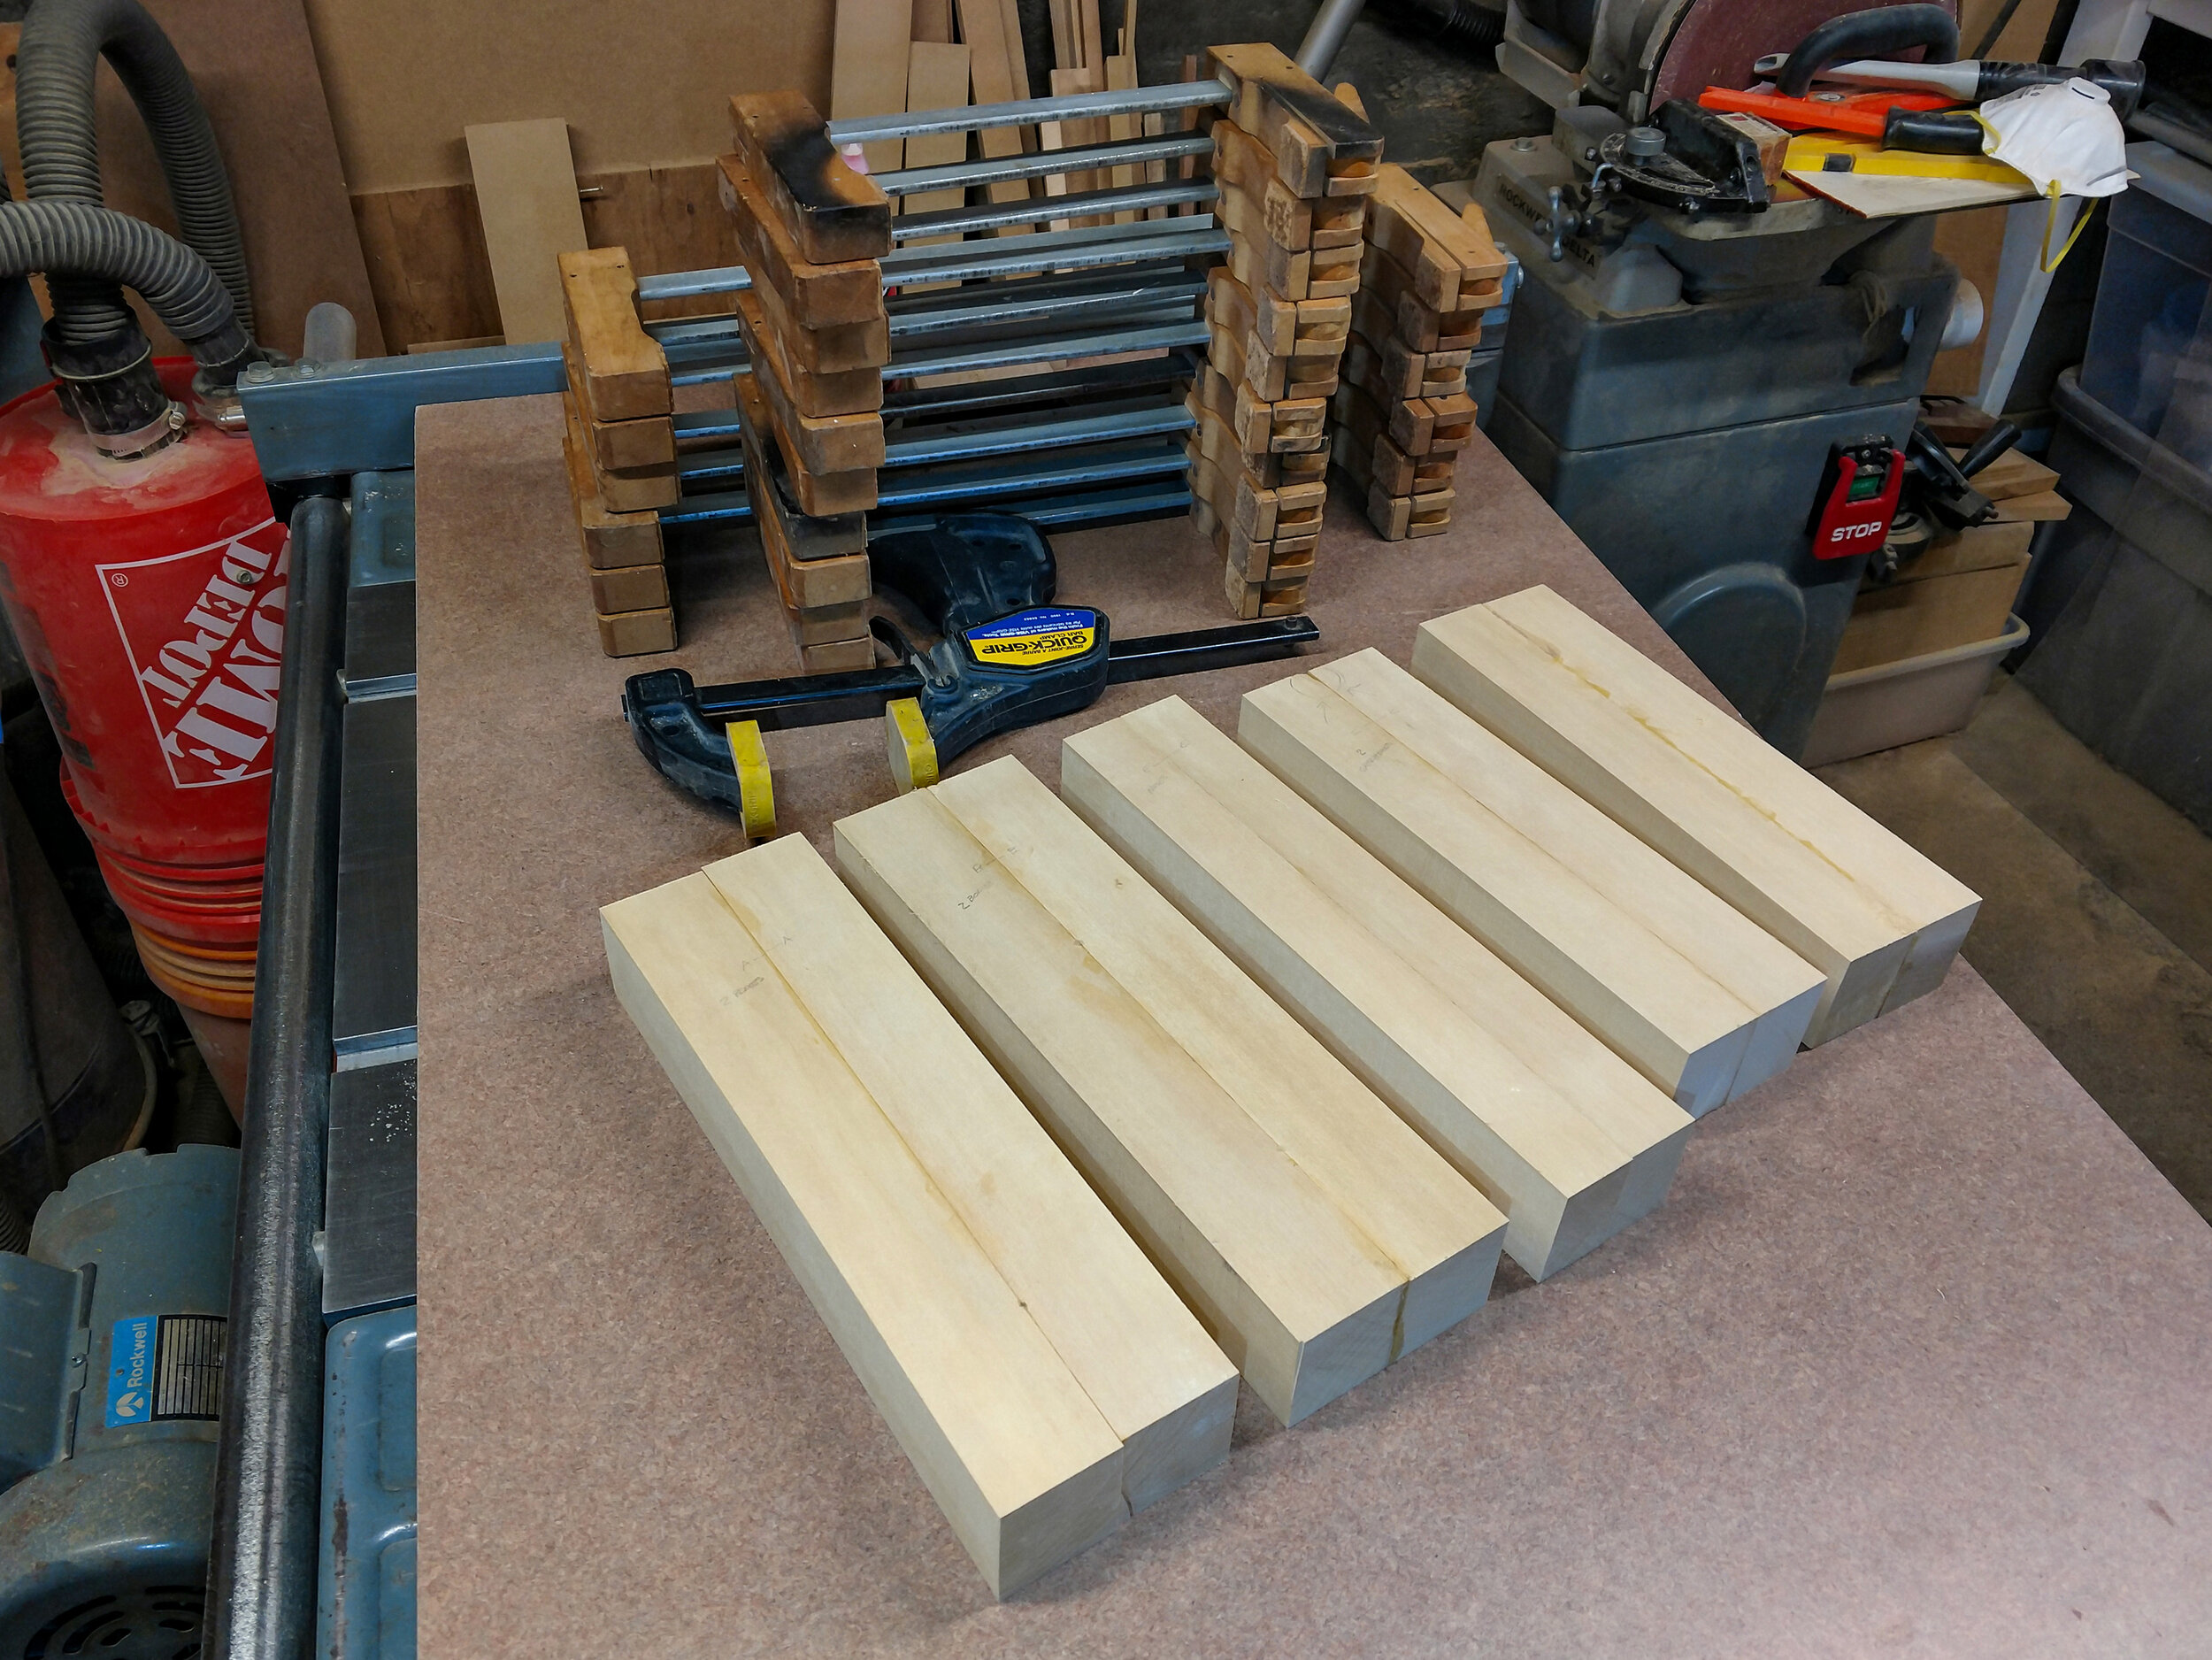
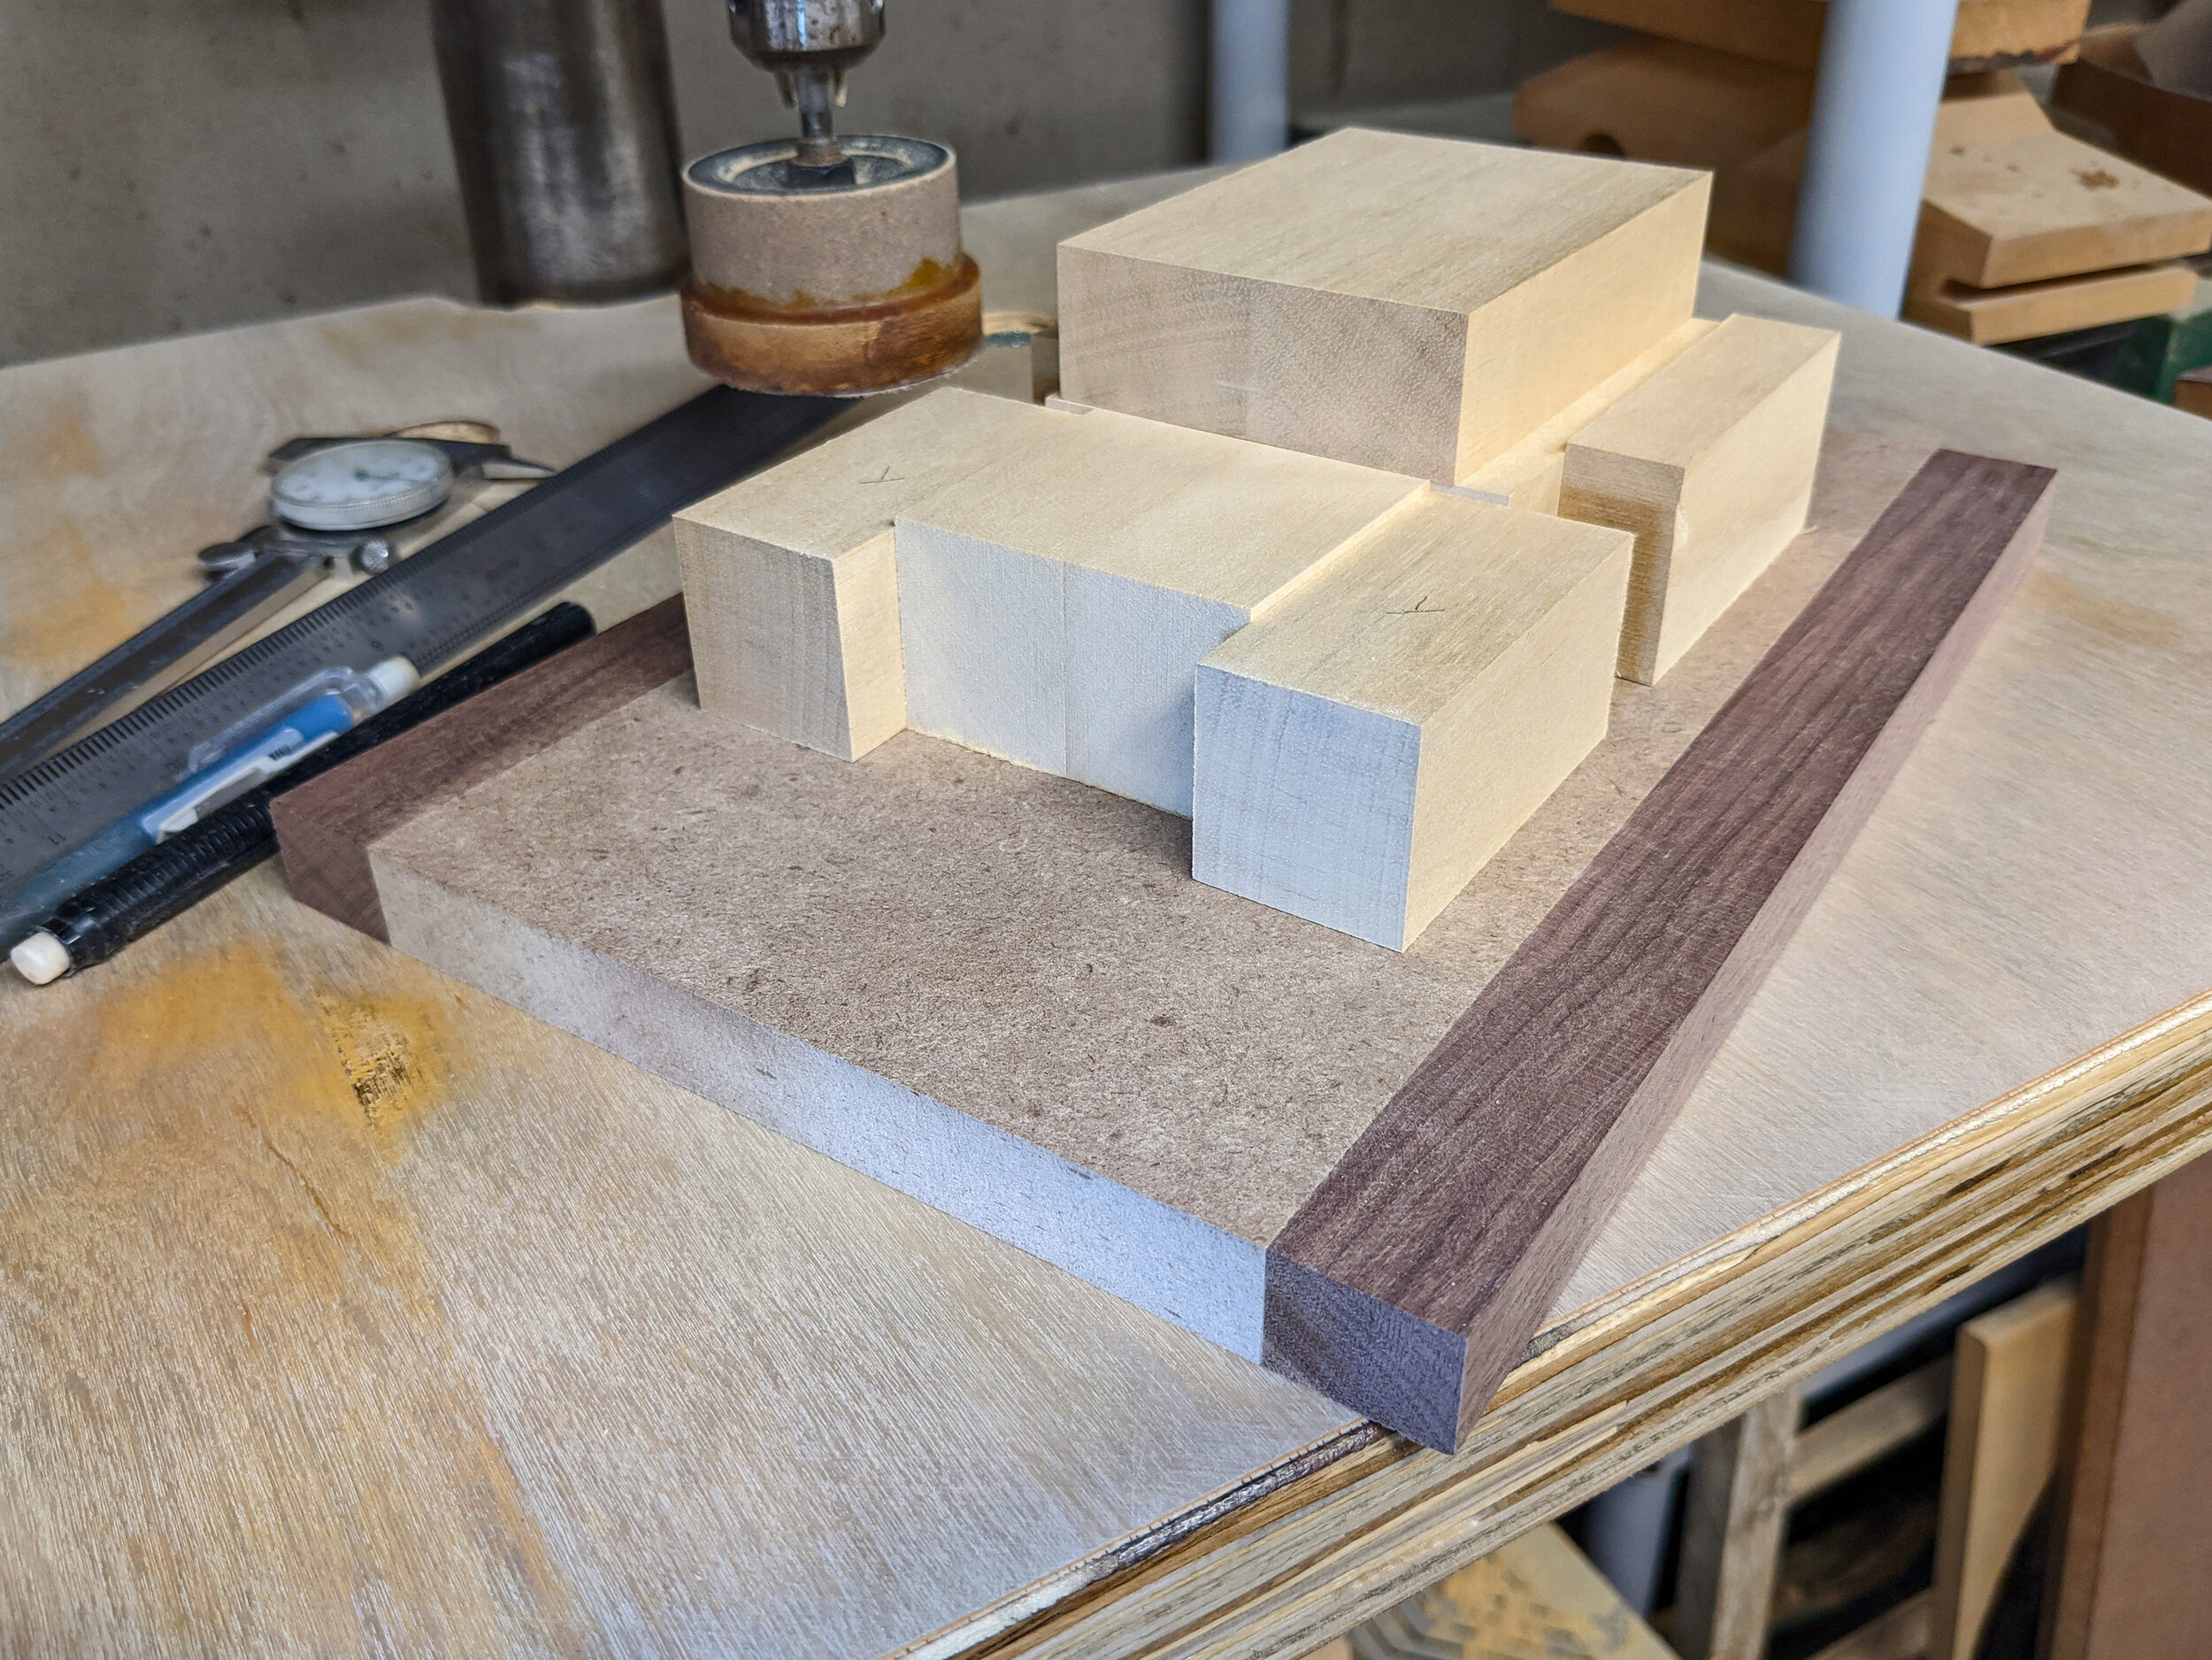
Lots of progress on adding the first and second skin layers. I'm finding that the combination of materials is harder to work with than desired - jelutong is soft and shapes easily, whereas the polystyrene requires more force but has the needed flexibility and flat surfaces.

However, it is a plus having two layers which leaves an automatic center line to work to during final shaping. The contact cement has great holding power but is difficult to remove in tight spots.

Co-Hog Porsche G935 - Update 012

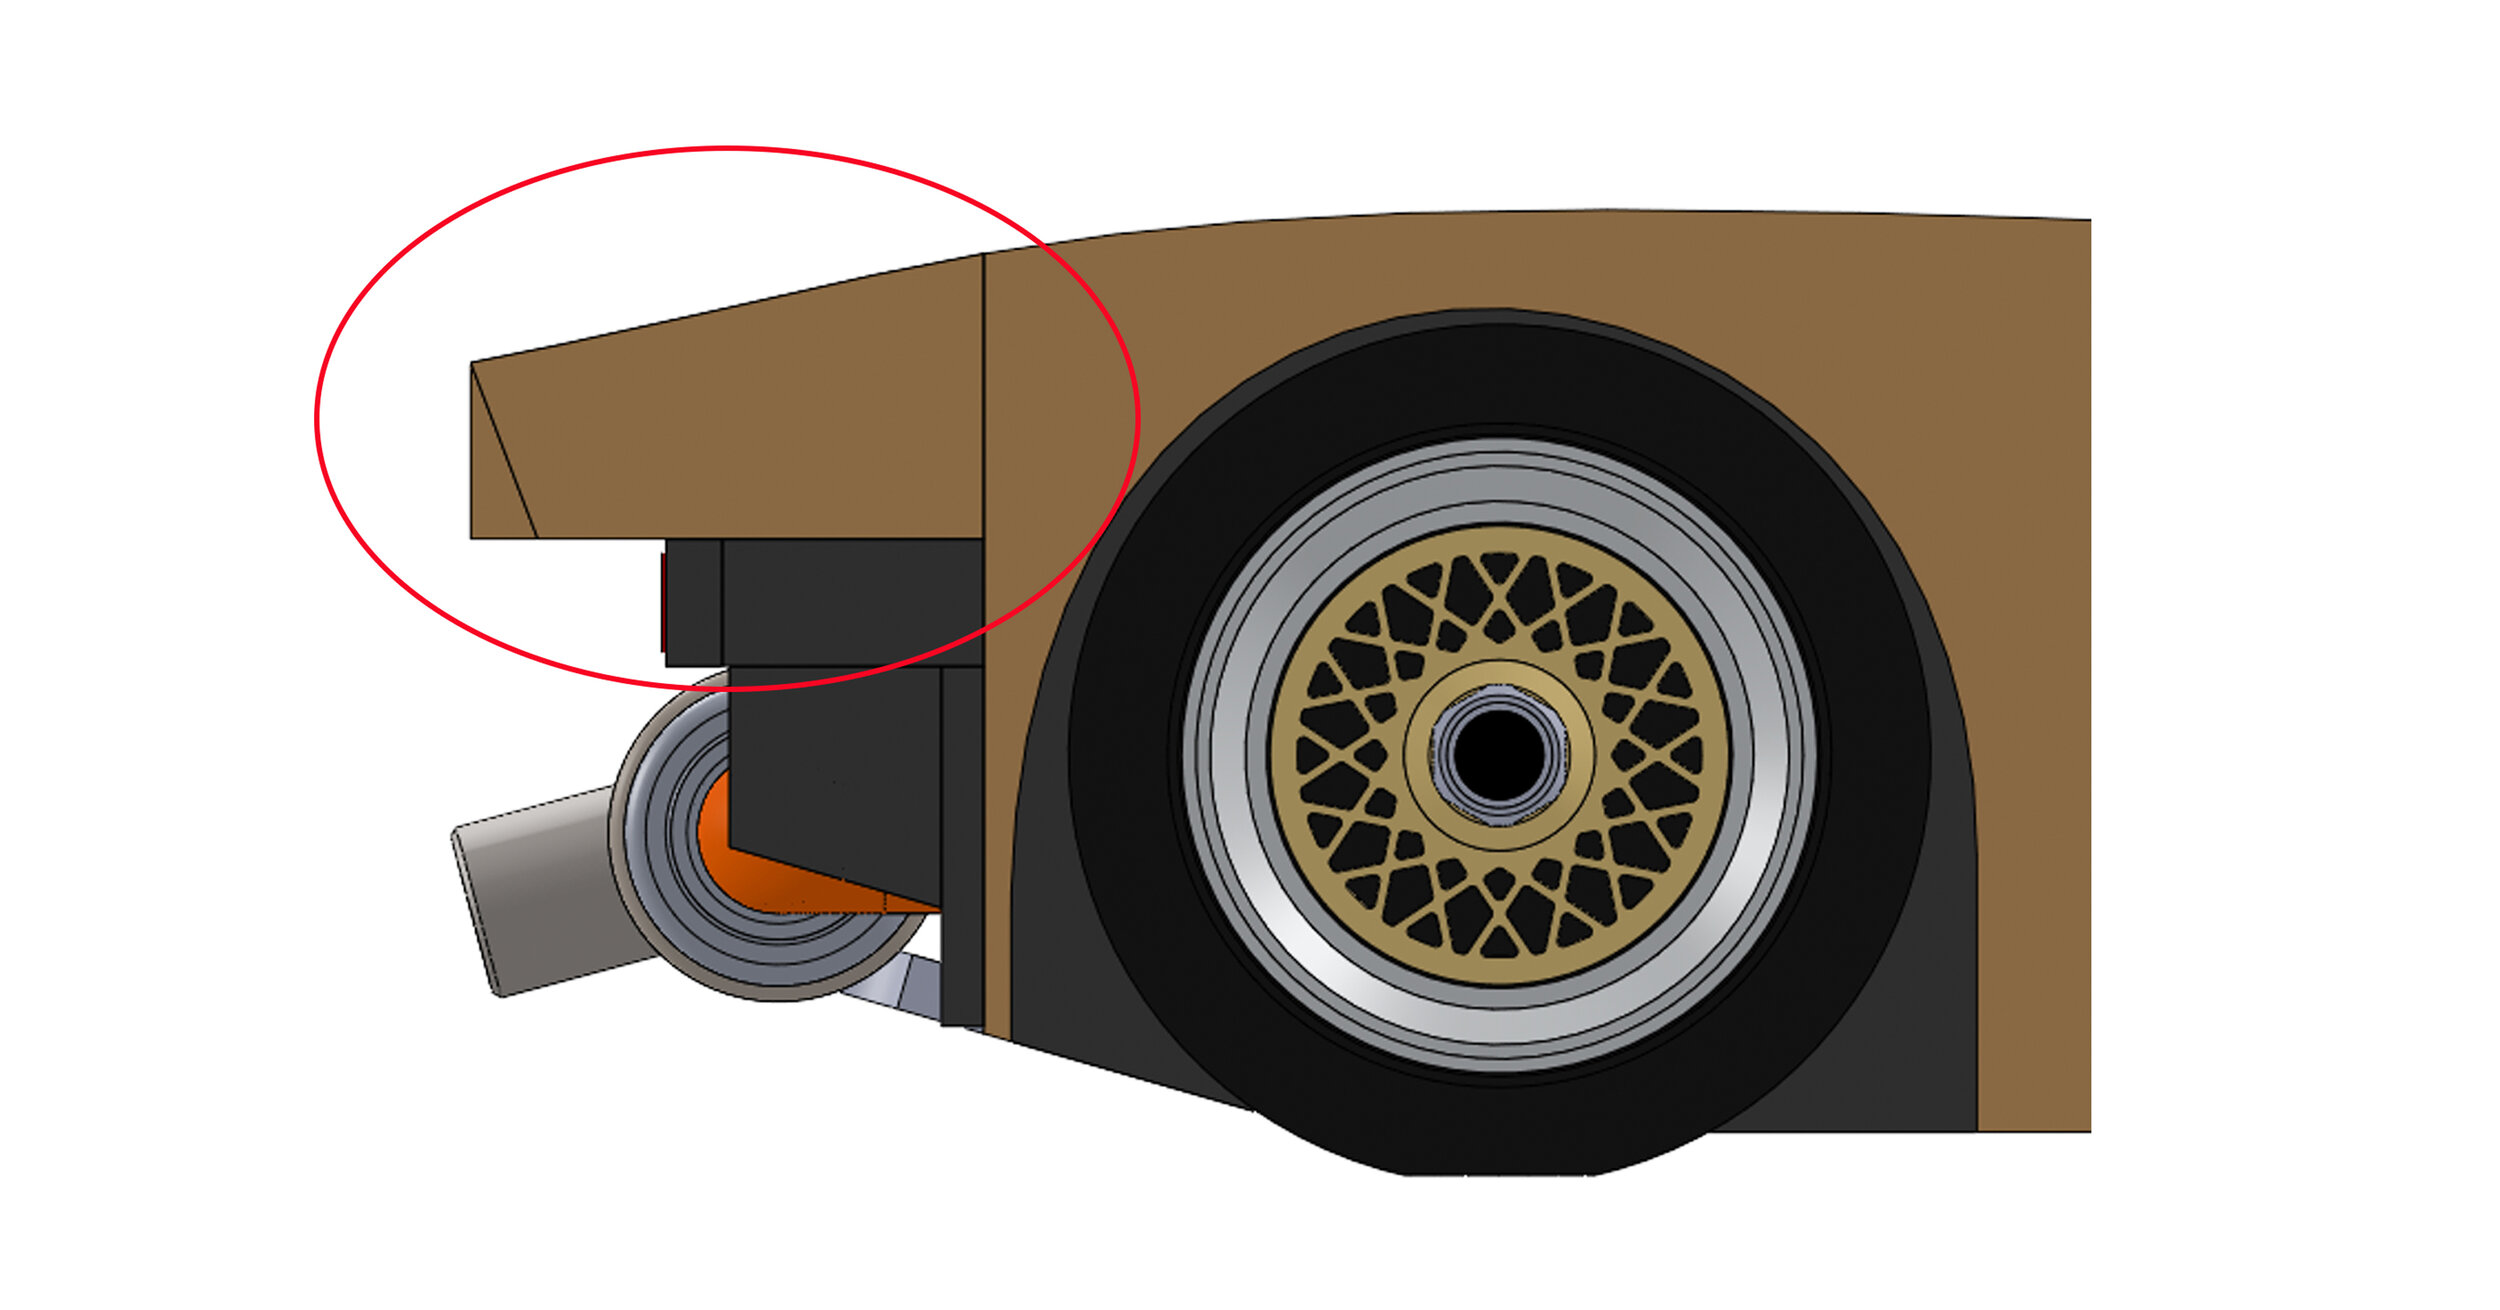
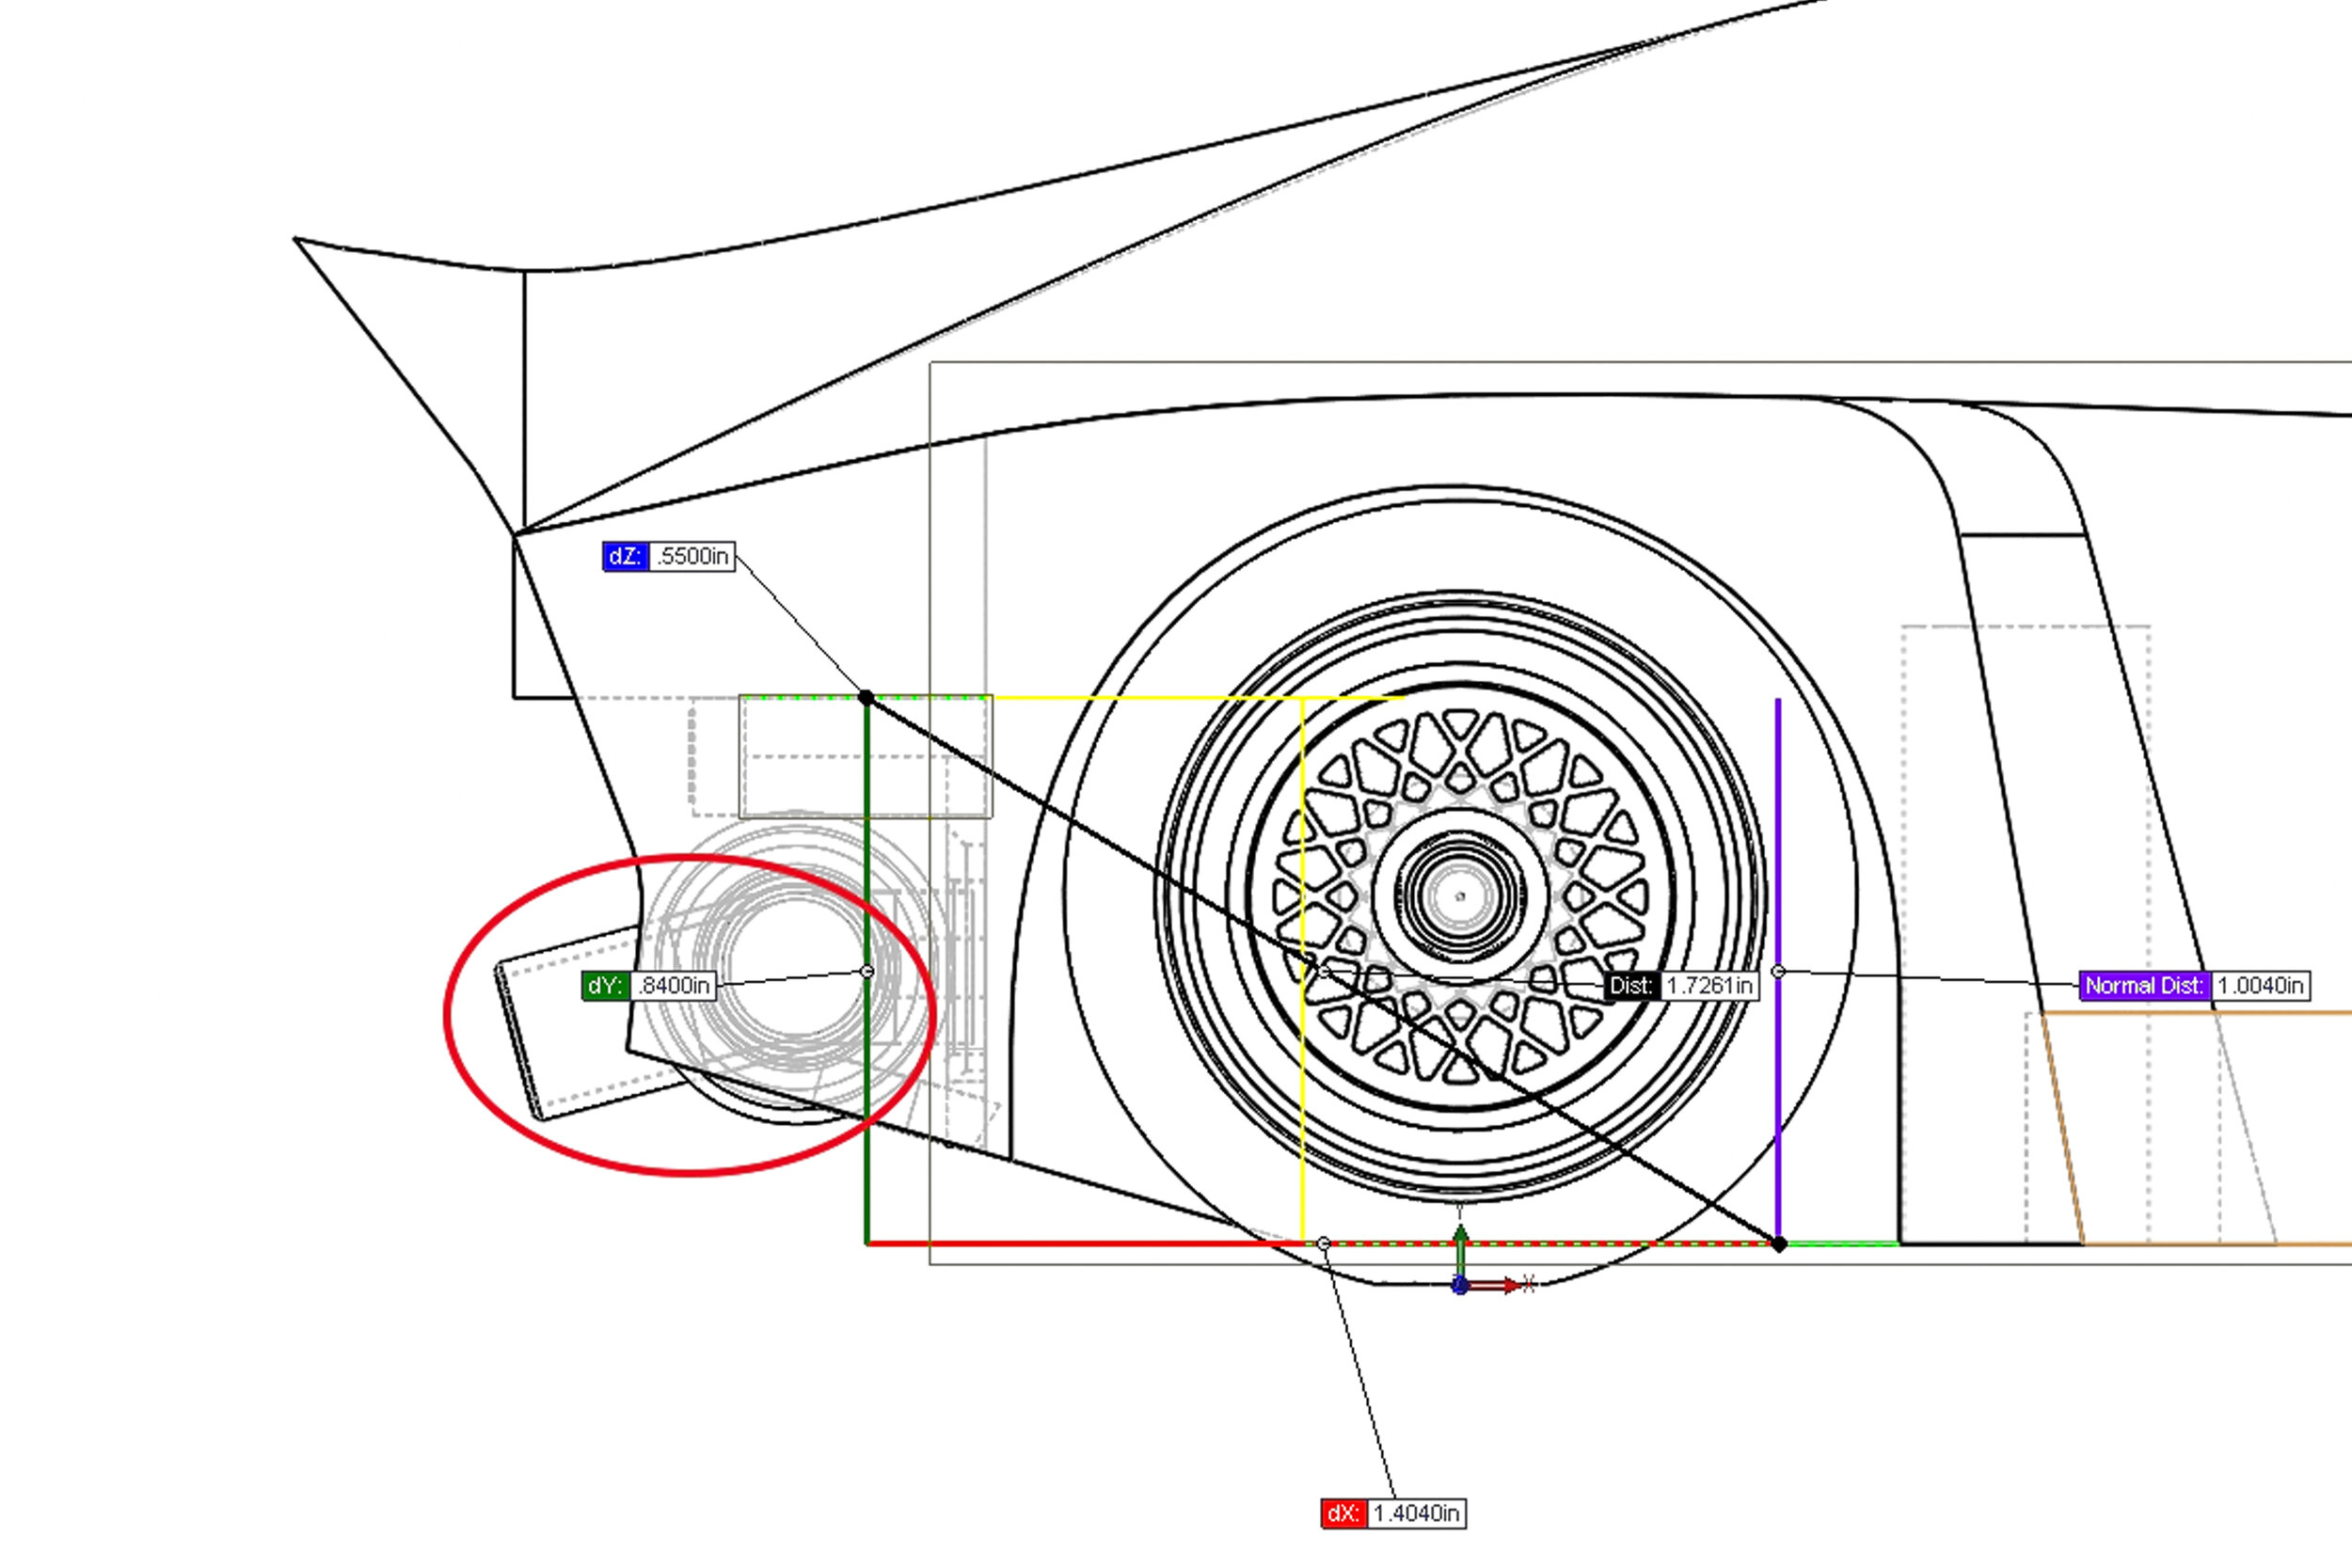
Showing some preliminary splitter profile shaping. The splitter wedges that blend the horizontal plates into the vertical fronts are in the works.

The rear fenders have their back edge aero plates in place now.

Co-Hog Porsche G935 - Update 012

The shape of the rear wheel wells is close to done. They'll be fine tuned along with the stance. The second skin layer provides some tire overlap which helps get the stance closer to what I want.

Co-Hog Porsche G935 - Update 012

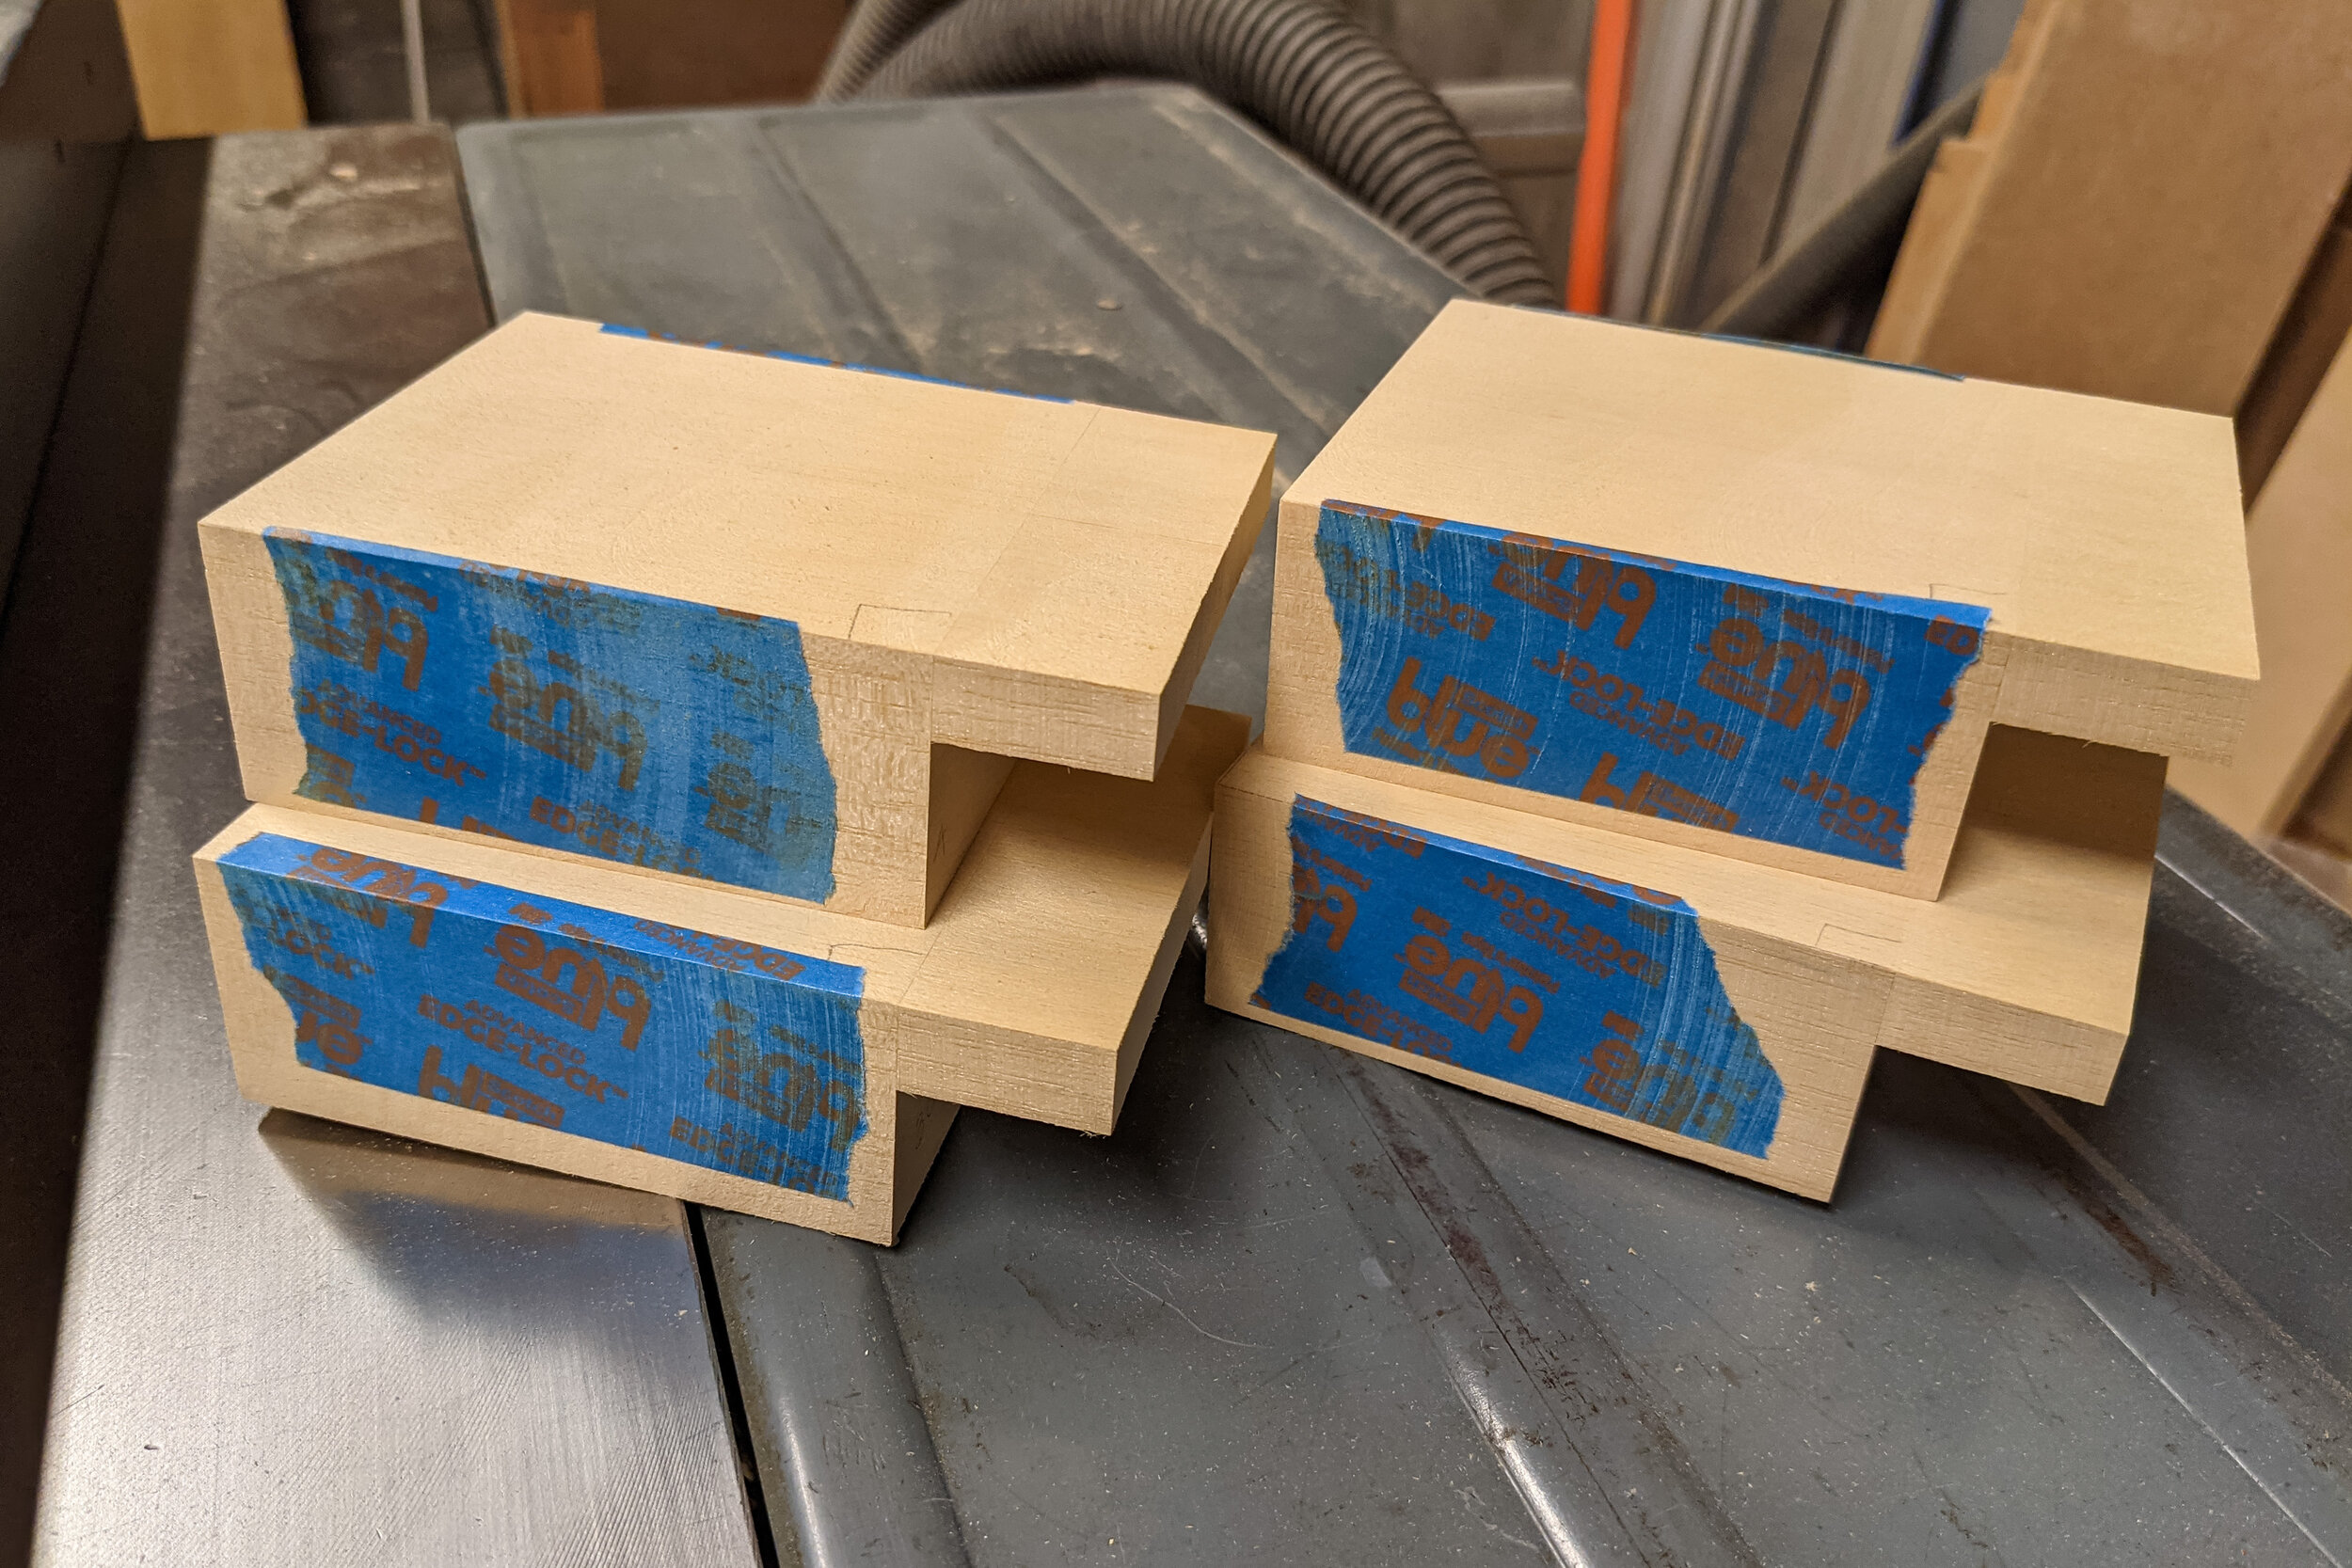
Splitter recesses have been dadoed into the front of each G935 and the first splitter is in position. At 0.045" (1.14 mm), the splitter is just a bit thicker than each skin layer.

Co-Hog Porsche G935 - Update 012

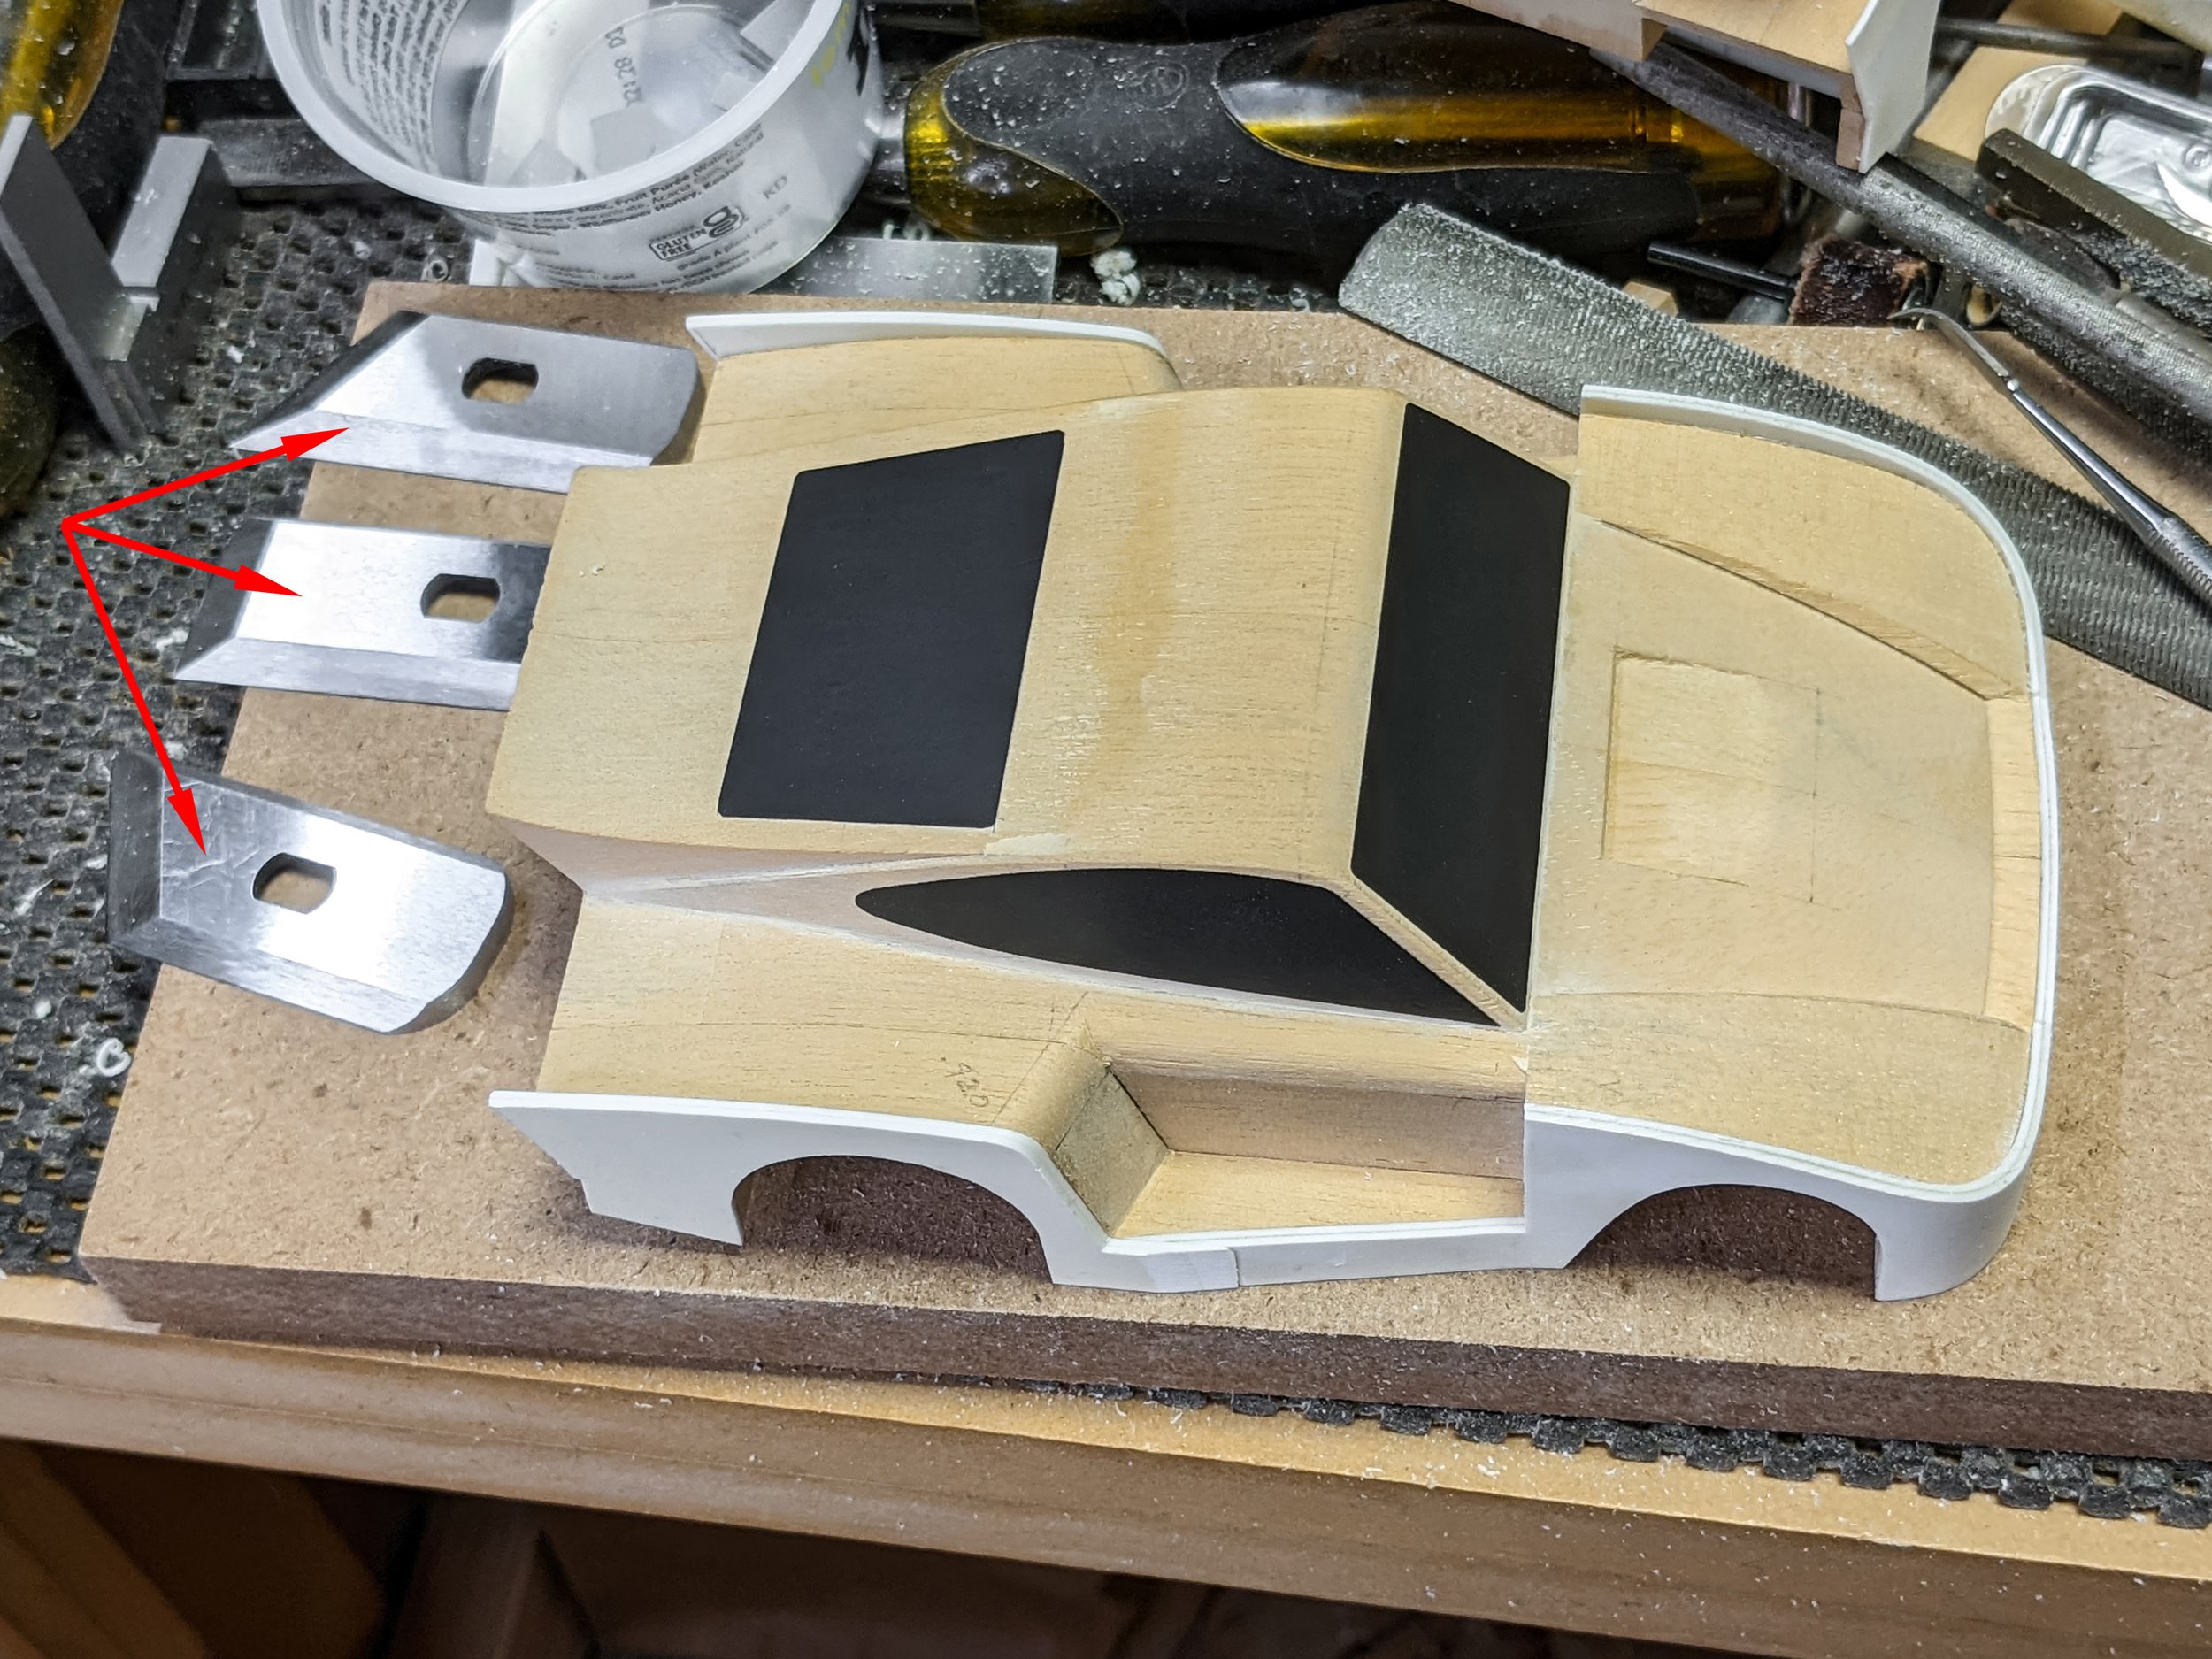
All skins are in place and side profile shaping is closer to done. The trio of StewMac chisel planes are great (after some serious sharpening) for really fine work, especially trimming the skins flush with the jelutong surfaces.

Each plane also has a well-sized spherical handle that screws on to give more leverage for heavier work.

Co-Hog Porsche G935 - Update 012

The second rear skin layers are on. Templates printed from CAD data are in place for the rear wheel well and fender top profiles.

Co-Hog Porsche G935 - Update 012

The first rear skin layers are in place.

Looks like Batman would like it!

Co-Hog Porsche G935 - Update 012

Now both skin layers are on the front. Lots of trimming and shaping are still needed.

The rear fender profile tips have been glued on, I couldn't add rear skins until these were in place.

Co-Hog Porsche G935 - Update 012

To complete the rear fender profiles tiny fender tips were made and glued on.

Co-Hog Porsche G935 - Update 012

Hand-forming of the front skins was done using this highly technical jig. A piece of brass rod held in a vise provided just the right strength to gradually form each piece into a much better shape for more accurate placement during gluing.

Co-Hog Porsche G935 - Update 012

This front skin is ready to mount. Each body's skin had various slots and relief cuts added as I learned where the stress lines were.

Next up will be 013 - Nose Shaping - the nose and splitter start to take shape.


Spray Booth Progress

The biggest fiasco during the construction of the Co-Hog Porsche 935 Artist's Proof was the so-called spray booth. Removing debris from paint and final clear coats added up to significant delays. Plans to replace the booth were already underway, but it was going to be major undertaking in such a tightly packed shop. More than a year later, I'm still working on it between all the other projects, so here are some images and explanations (in the photo comments) to bring things up to date.

Read More

Porsche G935 - 011 - Front Skins


Co-Hog Porsche G935 - Update 011

This was taken back in May, while the bodies were still being shaped. The thin piece of jelutong with the polystyrene edge-wrapping was done to test the process and check the endurance of using contact cement.

In the foreground is one of the test paper templates used to create a process for transferring the unique profile of each G935.

Co-Hog Porsche G935 - Update 011

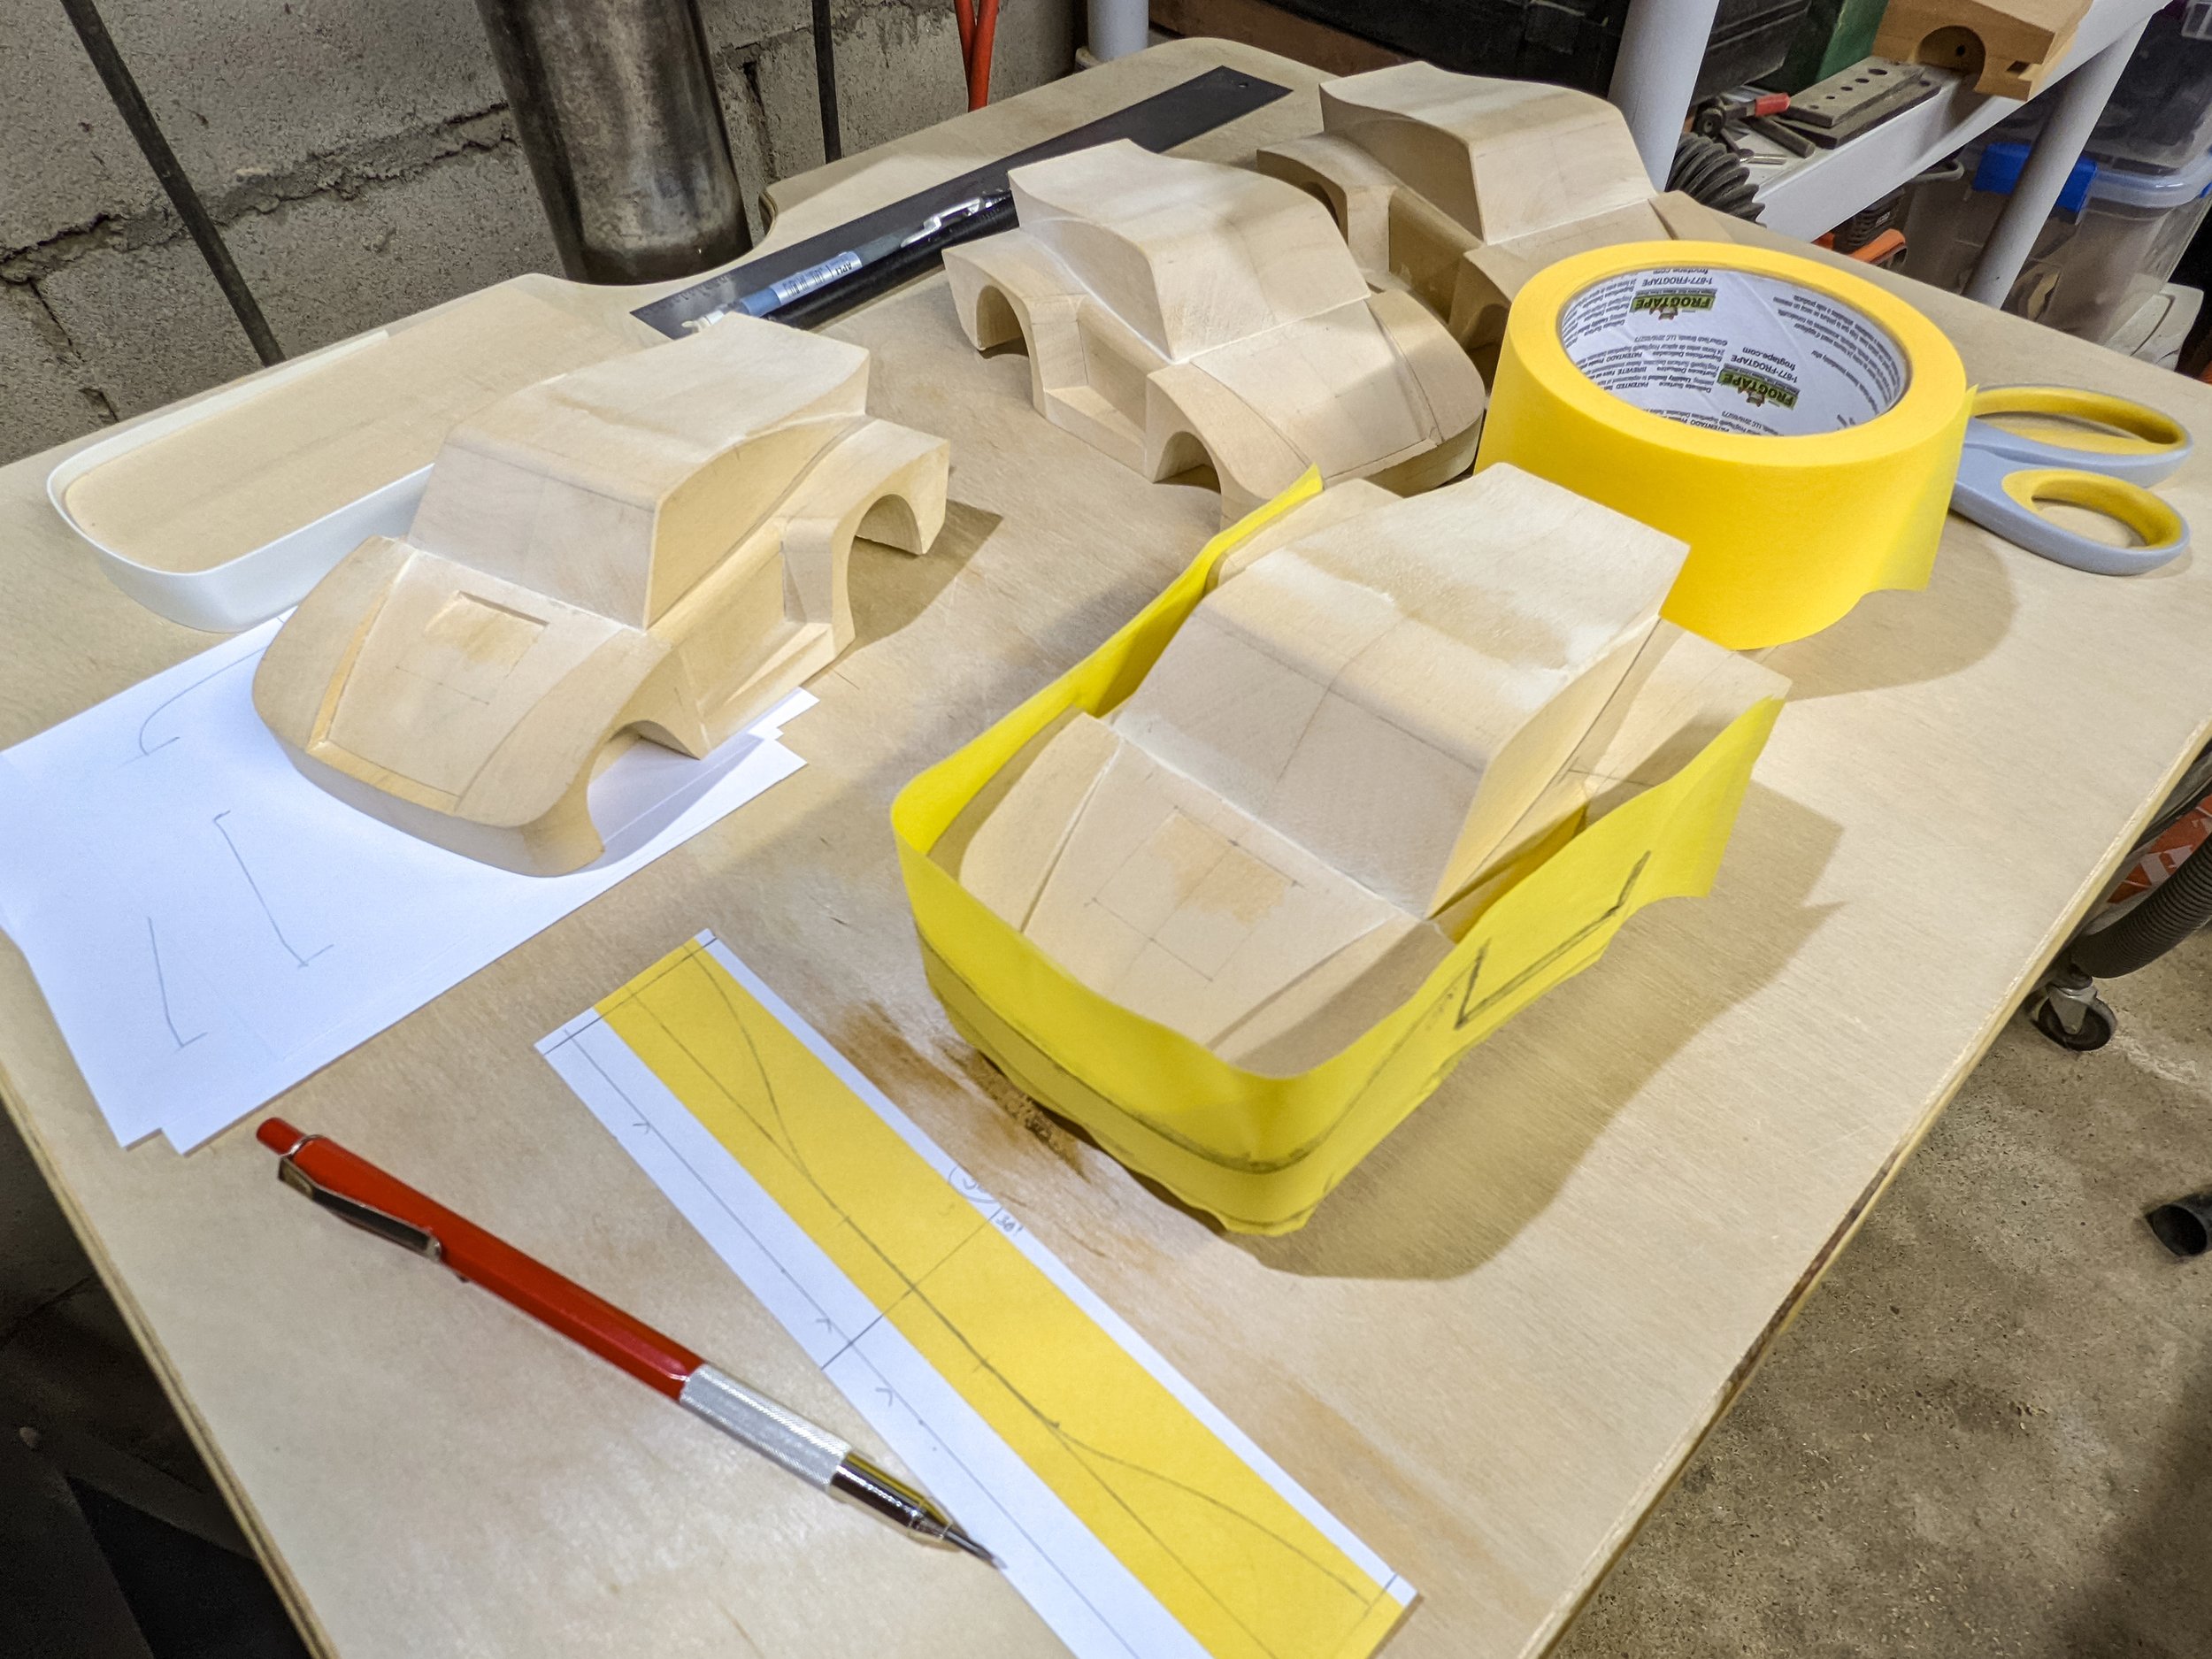
All four G935’s are ready to be skinned. Final plan view profile shaping and blending has been done. The guinea pig has its template wrapped and ready with the needed profiles marked.

Co-Hog Porsche G935 - Update 011

The template has been unwrapped and transferred to the first 0.030" (0.76 mm) polystyrene layer.

Next, the template is marked and trimmed so that only areas where adhesion is desired are left exposed.

Co-Hog Porsche G935 - Update 011

The body has been masked as well and contact cement has been applied to both the body and the polystyrene.

Co-Hog Porsche G935 - Update 011

The prepared polystyrene sheet was carefully positioned starting with the front center line and then gradually wrapped around each side.

Some interesting clamping was needed to help maintain correct positioning.

Co-Hog Porsche G935 - Update 011

After clamping for 24 hours the result is ready for rough trimming. Bumper cars anyone?

Co-Hog Porsche G935 - Update 011

Rough trimming has been completed. The final wheel wells shapes are done tight to the profile so the second sheet can be added and there will be extra material to shape the wheel openings to properly work with the tires.

Next up - 012 - 2nd Skins Layer-Splitters - rear fenders will receive skins after some additional work on their profiles.


Special Edition - 1979 BMW 320i (E21)


Co-Hog BMW 320i photo

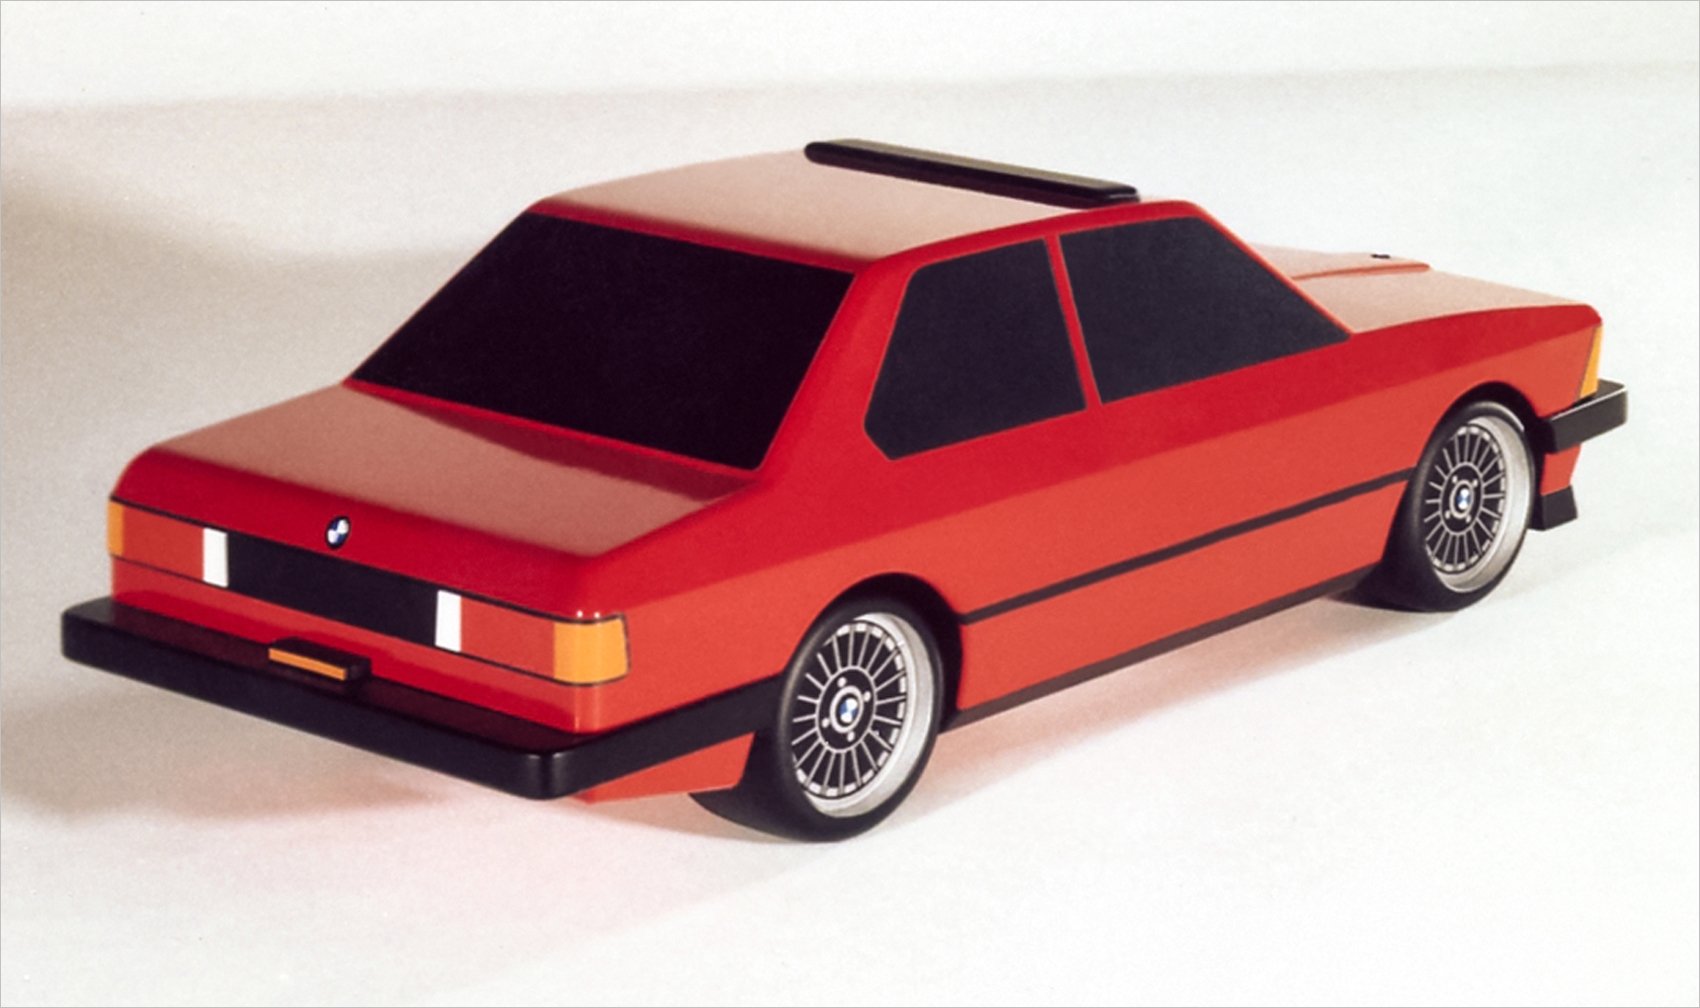
The first of only three Co-Hog BMW 320i's was commissioned by Michael J. Izor. He bought his 1:1 Iberian Red 320i (E21) in 1979 and enjoyed it passionately. It was his pride and joy and he kept it in perfect condition.

Michael also collected miniature BMW's. At its height, he had well over 500 little ones. He was selective and worked hard to secure pieces from difficult to find sources. After discovering Co-Hog Toys, he took his time, did his research and finally asked us to make his 320i for him.

Since he lived within easy driving distance of our shop, Michael kept a close eye on its development, visiting the shop several times during its creation. Sharing his BMW experiences was also important to him so he took photos and wrote an article that was released in the Fall 1989 Little Cars Quarterly, which was created and published by the late George Grenz.

Co-Hog BMW 320i photo

Michael's Co-Hog BMW was delivered on 8/7/1984 and his immense smile said it all. The paint was genuine BMW. I drew up the wheels and silkscreened them. I also drew up and had the iconic BMW grill photo etched in steel. Even the BMW logos were meticulously interpreted for the front, rear and wheels.

We made sure to include his personal additions; the roof top wind deflector and a Cyberlite braking indicator on the rear bumper.

It became the centerpiece in his collection and occasionally even traveled to work with him.

Co-Hog BMW 320i photo

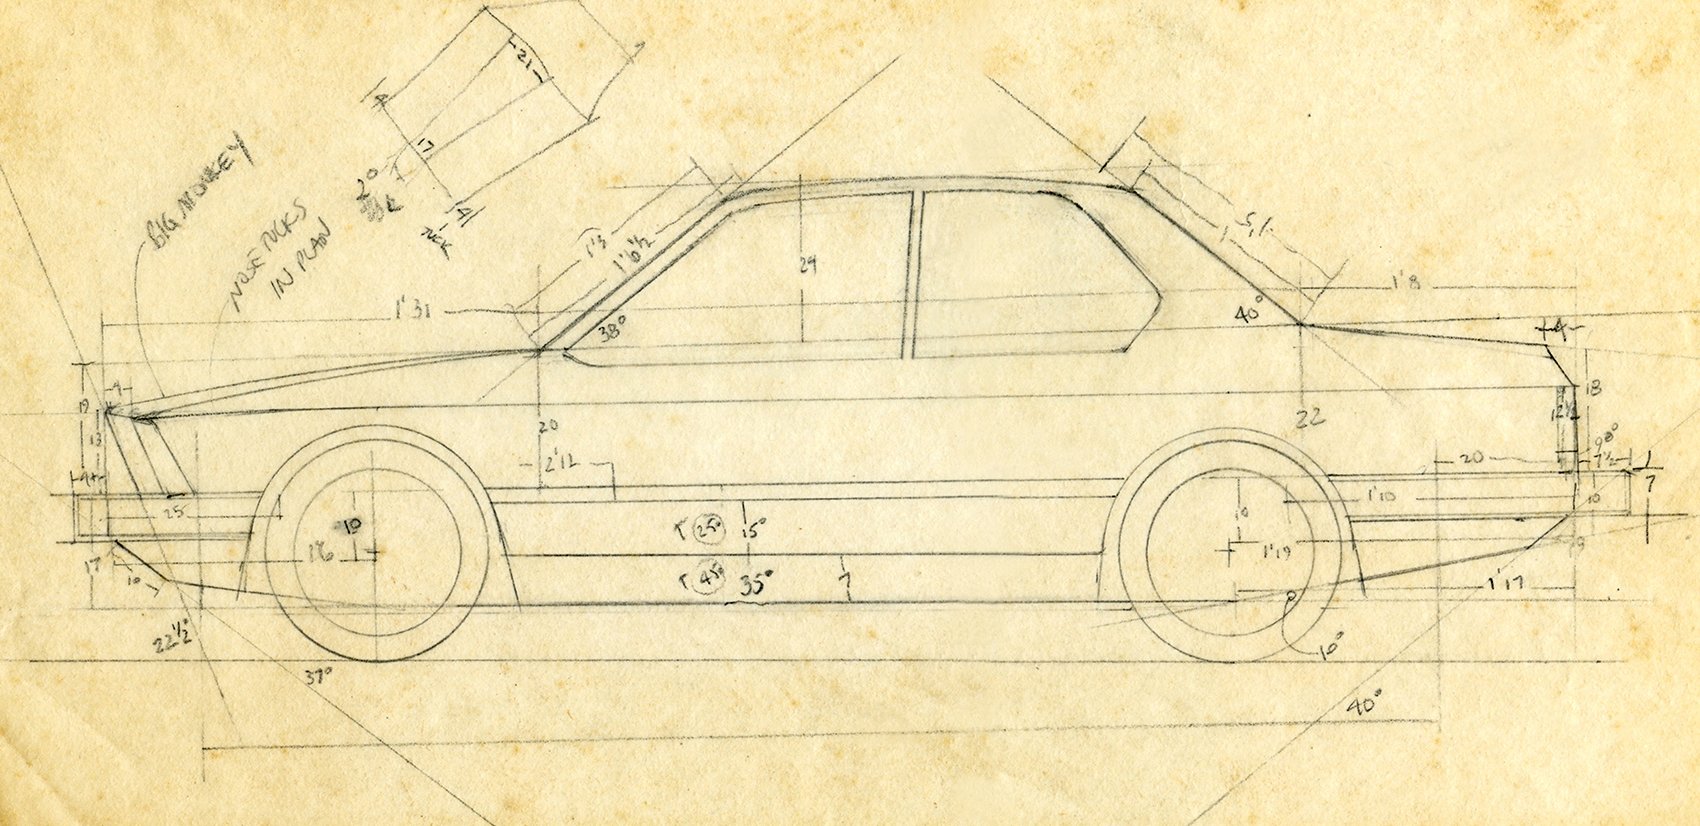
This is the original drawing used to develop the construction process and help guide prototype development. Finished, it's a little over 6" (15 cm) long. Without the internet or digital cameras, the actual car; brochures from the dealer and magazine shots were our source materials.

The "big monkey" referred to in the note over the hood is the larger of two drawing sweeps (templates) for tighter curves that all transportation and product majors made at Art Center. We referred to them as monkey tails because that's what they looked like.

The complete set that we each made also included five larger sweeps that I still use for longer curves.

Co-Hog BMW 320i photo

photos by Michael Izor

The simplified construction process:

Top - Primed and almost ready for color after quite a bit of sanding, filling and more sanding.

Middle - Part way through shaping - The bumpers are separate pieces. It was held together during construction with hex-head machine screws which worked surprisingly well in jelutong and allowed easily repeatable assembly during the build process. They also provided built-in clamps for the final, glued assembly.

Bottom - Basic building layers - sized from the drawing and a prototype.

Co-Hog BMW 320i photo

photo by Michael Izor

This is the only photo I know of that shows me working on a Co-Hog. Michael documented the whole procedure.

The prototype for the 733 lurks in the lower right.


  • Special note: If an image does not have an attribution it’s because I can’t be sure who took it or I took it myself.

Porsche G935 - 010 - Intercoolers-Sills


Co-Hog Porsche 935 builds - next steps

The parts in blue are those being worked on this time around. Piece by piece, the Porsche G935 group of four is taking shape. It’s taking longer than expected as so many other projects are coming to a head at the same time. I have to stay nimble to keep them all moving.

Co-Hog Porsche 935 builds - next steps

The sills were carefully fitted both in length and in matching the double angle needed to join the rear fender.

The vertical side surfaces will actually have a subtle compound surface from the front wheel well to the rear. I needed to leave some extra meat to match up the rear fender lines later.

You’ll see them mounted in place in a later pic.

Co-Hog Porsche 935 builds - next steps

Intercooler boxes were rough cut from butterfly cut and glued jelutong stock. CAD-generated paper templates and maintaining squareness were quite helpful. Precise curves were needed to match the roof lines.

Co-Hog Porsche 935 builds - next steps

Each intercooler was double-face taped to the master square block and the roof line mating surface was drum sanded to the template line using the drill press. Hand-sanding then matched each intercooler to a particular body.

Taking my time and thinking smooth thoughts helped.

Co-Hog Porsche 935 builds - next steps

The same process was followed for shaping the top surface. The double-face tape is aggressive enough to hold it in position even with only tiny lines of contact.

The front edge gets quite thin, but enough thickness must still be left for the final hand sanding to blend the surfaces together. The templates start to shift away at the tip due to drum rotation, so it comes down to careful eye-balling to get it close.

Co-Hog Porsche 935 builds - next steps

You can see the delicacy of the piece ready for plan view side curves to be added before fitting to the body. The greenhouse drip rail chamfer has not been added yet.

The vertical line on the bottom rear of the intercooler indicates an additional mating surface that must also be fitted before it can be glued in place.

Co-Hog Porsche 935 builds - next steps

The plan view curves for each greenhouse varies slightly, so the outlines are traced onto the bottom of the matching intercooler box. The straight arrows show how subtle the curves are in each plane that need to be followed.

Slow removal of material on the 5” disc sander let me sneak up on just the right line for each side while still being centered on the body. The one on the sander has already been shaped.

Co-Hog Porsche 935 builds - next steps

Here you can see the sills in place with that little bit of extra thickness as it joins the rear fender. The now vertical surface will be blended front to back with a compound surface.

Now the intercooler boxes have been glued in place and hand sanded to blend into the roof line. Filling and sanding along the feathered joint leaves a smooth roof surface. The greenhouse chamfer surface can also be clearly seen, running from the windshield base to the tail end.

I use a great wood filler called Timber Mate which is made in Australia. It's very stable, water-based and easy to work with. The hardness is just a bit less than the jelutong so it's easy to remove excess filler without taking the wood too. Takes finishes like a champ and doesn’t swell.

It's meant for use as a grain filler, but I find that by building with thin layers, it's strong enough to beef up corners and edges as well.

Co-Hog Porsche 935 builds - next steps

All four G935s now have their sills and intercooler boxes. Filling has barely been started on all of the joints. Oh the joy of filling and sanding! It makes things right, but takes all night…and day.

Upper door curves are also moving along. The crease where the door curve meets the rear fender has to be dealt with very carefully.

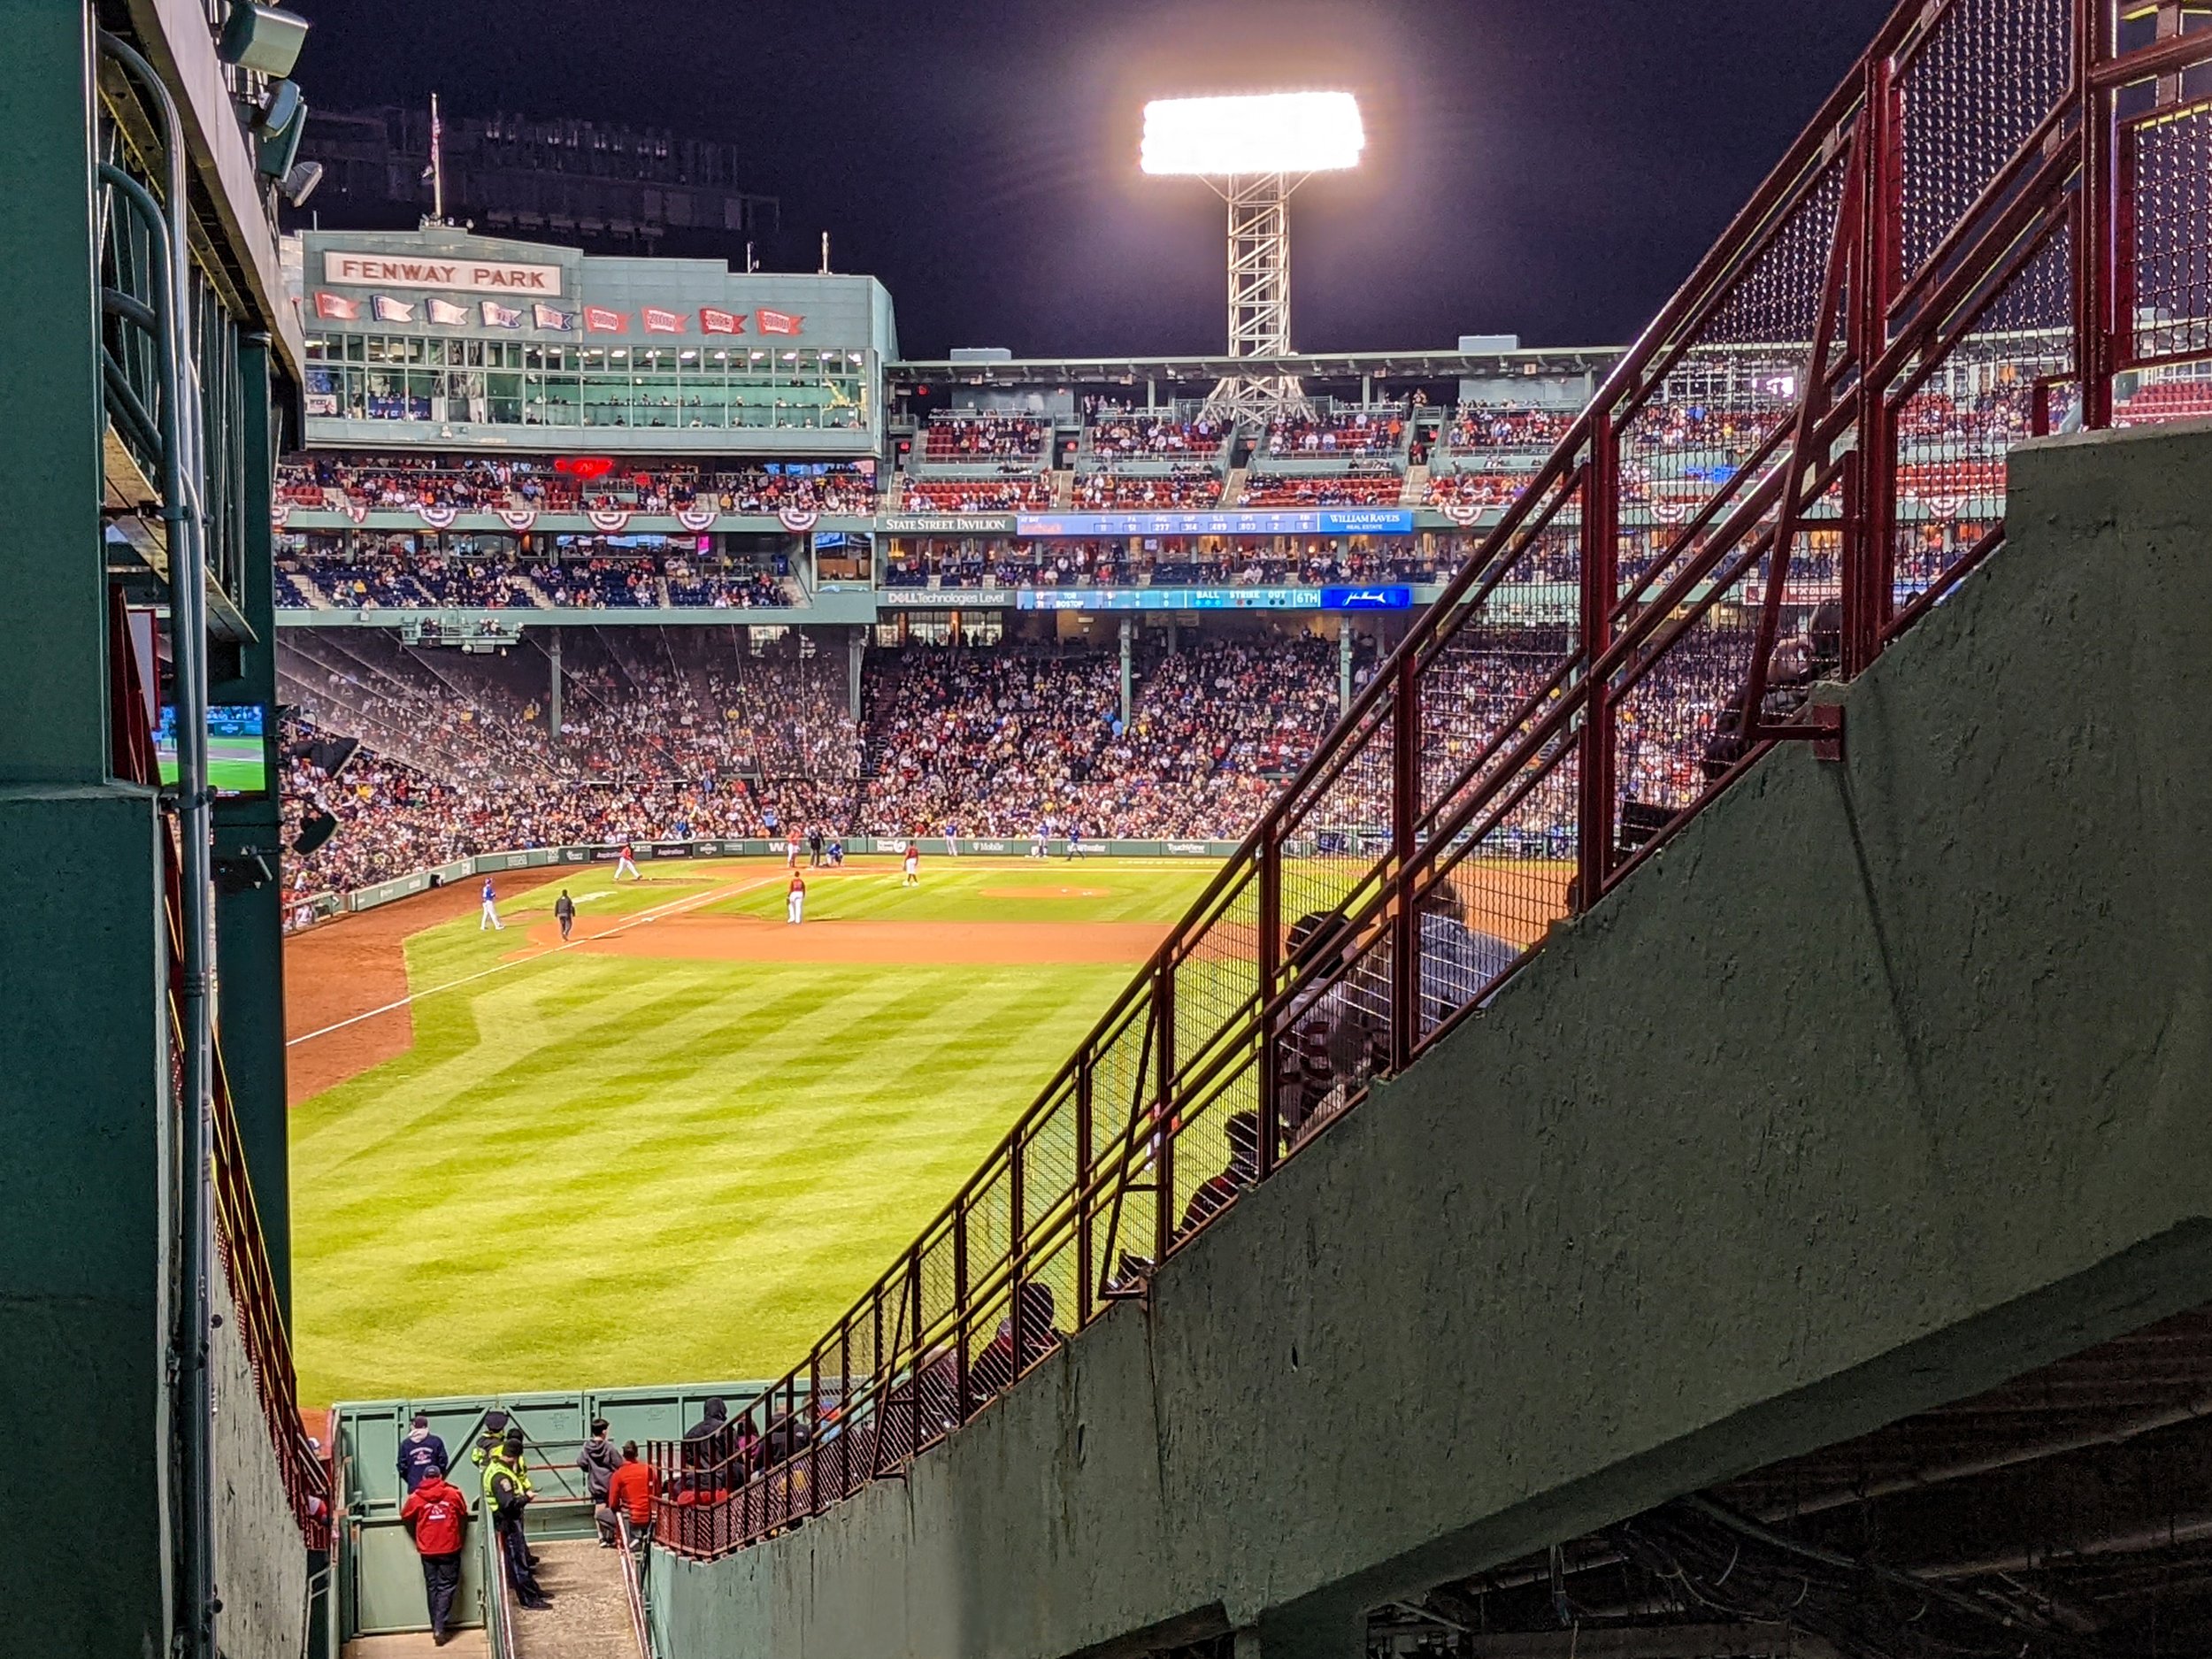
What the deuce? (Meant in the old Pennsylvania Dutch way that my grandfather used it - "What the devil?") Every now and then I do something besides cars (quite a lot of things, actually). Recently had a great night out at the ballpark with my wife courtesy of a wonderful friend's generous sharing of his season tickets.

His fantastic seats are on the first base line close to home plate. People have gotten a lot bigger since the original seats were built in 1912. I'm well over 6' tall and it took three seats to have enough room to be semi-comfortable.

I was out wandering around to stretch my legs when I took this shot.

Now, back to cars!

Next up - 010 – Intercoolers-Sills – The side and plan view profiles are closer to final with the addition of two more key components: the intercooler boxes and sills.


Special Edition - Porsche 911


CoHogToys Special Edition Porsche 911

I only made four of the Co-Hog Special Edition Porsche 911s. Hank Hammer received the first, which was completed in 2/1984. The vibrant Deep Autumn Maple Metallic color with the etched gold wheels and aluminum rims has long been my favorite combination. These wheels and rims were done specially for Hank.

My wife and I met Hank and his wife in Hawaii after Gene Parrill, the Cars In Scale columnist at Road & Track, made a last minute suggestion to call Hank when he found out we were visiting my folks there. Hank and his wife were incredibly gracious. It was a memorable evening.

After ordering and receiving a couple Co-Hogs, Hank made it a standing order for one of any Porsche I made.

CoHogToys Special Edition Porsche 911

The rear view is the best. Porsches always look ready to launch with those wonderful rear haunches.

The Targa was the only other 911 I made and again, just four of those. $400 was the going price in ‘84 for the 911 variants, approximately $1,100 in today’s dollars. The 930 Turbo Flachbau (Flatnose/Slantnose) was a whole other beast and I only made one of those as a special project.

CoHogToys Special Edition Porsche 911

This is the original 911 prototype for both variants, made in 1982 using jelutong for the body and bumpers and maple wheels just as they were in “production”. I drew up and silkscreened my version of the Fuchs rims, which were the standard Co-Hog 911 offering.

One of my sons keeps this prototype with his other ancient parental artifacts.


Porsche G935 - 009 - Wheel Wells


Co-Hog Porsche 935 builds - next steps photo

All four of the Porsche G935s have had their wheel wells marked, drilled and shaped and I've started adding the sill boxes.

To get the stance right, the position and shape of the wheel wells is critical. The bodies are now almost at full width and the main profile shapes have been refined. It’s time to do the drilling and shaping.

Co-Hog Porsche 935 builds - next steps photo

This was achieved using a fixture (middle) to hold the jig plate (left) in a vertical position with screws into the edge and through the face of the plate. The jig plate is reversible so both sides could be done.

A heavy machinist's v-block (right) sits in the pocket between the plate (when installed) and the rib on the rear of the fixture to hold the fixture steady during drilling and removed to allow finer motion during shaping.

Co-Hog Porsche 935 builds - next steps photo

To allow the full diameter of the Forstner bit to clear the jig plate, a spacer plate was thickness sanded to position the G935 farther away from the jig plate whilst still allowing dowel pin engagement.

Co-Hog Porsche 935 builds - next steps photo

Templates were used to position and mark the wheel well outline and axle centers on both sides of each body. Previously marked feature lines and measurements were used to match side-to-side positioning.

Co-Hog Porsche 935 builds - next steps photo

The spacer plate is in position and the fixture was ready to assemble.

Co-Hog Porsche 935 builds - next steps photo

The fixture is set up for the driver side wheel wells. Four screws allow the jig plate to be reversed to do the passenger side wheel wells.

Before drilling, the spacer plate was relieved for the front wheel wells on both sides. The vertical pencil lines indicate what needs to be removed to allow the Forstner bit tip to engage with the axle center punch mark.

Co-Hog Porsche 935 builds - next steps photo

The drill stop was set for the correct depth and the main bulk of the wheel well was removed with a Forstner bit. The clamp and heavy v-block behind the plate help keep the body aligned during drilling.

Co-Hog Porsche 935 builds - next steps photo

A separate, thicker spacer plate was used to move the body even farther away from the plate to leave space for the sanding drum for shaping the wheel wells to their precise outlines.

Co-Hog Porsche 935 builds - next steps photo

To make fine motions easier, final shaping was done without the heavy v-block.

Co-Hog Porsche 935 builds - next steps photo

After careful sanding, there is a slight offset from the marked lines to allow for future final adjustments.

Co-Hog Porsche 935 builds - next steps photo

Bonus shot since you came this far - first shot with prototype maple wheel/tires in nominal position to start final zeroing in on the stance. The sill boxes have been added and shaping of the door profiles has been started.

Next up - 010 – Intercoolers-Sills – The side and plan view profiles are closer to final with the addition of two more key components: the intercooler boxes and sills.


Munched on Mercedes


Love can be a very different animal when you are, in fact, a dog. This Co-Hog Mercedes 380 SEL has the scars to prove it.

Munched on Mercedes

Sometimes the crunchy wheels are the best parts.

Munched on Mercedes

And other times just a few solid gnaws will do the trick.

Munched on Mercedes

No matter how you bite it though, you’re bound to leave some drool behind - everywhere.

Munched on Mercedes

Fortunately the Mercedes was rescued by Paul before it was reduced to kindling and Caroline was fine too after she got over losing her toy.

Does she look happy or what?


Porsche G935 - 008 - Rear Fenders-Plan View Profile


Co-Hog Porsche 935 builds - next steps photo

The Porsche G935 pieces for my sons have been moving along. Shop time ends up being split between working on them and building a new spray booth so I can paint them properly when ready. The booth has been more work than expected. Lots of finicky finagling to try to keep it 'airtight'.

Since it is winter here, the shop in the basement is rather chilly. To keep everything close to room temperature I carry the work-in-progress bin up and down as I work on them. I do all the CAD and 3D printing upstairs so I need to keep them handy as reference.

White styrene spacer plates have been added to provide the base for the engine bay 3D printed parts and fender filler pieces have been blended in prior to final shaping.

Co-Hog Porsche 935 builds - next steps photo

Rough fender filler pieces have just been added to begin closing up the engine bay space.

The jig plate holes look oddly positioned because I mistakenly placed them backwards lengthwise. Oops! They will ultimately be plugged.

Co-Hog Porsche 935 builds - next steps photo

The plan view nose profile has been shaped and blended into the front fenders.

Chiseling the hood details has also been started. The broad inlet vent and facets on the fender profiles are roughed in.

Co-Hog Porsche 935 builds - next steps photo

Nose profile and fender facet templates were printed on glossy photo paper which has a 0.010" plastic sheet as a base. That makes the templates flexible and durable.

Templates for wheel wells, axle placement and profile checking are printed on paper and adhered to the fenders to allow frequent checking and re-checking of details.

Co-Hog Porsche 935 builds - next steps photo

The profiled rear fenders are off to the left in this shot, ready to be glued in place. Some early door profiling is underway.

Co-Hog Porsche 935 builds - next steps photo

This was the spray booth that I used through completion of the Porsche 935 Artist's Proof. Lots of cardboard and duct tape and fumbling around. It worked, barely. Lots of extra time was needed to get the dust and dirt out of every layer of finish added.

It was mainly re-purposed cardboard boxes and duct tape. No incoming air filtration made it primitive at best.
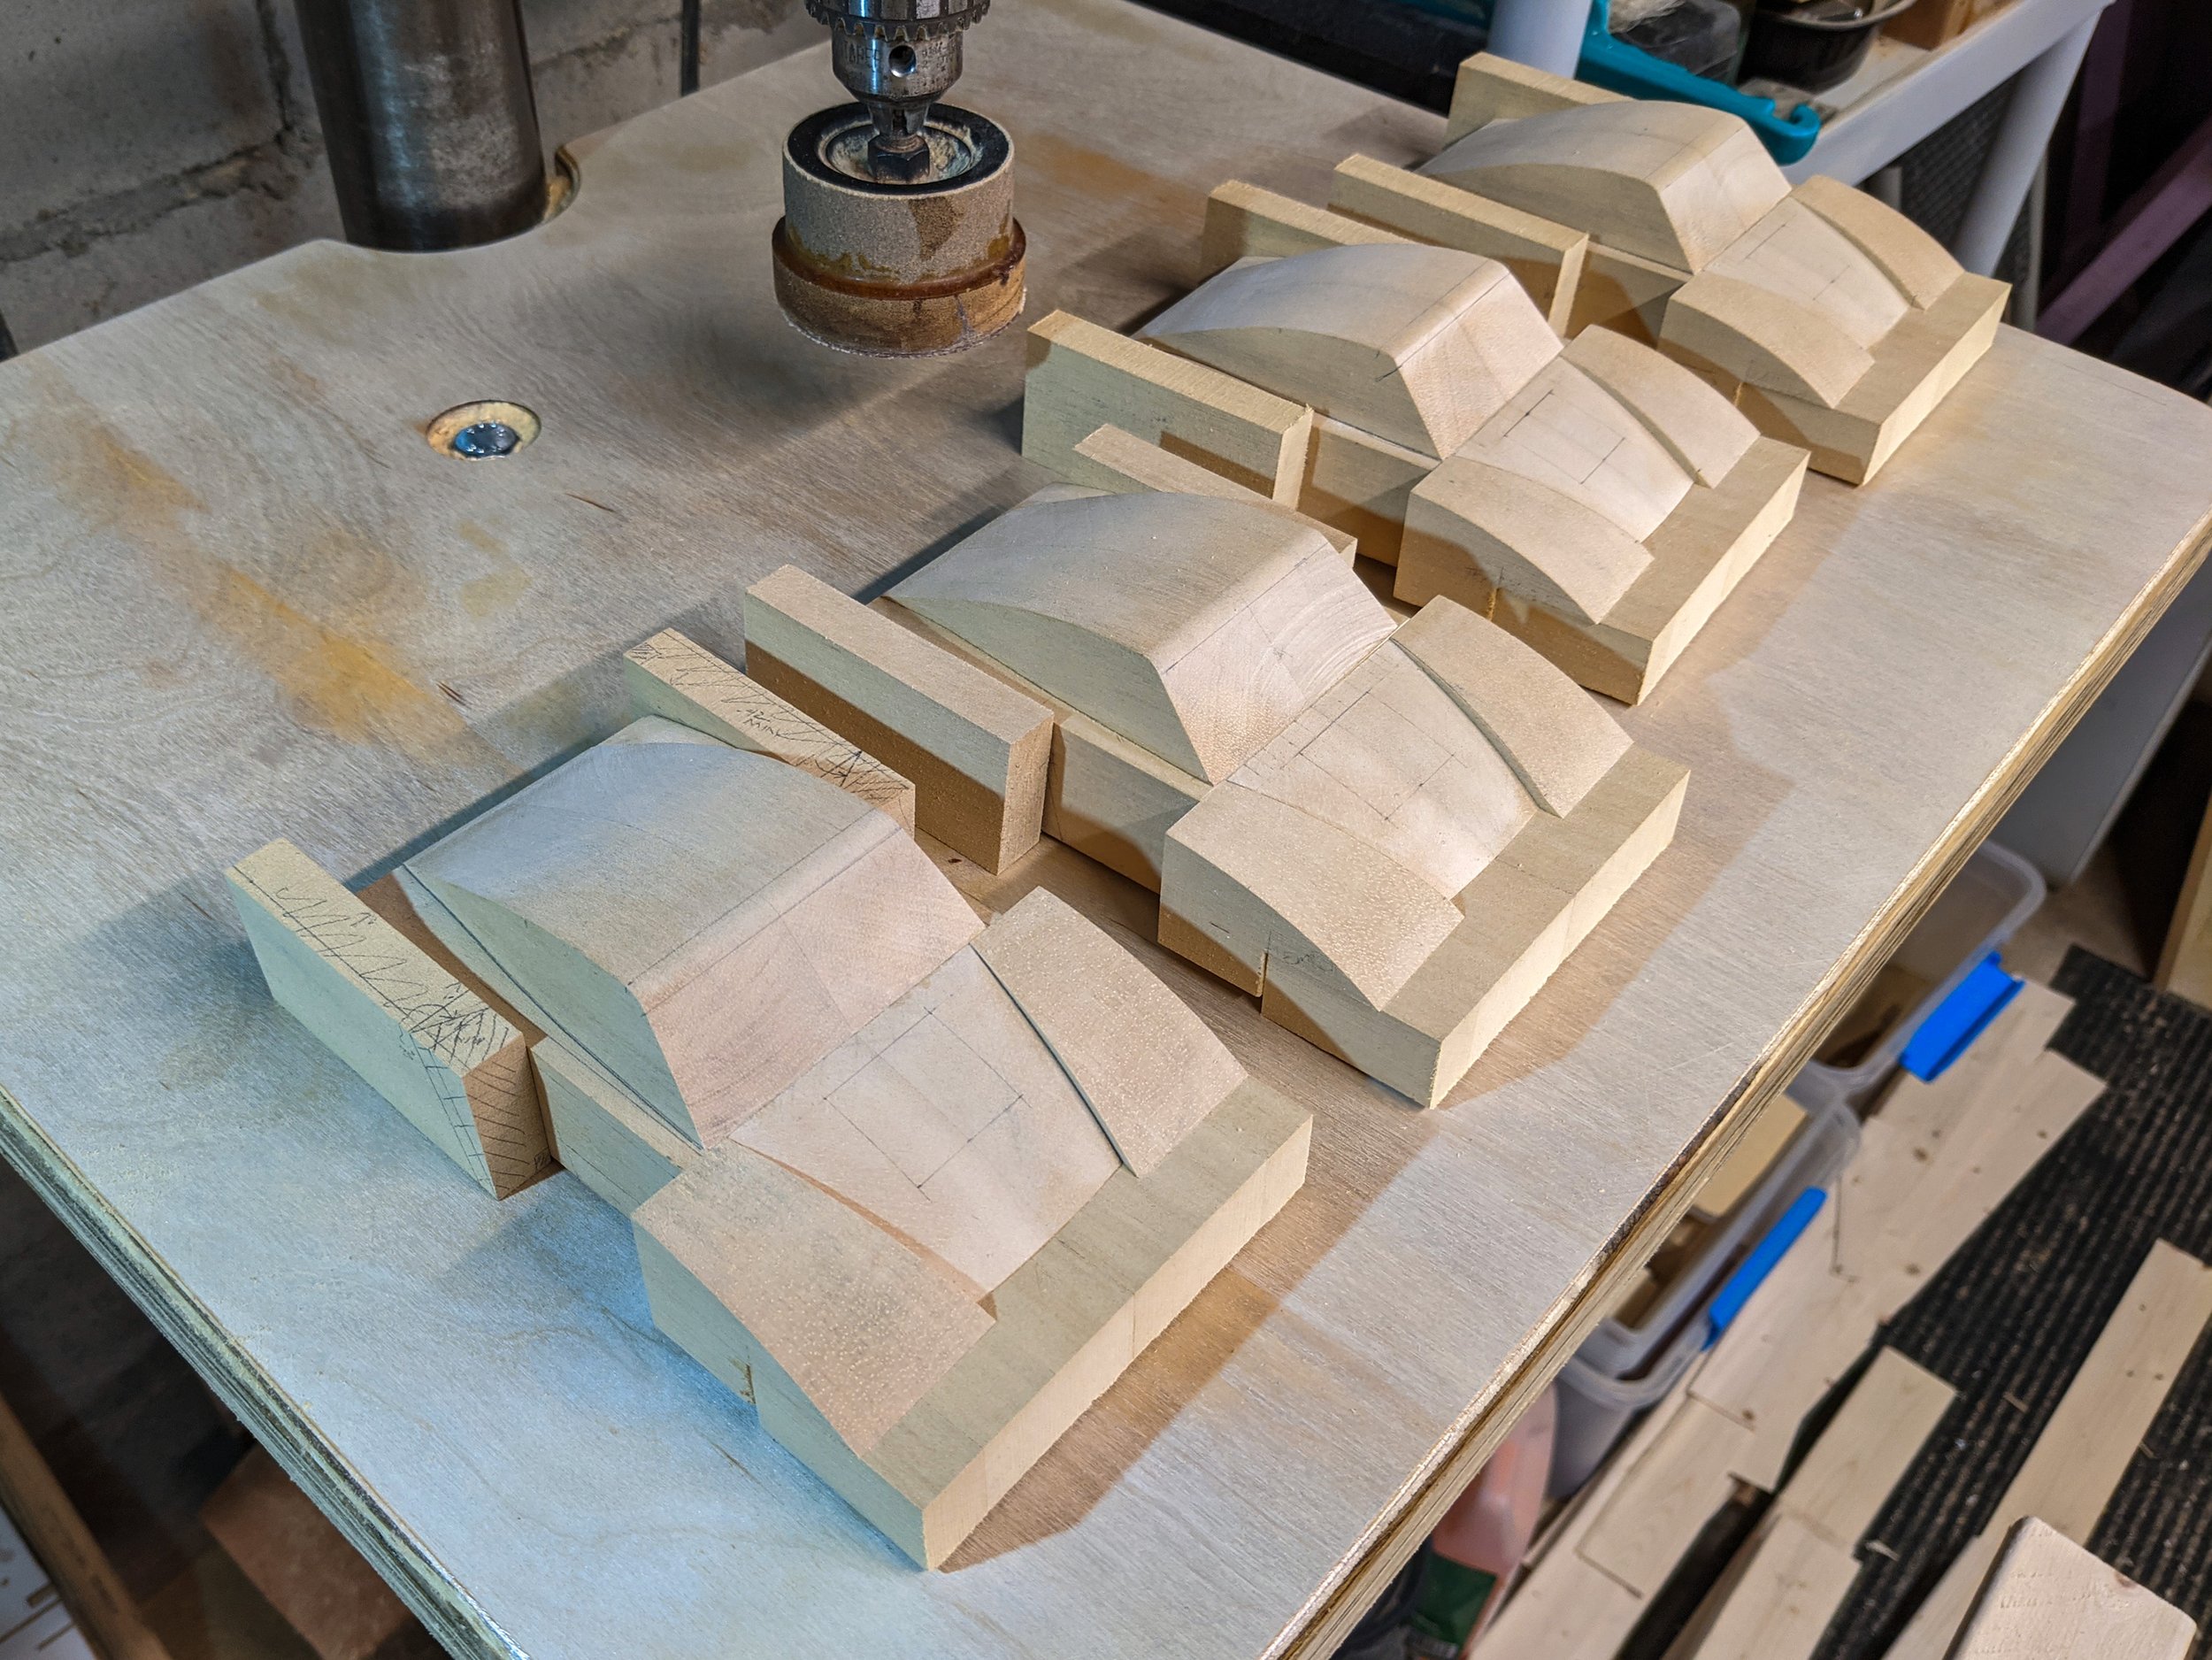
Co-Hog Porsche 935 builds - next steps photo

The new spray booth in progress is a downdraft setup with the fan vibration isolated from the booth by being bolted directly to the basement wall and flexible foam between it and the booth structure. Too many airflow bends I know, but the 10" fan should handle them. Needs lots of insulation and a vapor barrier to prevent moisture and mold. It's mighty cold and dry now but will become aggressively hot and humid in coming months.

The plenum will mount above the fan with filtering and baffling. The window in the left wall is one of two openings that will have sticky filters for incoming air. They will be covered when the booth isn't being used.

Blue tape marks the future door opening. A heated and ventilated paint drying box will be on left, paint preparation and storage will be on the right. The ceiling will be covered and the front wall added. Having the kitchen sink feeds and drain, heating and sillcock lines directly overhead requires providing access panels for any future needs. Complicates the whole thing.

I'm building the trickiest bits first so that I can do all my testing as I apply the early sealing and priming coats. By the time I'm ready for finish coats, hopefully the booth will also be finished.

Next up - 009 – Wheel Wells - To get the stance right, the position and shape of the wheel wells is critical. The bodies are now almost at full width and the main profile shapes have been refined. It’s time to do the drilling and shaping.


First 'Your Co-Hogs' Story


Ferrari 512 BB sculpture by Co-Hog Toys

Photos courtesy of Rick Maningas

It seems fitting that the first entry on the ‘Your Co-Hogs’ page should celebrate Rick Maningas and his gorgeous red Co-Hog Ferrari 512 Berlinetta Boxer - #16 out of 45 made. His wife ordered it as a birthday present for him and it was completed close to 40 years ago on 11/10/1982. It looks like it is in pristine condition.

What makes Rick unique is that in 2011 he set out to gather Co-Hog owners together to share anything and everything about their Co-Hogs and the company itself. He started both a WordPress blog and a Facebook page to help spread the idea. Rick also created a mostly accurate YouTube video asking the Co-Hog community to share their experiences with him. There was so little information available that even Rick didn’t know that Co-Hog Toys was started in 1978 rather than 1982.

This post was the very beginning of the Facebook page. It was slow going but Rick stuck with it. He let me know about the page and I started adding little bits and pieces as I could. It has grown since then but is still a pretty much a secret spot. In the great big universe out there Co-Hogs are quite rare.

Each Co-Hog Boxer was handmade from sustainable jelutong wood for the body and maple for the tires. They were spray painted with DuPont automotive acryIic enamel. I used pen and ink to draw up my interpretation of the wheels and silkscreened them on Scotchcal vinyl. The graphics were all hand cut using black vinyl and various Scotchcal colors.

The total of 45 examples were made from June 1982 to July 1986. Each new Boxer had slight differences and improvements. The owner chose their own color and whether they wanted the European or US version. The found homes in the US, Italy and Japan.

I extend many thanks to Rick for his original interest in gathering the Co-Hog community together for mutual benefit. This website is one long-term result of that effort.

Please add your own stories, experiences and photos for the community to enjoy. See the following information on how to do that, or add it to the Facebook page.

There is also an Instagram page cohogtoys to follow if you like. The Instagram page occasionally includes one of my automotive photographs from pre-pandemic days.


This page is just for stories like this. If you have any good Co-Hog stories or photos please use the Contact page to send them to us to be included. We’ll then contact you and you’ll have an email address to send photos to. It would be great to hear from you!

(We haven’t figured out how to do it more directly yet. Sorry.)


Special Edition - 1978 Camaro


Co-Hog Toys evolved from their early blocky forms into the slightly more subtle Special Editions line in early 1982 as more owners requested specific marques and models. The first five models we selected were barely introduced when folks started commissioning their own favorites.

One early example is a 1978 Chevrolet Camaro requested by Janet Albert in September 1982 for her husband Jon who drove this Camaro that he had specced out. The plan was for Janet to surprise him with it for Christmas.

It was going to be a challenge since Jon was deeply into the automotive world at GM. He was one of two designers for the original Pontiac Fiero interior and part of the exterior team as well. He was individually responsible for the design of the Fiero's badge which was based on the immortal winged horse Pegasus, one of the names being considered for what became the Fiero. The 1984 Fiero was the Official Pace Car for the Indianapolis 500 that year and was also included in Car & Driver’s Top 10. Jon was also involved with the Pontiac Firebird and 6000 models.

Perhaps best of all, he was involved in the gestation of the legendary ‘94-’96 Impala SS. The story goes that Jon’s next door neighbor had a hotted up Caprice wagon that was quite the beast. Jon was instrumental in getting it brought to the attention of the appropriate people at Chevrolet who had the good sense to turn it into the Impala SS. Jon and his team created the interior that reinforced the Super Sport theme. As a longtime wannabe owner, a clean ‘96 SS still gives me goosebumps when I see one, preferably in motion.

All told, Jon’s automotive design career at GM included 32+ years during which he became the GM Design Manager/Chief Designer. He led projects at the Advanced Concepts Center in CA, as well as in Michigan, Japan and Brazil.

Rivian has also benefited from his skills and experience. And he found time to teach emerging designers at the College of Creative Studies in Detroit. In other words a car guy to the bone.

The Co-Hog Camaro arrived on Christmas Eve day (phew!) and Jon cajoled his way into opening it that day without waiting until Christmas. With his obviously well-tuned design senses, it took Jon a bit of time to actually like the Co-Hog version. It is a bit awkward to be kind, but Jon grew to admire it and still has it with him 40 years later.

Now he can enjoy it whenever he's not out motoring in his gorgeous home-market 1946 MG TC.


If you have any good Co-Hog stories or photos please use the Contact page to send them to us to be included on the Your Co-Hogs page. It would be great to hear from you!


Porsche G935 - 007 - 3D Printing the Engine Bay


Co-Hog - 3D Printing photo

My first (very expensive) 3D printed prototype part was done using SLA (Stereolithography). It was an air flow control chamber for a neonatal blood pressure unit I was of designing for what was then Siemens Medical Systems. The high cost was justified by the critical and complicated air flow, small size and the high cost of the eventual tool steel mold with actions on all six sides. That SLA part was made in 1992 by an outside service bureau and took several weeks.

Now I can make inexpensive FDM (Fused Deposition Modeling) parts on my desk in minutes. Certainly not big news in the real world, but it's a rocker in mine.

The three Porsche G935 sculptures that I'm making for my sons are almost entirely shaped from jelutong wood. Other materials are used sparingly and only where appropriate. Aluminum for the wheels, brass for wheel centers and details, cast acrylic for tires - and now my own 3D printed parts using PLA (Polylactic Acid) plastic. PLA is ubiquitous in the lower end of 3D printing because of its relative ease of printing and quite good physical properties.

Co-Hog - 3D Printing photo

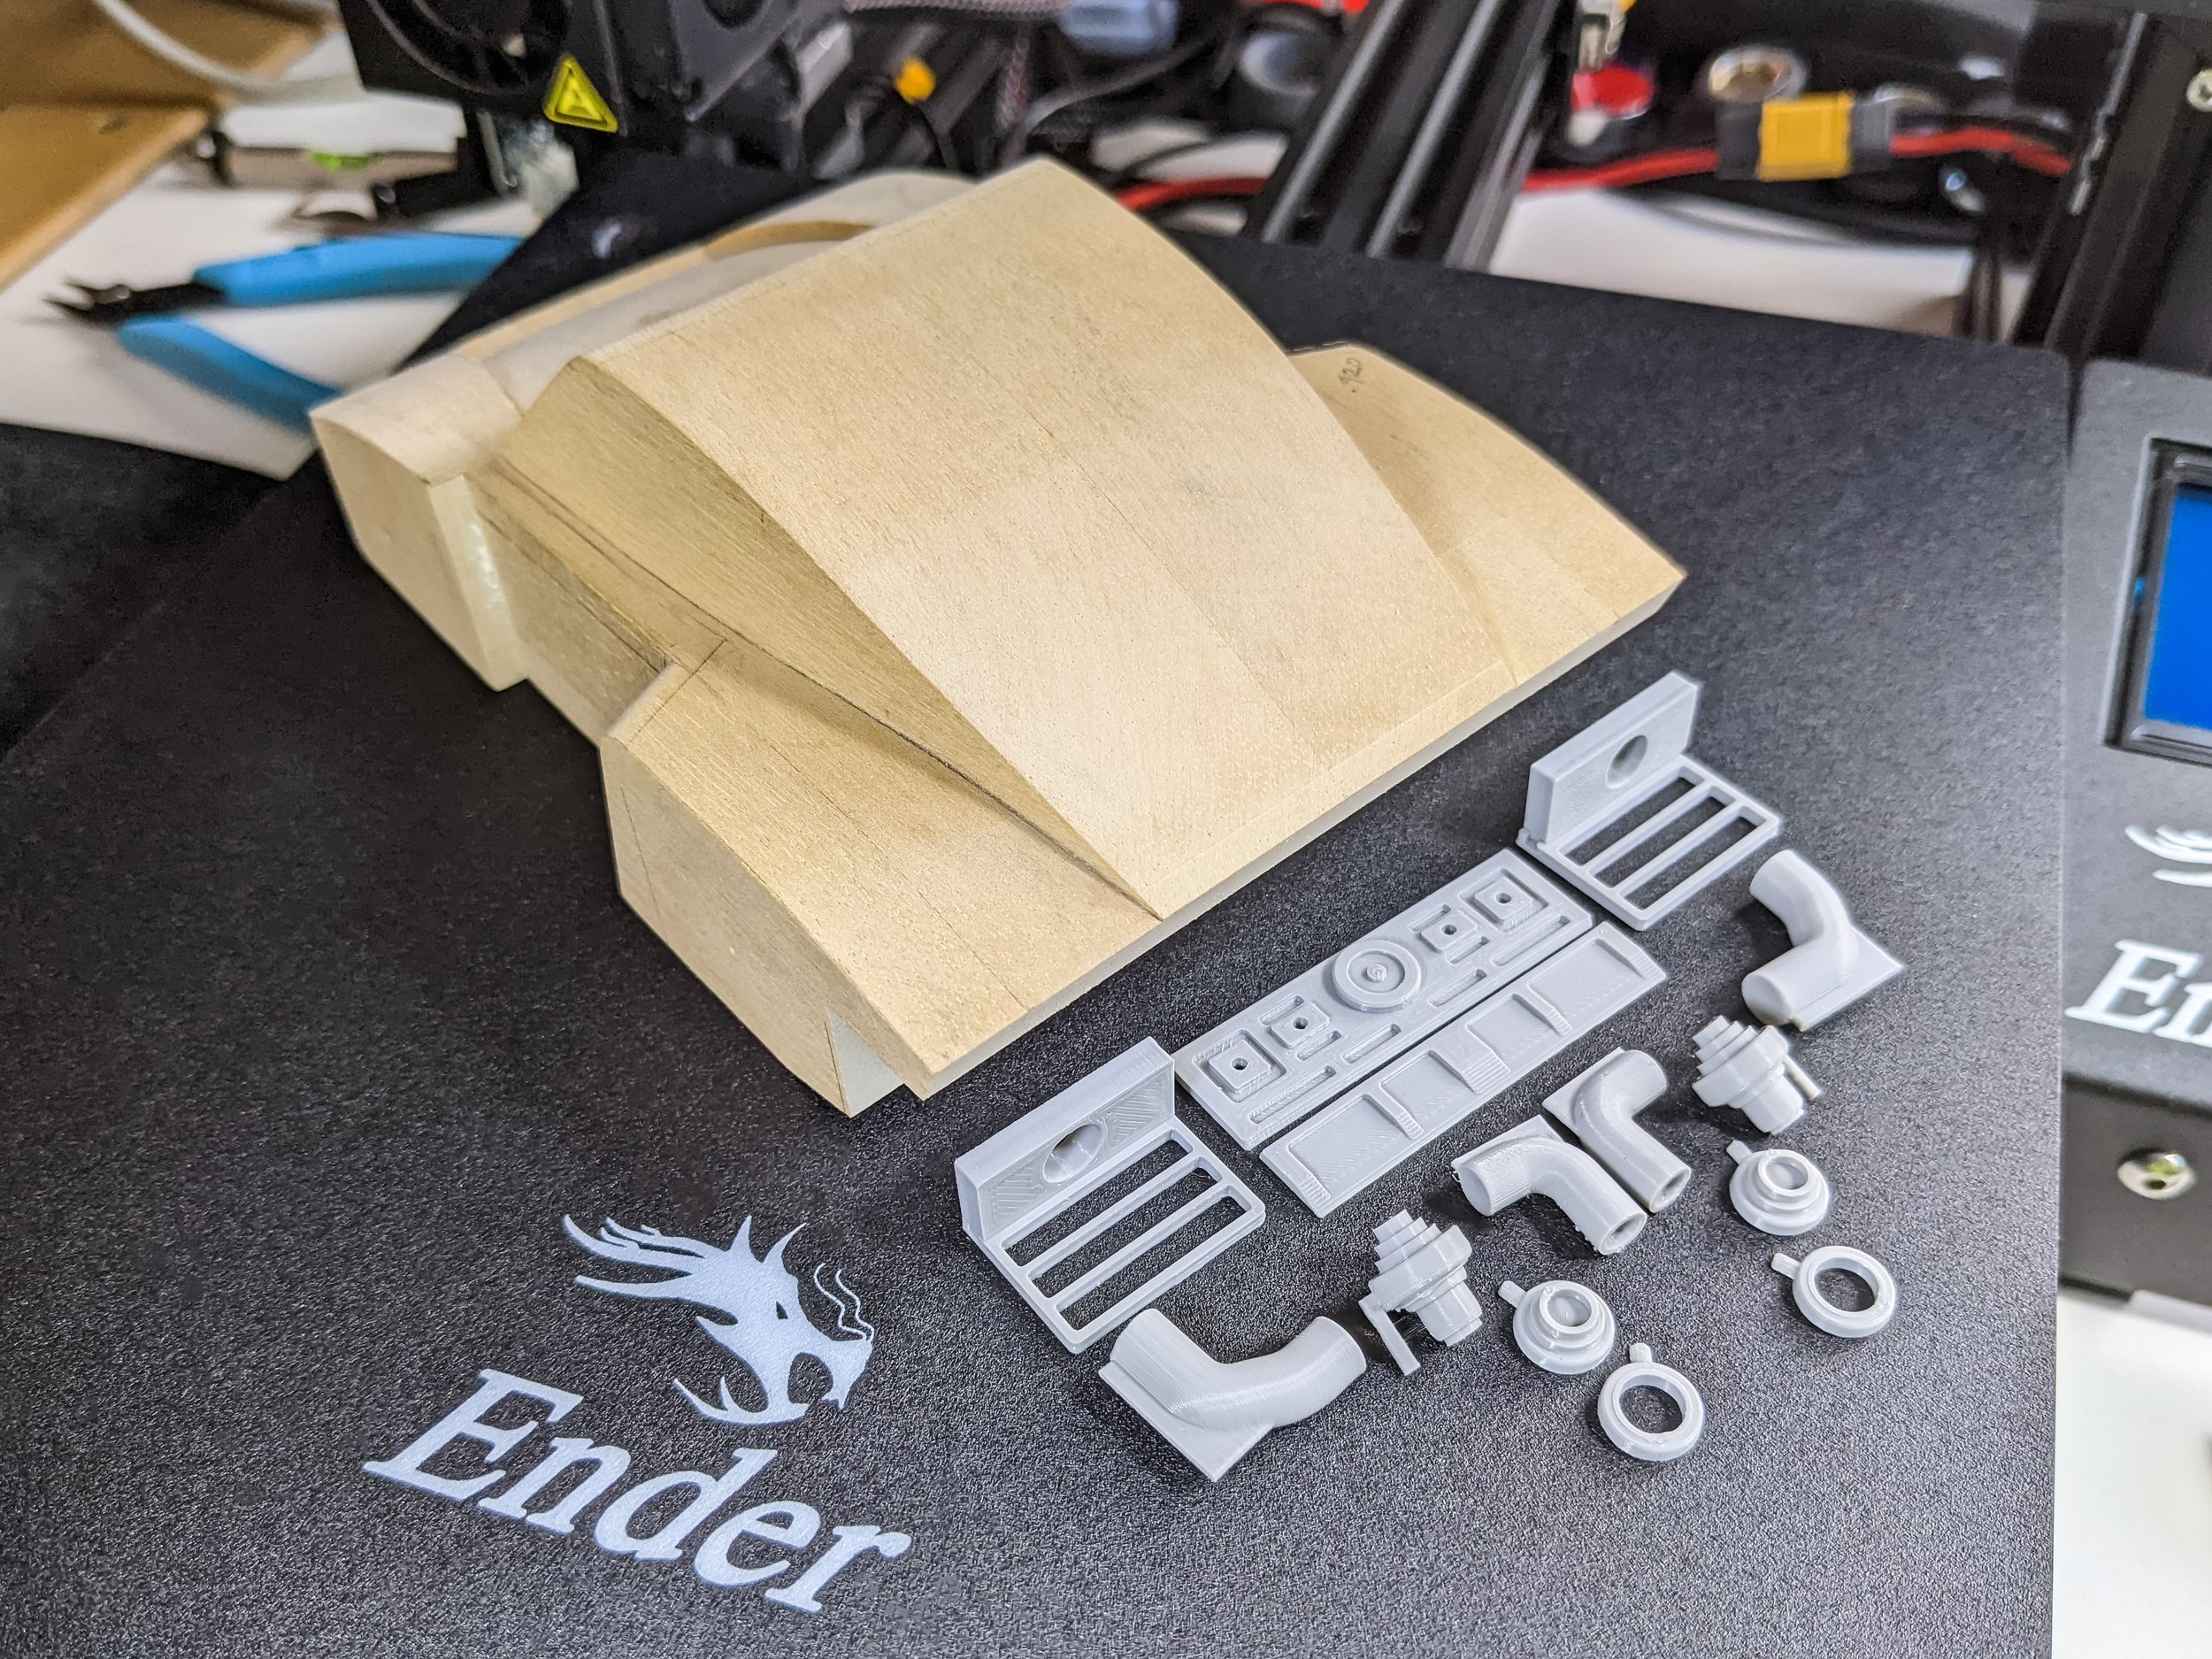
The 935 engine bay filled with complicated mechanical bits is the perfect place to make excellent use of 3D printing. The sizes and shapes keep changing a bit here and there and the extra details that can be added make the ease of 3D printing into a great attribute.

To facilitate painting and final assembly, the overall setup is broken into 13 smaller parts. They’re quite fiddly for my giant fingers so it’s still a challenge to get it right. Being able to add locating bosses, pins and slots is a big plus.

It’s also great to be able to make trial parts to test joint tolerances - especially when paint is added into the mix. Now I can not only visualize the mating fits in the wireframe CAD model, but can also have prototype parts to try on the bench before committing to the whole finishing process.

Co-Hog - 3D Printing photo

In return for some computer time I can make tricky parts that I can then revise parts to my heart's content. Three iterations of the same part can be done in a jiffy as I work out how the turbos will mount and make other updates as the engine bay evolves.

Co-Hog - 3D Printing photo

This is one of the exhaust turbo housings. The locating pin is the tricky bit to print. My third go at it is to split the part in two to make it a little more accurate. Just looking at it now and thinking back to various assembly tests so far, I think I’ll go back to a rectangular tab and slot arrangement to help line things up, but keep the split for better printing.

To make each new version I save the revised CAD data for the part as an .stl format polygon file. The rat's nest of black and white lines is actually thousands of tiny triangles.

I use a separate program to slice the .stl data into layers, create the outline geometry and then fill in them in and stack them up. The same program creates the G-code (machine code) which the printer uses to actually move the extruder tip in the X, Y and Z axis' to create the parts. To check them I can step through the printing process layer by layer if needed.

Sounds complicated, but the tools are surprisingly straightforward and speedy.

Co-Hog - 3D Printing photo

This is the whole set up including a PC behind the screen. Its separate from my CAD computer to help prevent “cross-pollination” of any malicious code. All I do is rotate my chair from one endeavor to the other.

The printer is to the right of the mouse with a vertical black gantry for the extruder hot end which zips around across in the X axis and up and down in the Z axis. The flat plate holding the "build” makes its amazing journeys in the Y axis. It all adds up to 3D geometry. It’s rather mesmerizing to watch especially with small parts which stay under the extruder as they’re built.

3D Printers are a tool to be respected as they slowly teach one the intricacies of developing parts for its specific capabilities. Having a long background in design and engineering helps, but good parts must be earned. I'm starting with a novice 3D printer and it will take time and experimentation to get better and better parts. That learning process is a big hunk of the fun!

Next up - 008 – Rear Fenders-Plan View Profile – Engine bay spacer plates have been added and fender filler pieces have been glued and blended prior to final shaping.


1985 Huffaker #53 Trans-Am Commission


The finished piece looking fine. Overall length is just over 12" (305mm ) which makes it approx 1:16 scale. Love the side dump exhausts! They'll burn off your pants leg cuffs in a hurry.

This Co-Hog was commissioned by Bill Doyle from Petersen Tractor to commemorate his SCCA #53 Trans-Am race car that he requested Huffaker Engineering to build for him in 1983. That car was nearly totaled at the 1984 SCCA National Runoffs when he was the tenth of 18 cars to succumb to a massive rain dump at turn six at Road Atlanta.

It was rebuilt for the 1985 season when Bill finished in the top 10 in the 4 races he ran and completed the season 18th overall.

Bill asked me to make the Pontiac in November, 1984 and it was completed in September, 1985. We had a wonderful dinner with Bill and his wife on a trip to CA after it was done. Great people!

photo credits: color - John Owens Photography - b&w - my own, taken as the piece was built

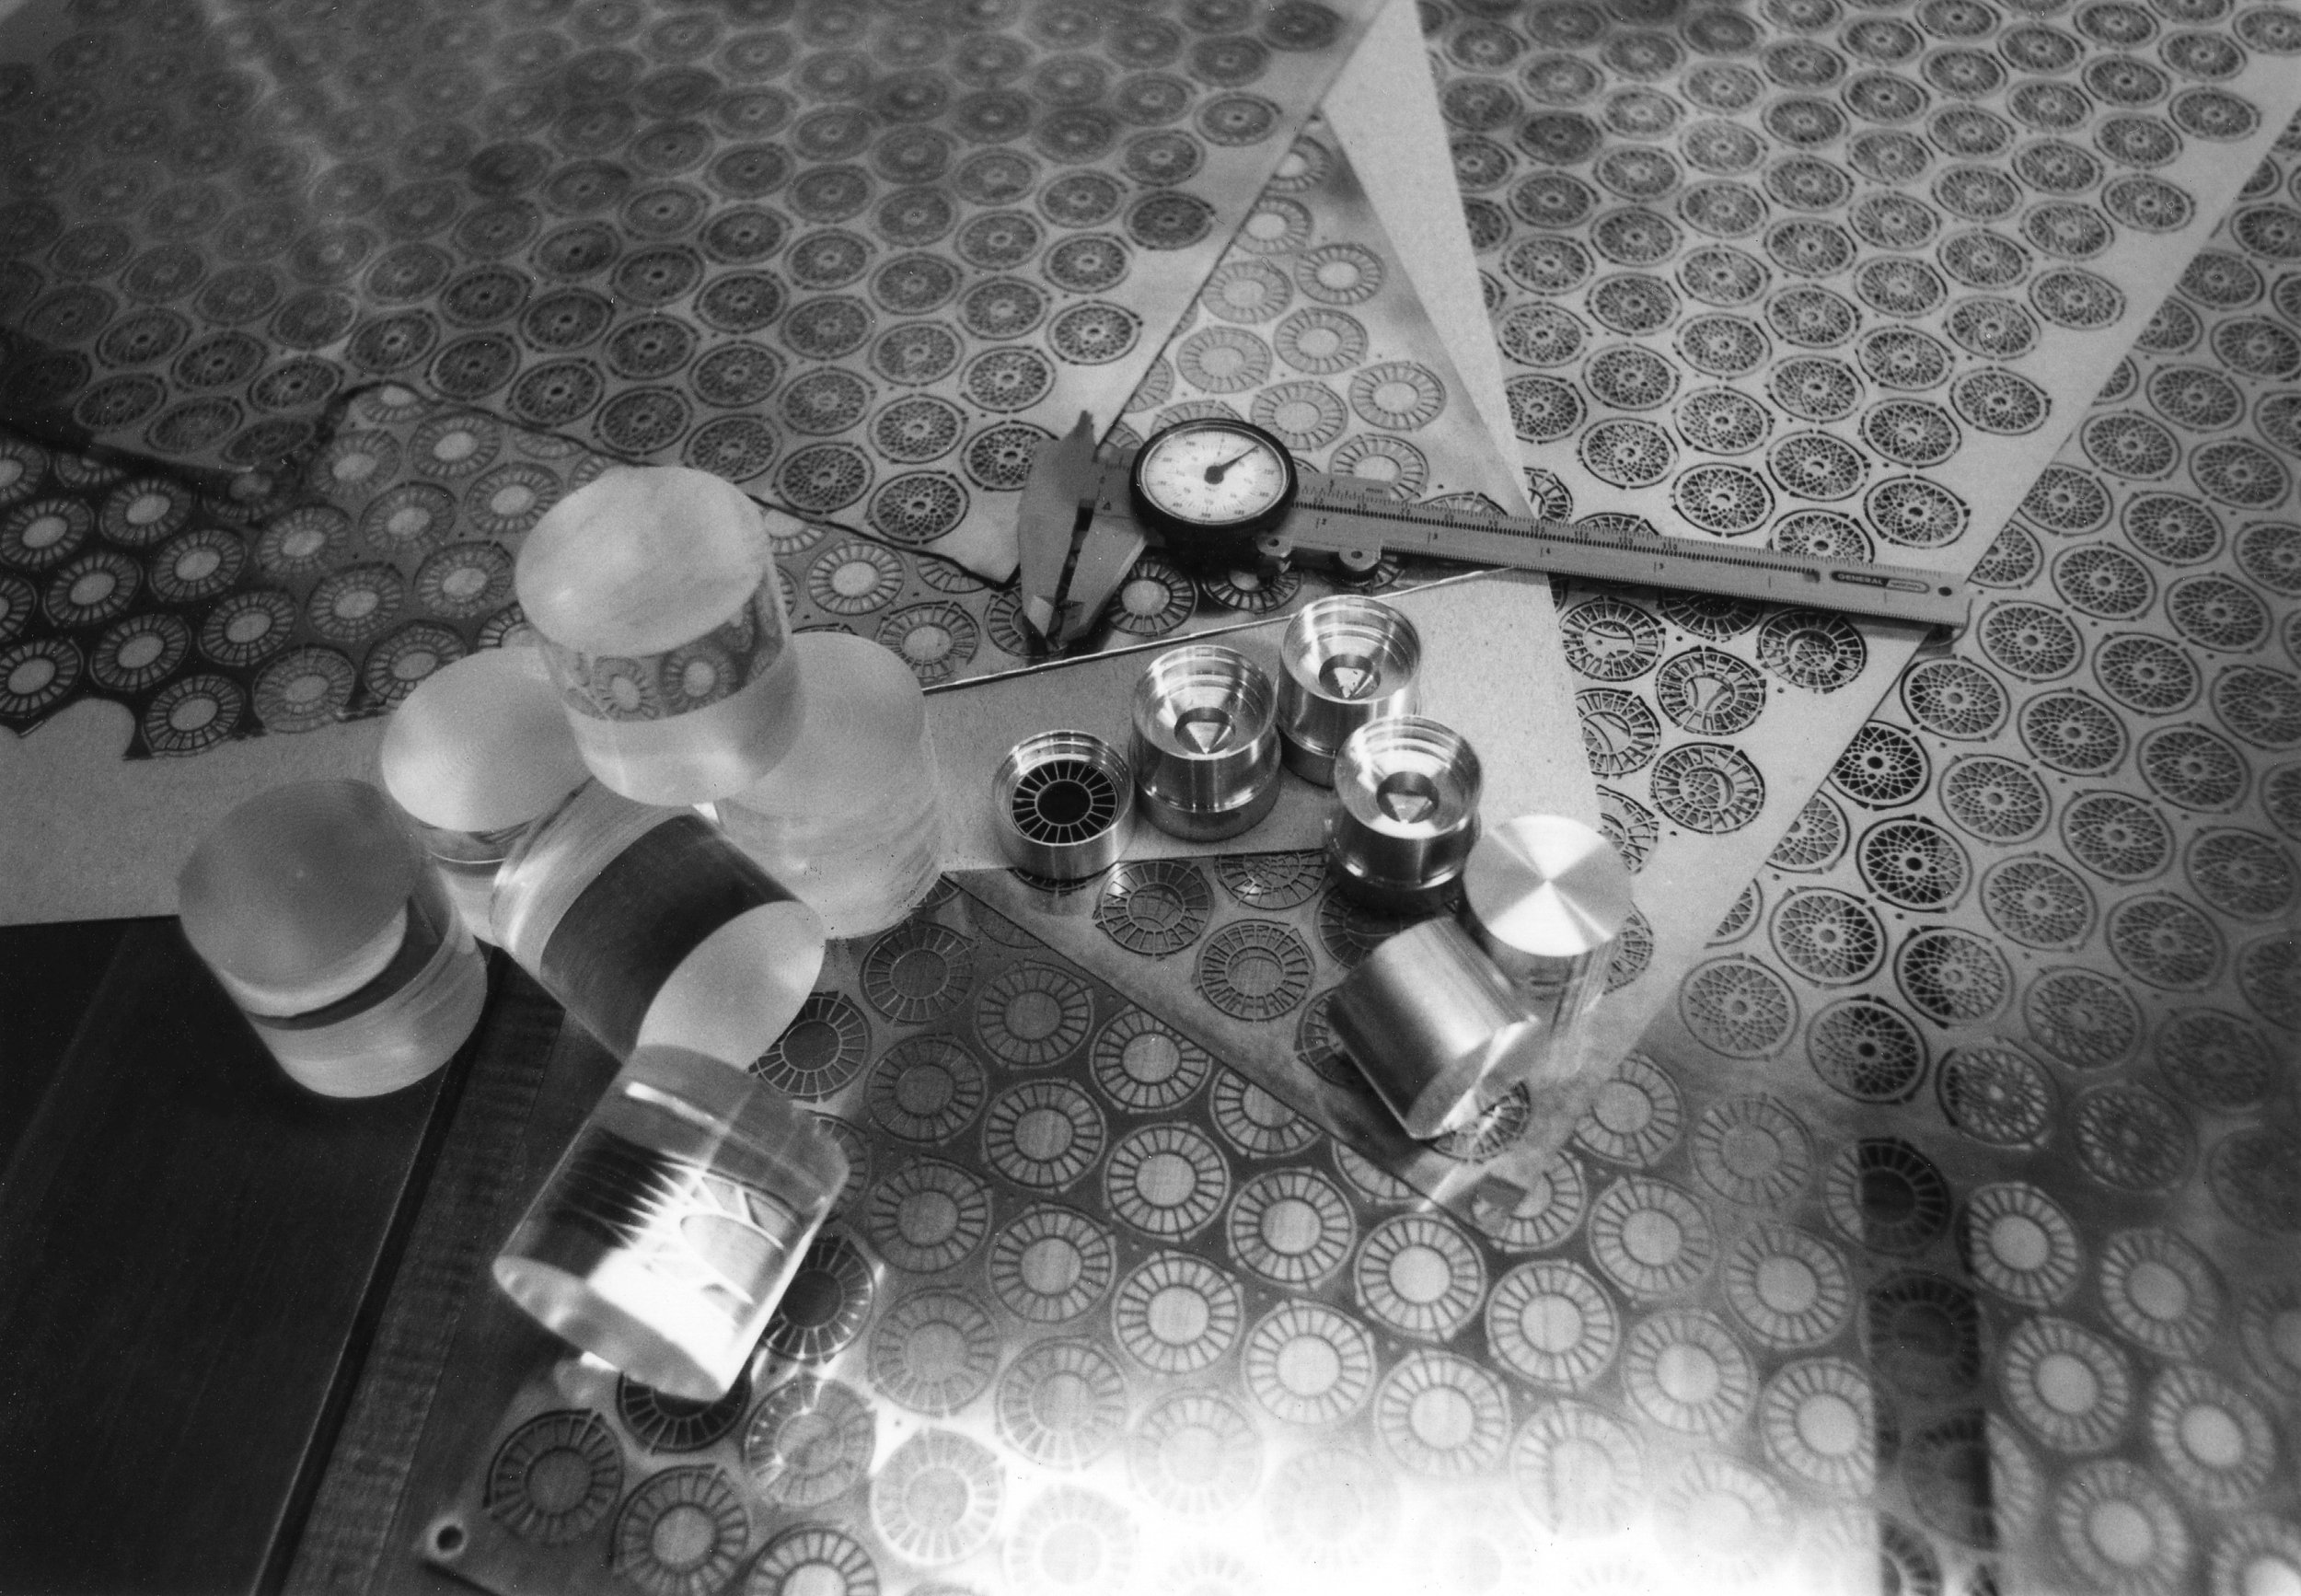
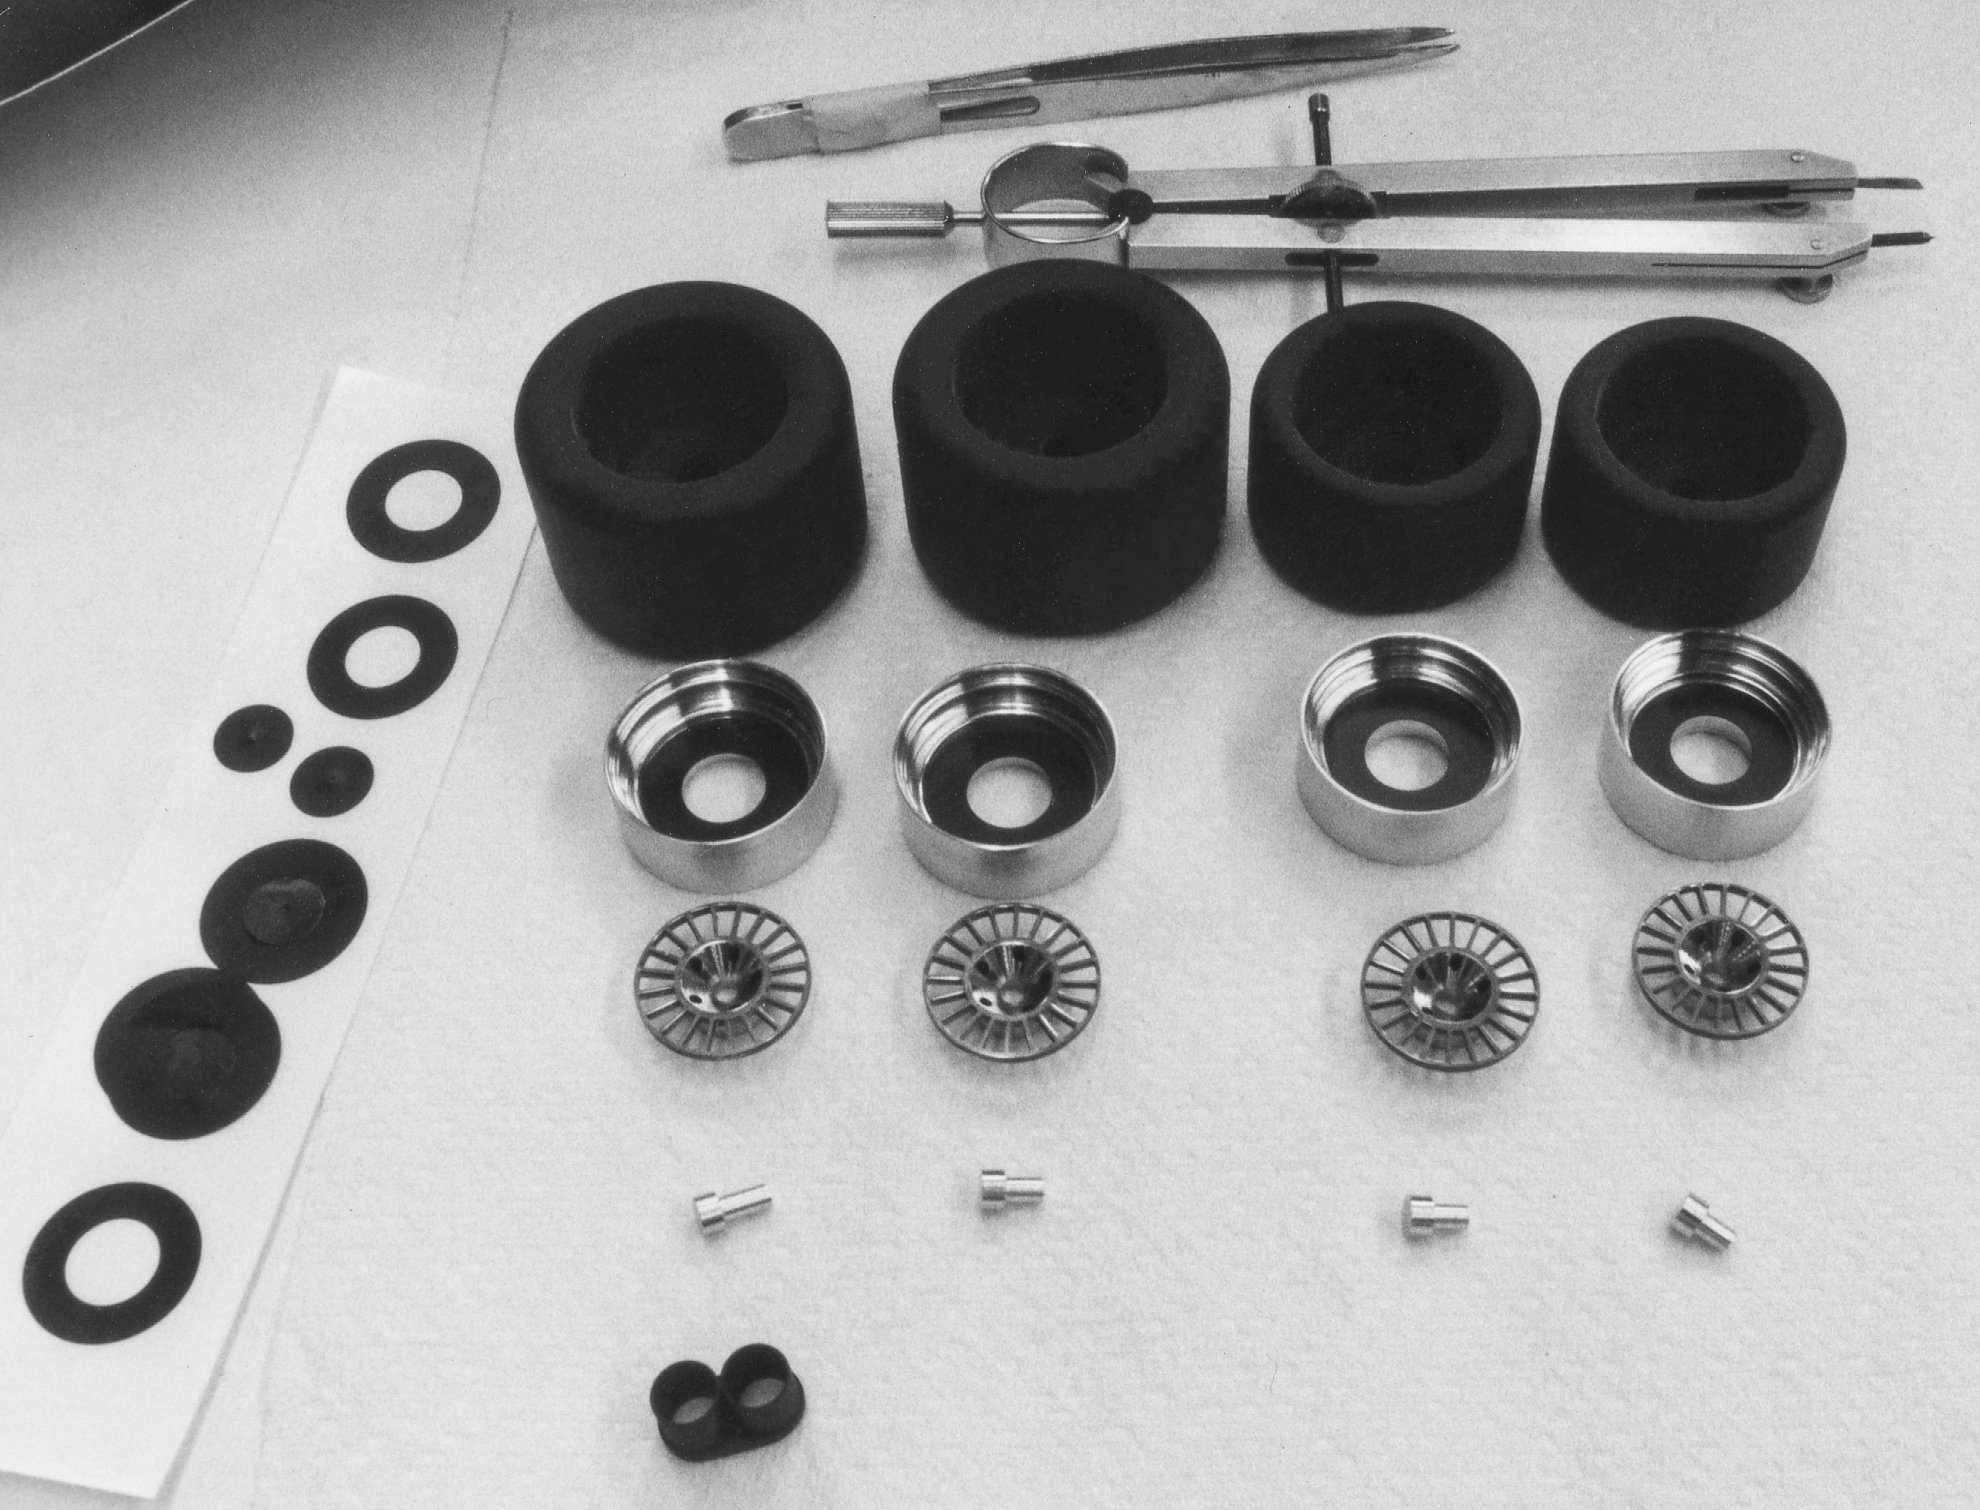
Most of the bits and pieces needed to make the wheels and tires. Photo-etched brass wheel centers made from my inked t-square, triangles and compass drawings. Five layers of 0.012" ( 0.3mm) were needed for each wheel.

Done before home computers when experience and a steady hand counted for a lot. Centers for a previously commissioned 280ZX Trans-Am race car are also shown.

Components were ready for final assembly. Exhaust pipe pair was fabricated from brass tubing. Wheel centers were constructed from a lamination of five layers of brass with a turned brass center. Wheel rims and center hubs were turned and polished aluminum and the tires were turned and painted cast acrylic.

Painting was completed and finish wet sanded. Windows, other graphics and tail lights were added using hand cut Scotchcal and vinyl. Here the #53 graphics were being added, each was 3 layers; white as a base, yellow and then black.

My hand-drawn ink drawings were used to make film negatives. The negs were then used to make pressure-sensitive Chromatecs. This was before I could make them myself so they were made by a typography firm. Applying the Chromatechs over the compound hood surfaces was tricky.

Next it was back into the spray booth for several finish coats of catalyzed clear to seal in all the graphics and give a great gloss.

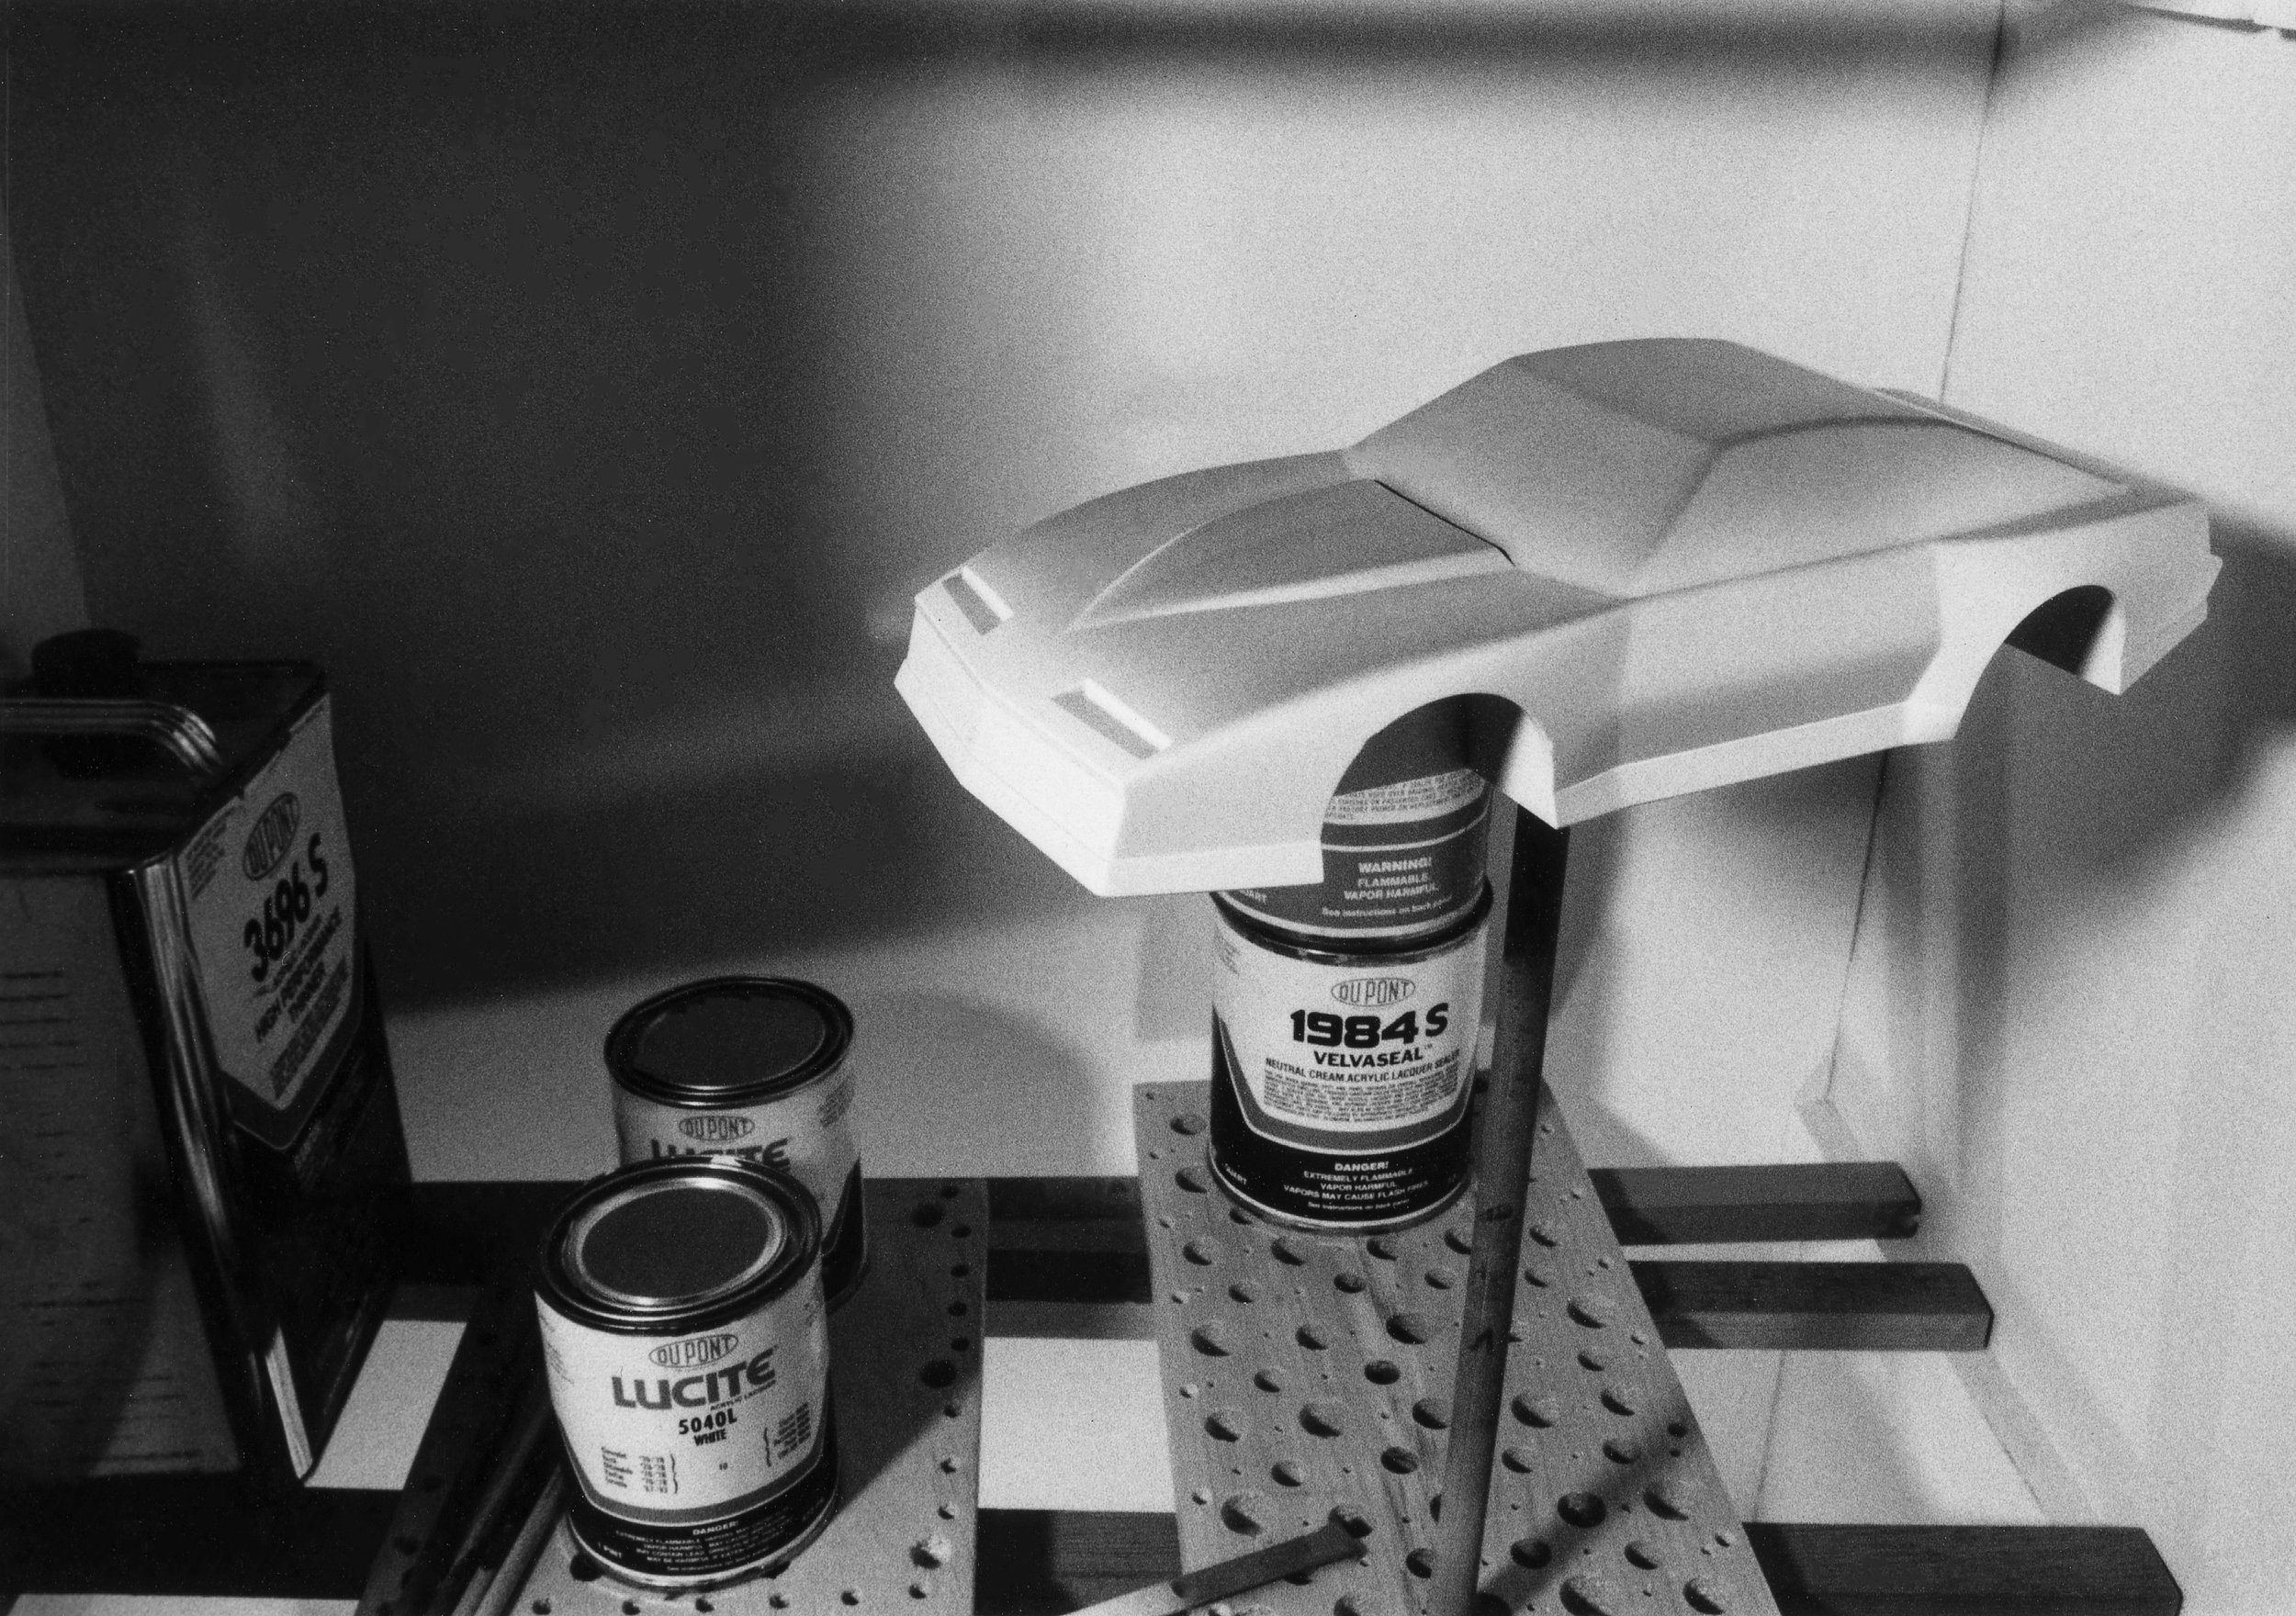
Automotive acrylic enamel colors to match the actual race car were used. I switched from acrylic lacquers shown here because the thinner caused swelling problems. Specific shades of blue and yellow came from the Petersen Tractor service trucks. Yellow and white stripes were each masked and sprayed.

That was a lot of taping and masking to get them right.

Priming is well on its way. It was time to make the rear spoiler by cutting it from aluminum sheet with a coping saw and bending it up.

A separate wing element visible in the color shot is made out of sheet styrene.

During sanding, shape refinements were regularly made with constant reference to the limited number of photos. If bare wood was exposed the surface was built back up again with sealer, primer and filler.

After every layer of primer surface imperfections were filled. This was one of the first cycles with seemingly more filler than primer.

The stance has been firmly established after progress on the wheels and tires. Body shape has been finalized and sealed, it's ready for an infinite number of priming, filling and sanding cycles.

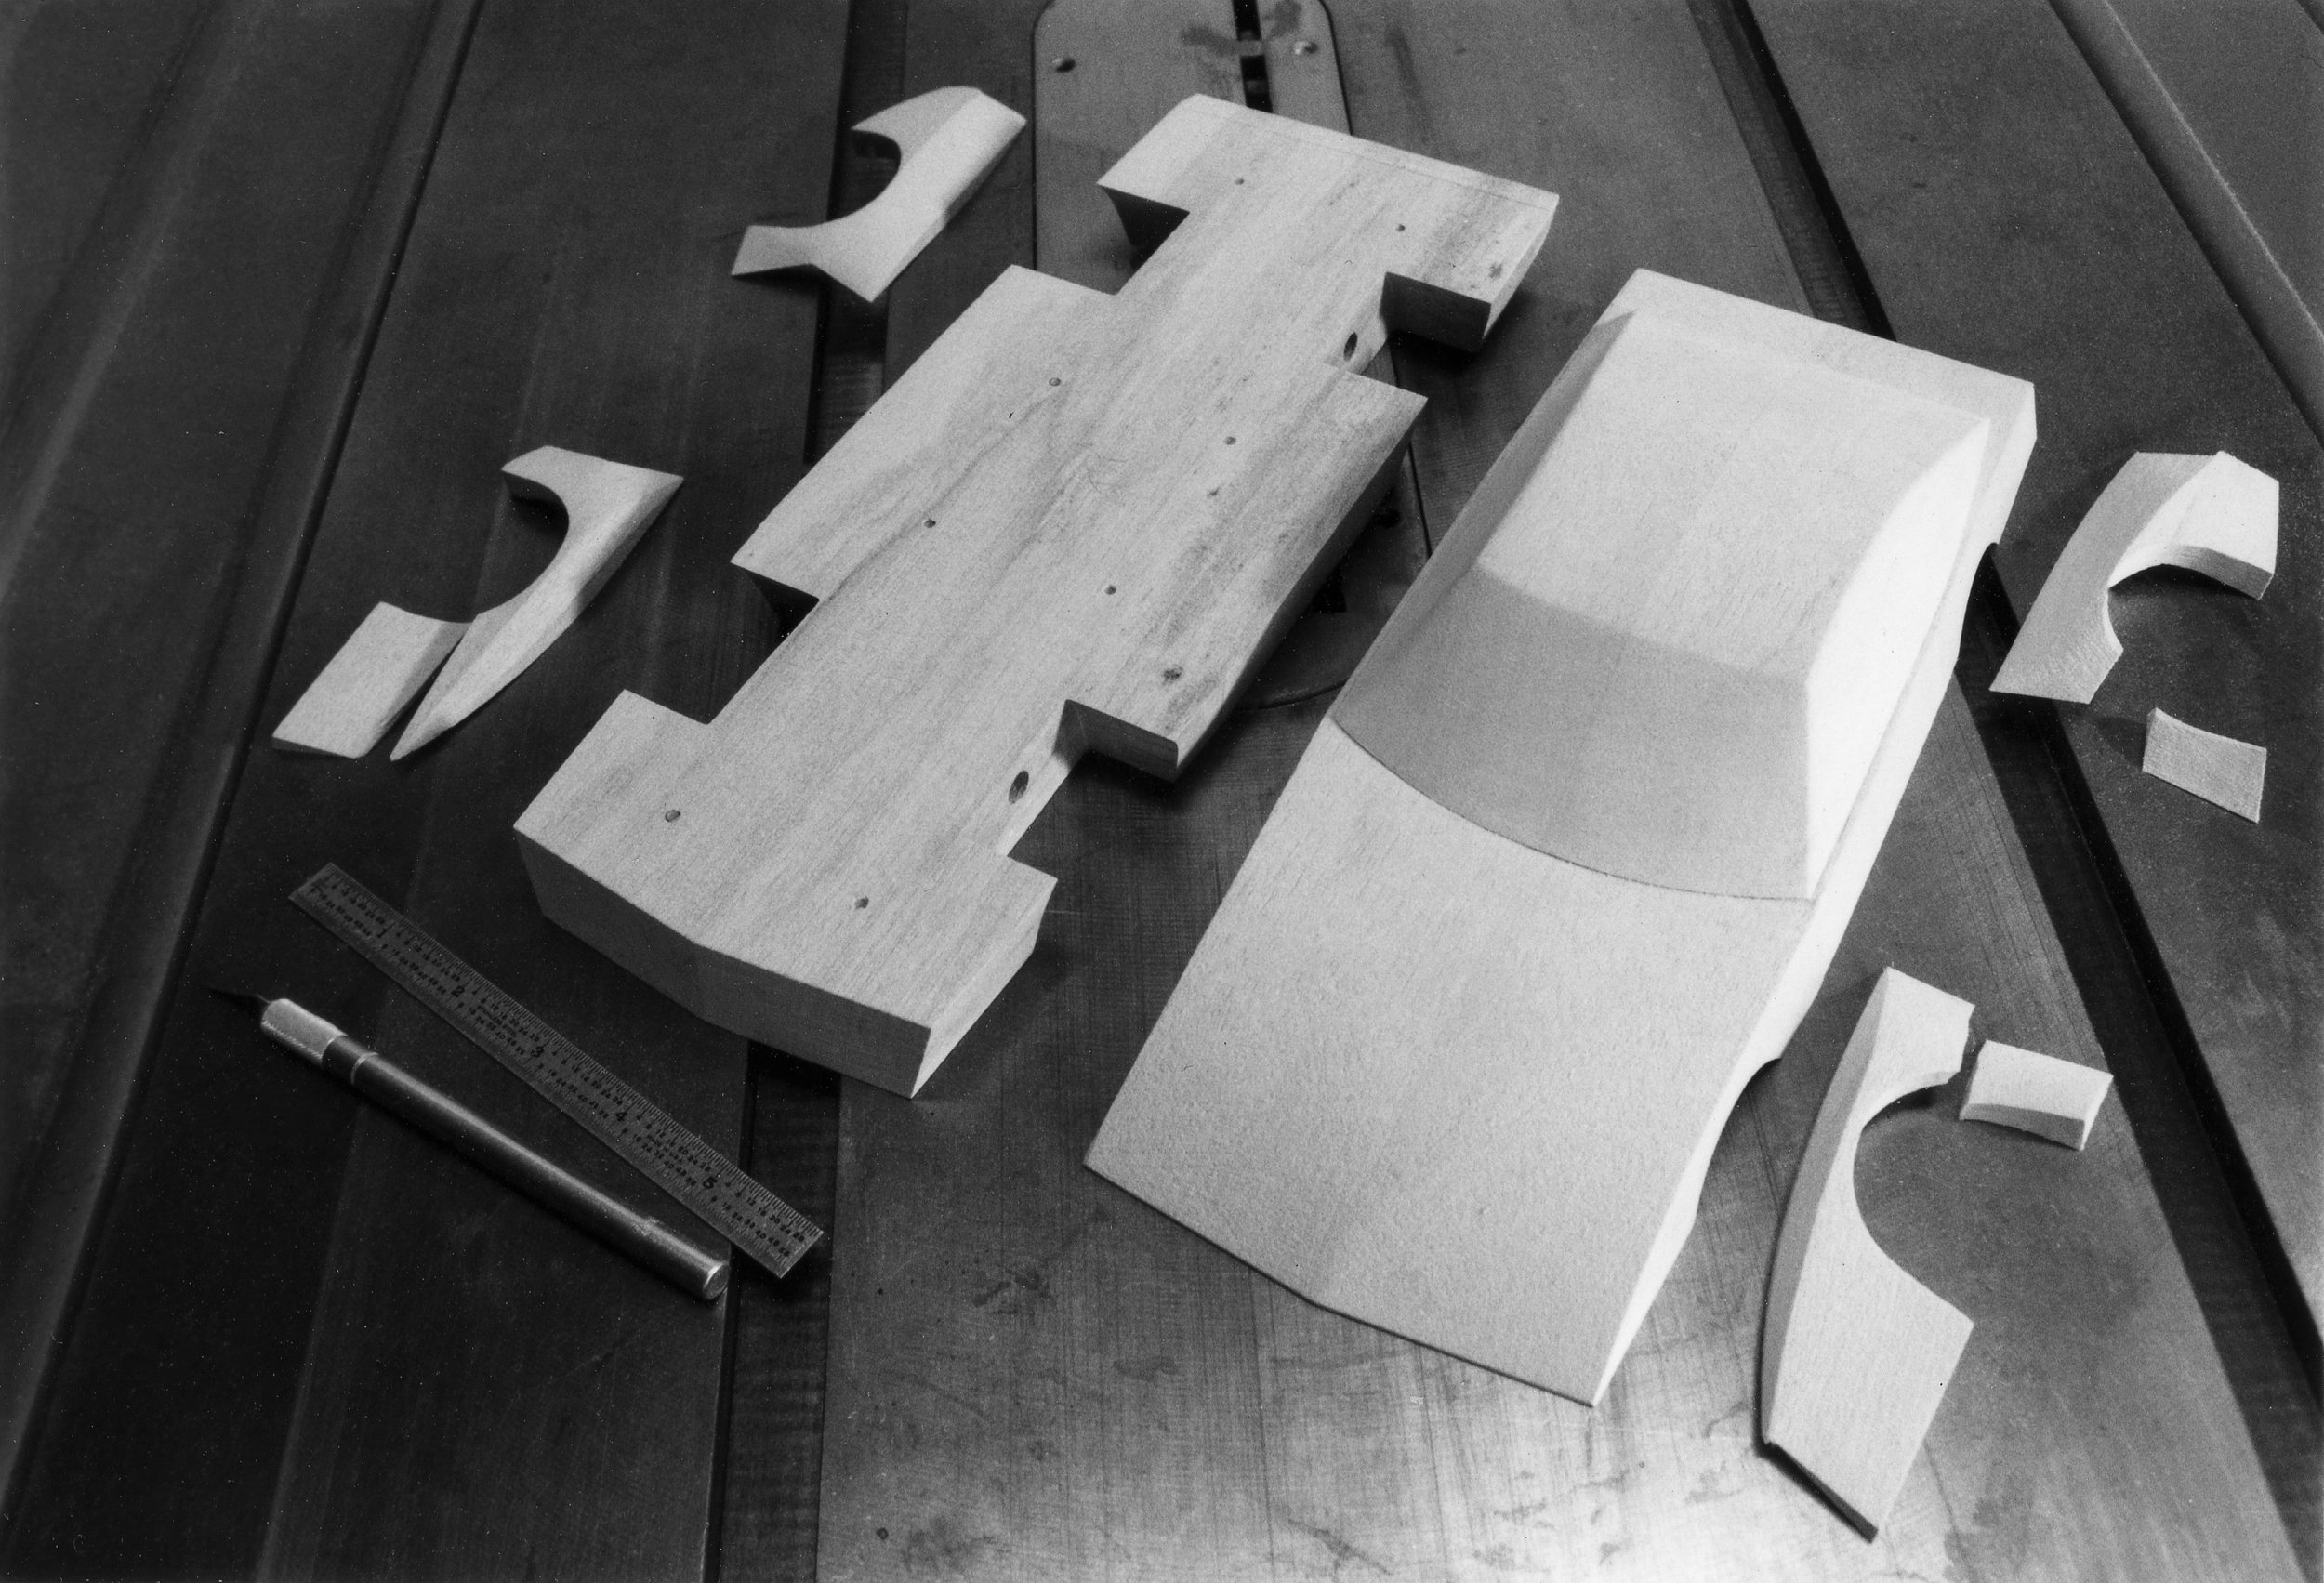
Making progress, greenhouse and the top body layer are glued together. Once the fender flares were built from several pieces and pre-shaped, the bottom two body layers were glued together and the flares were blended into the body.

Aluminum and cast acrylic blanks ready for turning. Body was separated into three layers, the stack was joined with screws for alignment and easy disassembly during fabrication.

Started out with jelutong wood blocks cut and glued using my now-standard butterfly method to have a consistent centerline to work to.

Original pencil side-view drawing. A few other detail drawings were done as needed. The layered construction concept was figured out and construction started.

No computer, no CAD - just basic dimensions and a few pictures to go by. Have learned more about the race car now with the internet than I knew at the time through calls, letters and shared photos.

Porsche G935 - 006 - Hood-Fenders-Air Dam


Co-Hog Porsche G935 hood surface development

I hope everyone is enjoying the simple joys that are at the heart of the holiday seasons. Be kind to yourselves and those around you.

The satisfying pleasure of making things is one of my primary joys so I've continued on the Porsche G935s by adding the hood, front fender and air dam blocks. The overall building block process is one of creating the needed interior lines and surfaces and then working outward to create the final outer lines and surfaces.

The hood blocks have had the side profile added and have been tapered in plan view for the hood opening creases. Then they were gridded out to visually aid in developing the hood surface.

Co-Hog Porsche G935 vertical hood curve

There is a slight plan view curve (the red line on the template) that necessitates the subtle surface development to keep the front hood line flat.

Co-Hog Porsche G935 hand shaping hood surface

Here hand-shaping is in progress to move the front corners of the hood surface down to meet the side profile line on each side of center and flatten the hood line all the way across.

Co-Hog Porsche G935 4 hoods ready to glue

All four hoods are shaped and ready to glue in place.

Co-Hog Porsche G935 front fender profile curves

Front fender top surfaces will be curved to match the outside fender line profile as shown on the yet-to-be-applied driver- and passenger-side templates.

Co-Hog Porsche G935 front fender tapers added

Front fenders are being tapered in plan view to match the hood taper and mate with the main body block.

Co-Hog Porsche G935 front fenders ready for glue-up

All glued up and ready for dadoing.

Co-Hog Porsche G935 front air dam dados added

The dado removes material to provide room to add the front air dam. The dado goes back to just about the front wheel centerline and up to just shy of the hood edge curve (red arrow).

Much wider fenders than necessary are used to allow for any tear out during dado cutting.

Porsche G935 front air dam block and pocket

The air dam blocks are butterfly cut pieces sized to fit into the dadoes. They are the bulk of the lower front end.

Co-Hog Porsche G935 air dams glued up

Air dam blocks are in place and the rear fender extensions have been roughly sized.

Co-Hog Porsche G935 3D printed exhausts

The exhausts are a bear to make because of the super tight inside bend radius. This is one of the first groups that I FDM 3D printed from my CAD data. They're promising, but I'm learning to make them even better to enhance priming and finishing.

The set of four is formed layer by layer on a base about 1/2" (12.7mm) wide by 1 1/4" (31.8mm)long. The exhausts are about 0.22' (5.6mm) in diameter.

Next up - 007 – 3D Printing the Engine Bay - The three Porsche G935 sculptures are almost entirely shaped from jelutong wood. Other materials are used sparingly and only where appropriate. Aluminum for the wheels, brass for wheel centers and details, cast acrylic for tires - and now my own 3D printed parts.

Merry Christmas and a Happy New Year!


Porsche G935 - 005 - Greenhouse


Co-Hog Porsche 935 builds - next steps photo

Thanksgiving is a busy time here in the states (we would be smarter to have it a month earlier like Canada). I hope you and your families all had jolly good feasts!

Back to cutting wood. I always like to show the seemingly random jumble from which the finished pieces are created. It is actually a big help for keeping my next steps firmly in mind.

The Porsche G935 greenhouse is one of the most important pieces to be added since it determines the position and shape of so many other parts.

This is where the CAD work really pays off. The resulting templates give a great starting point to help define the 3D features while keeping track of the overall construction.

Co-Hog Porsche 935 builds - next steps photo

The template for the side window quickly showed that the starting blocks were a bit short. Small butterflied blocks were added to the ends and the rear top profile was roughly cut on the bandsaw.

Co-Hog Porsche 935 builds - next steps photo

The bandsaw was also used to remove the bulk of the material for the bottom profile.

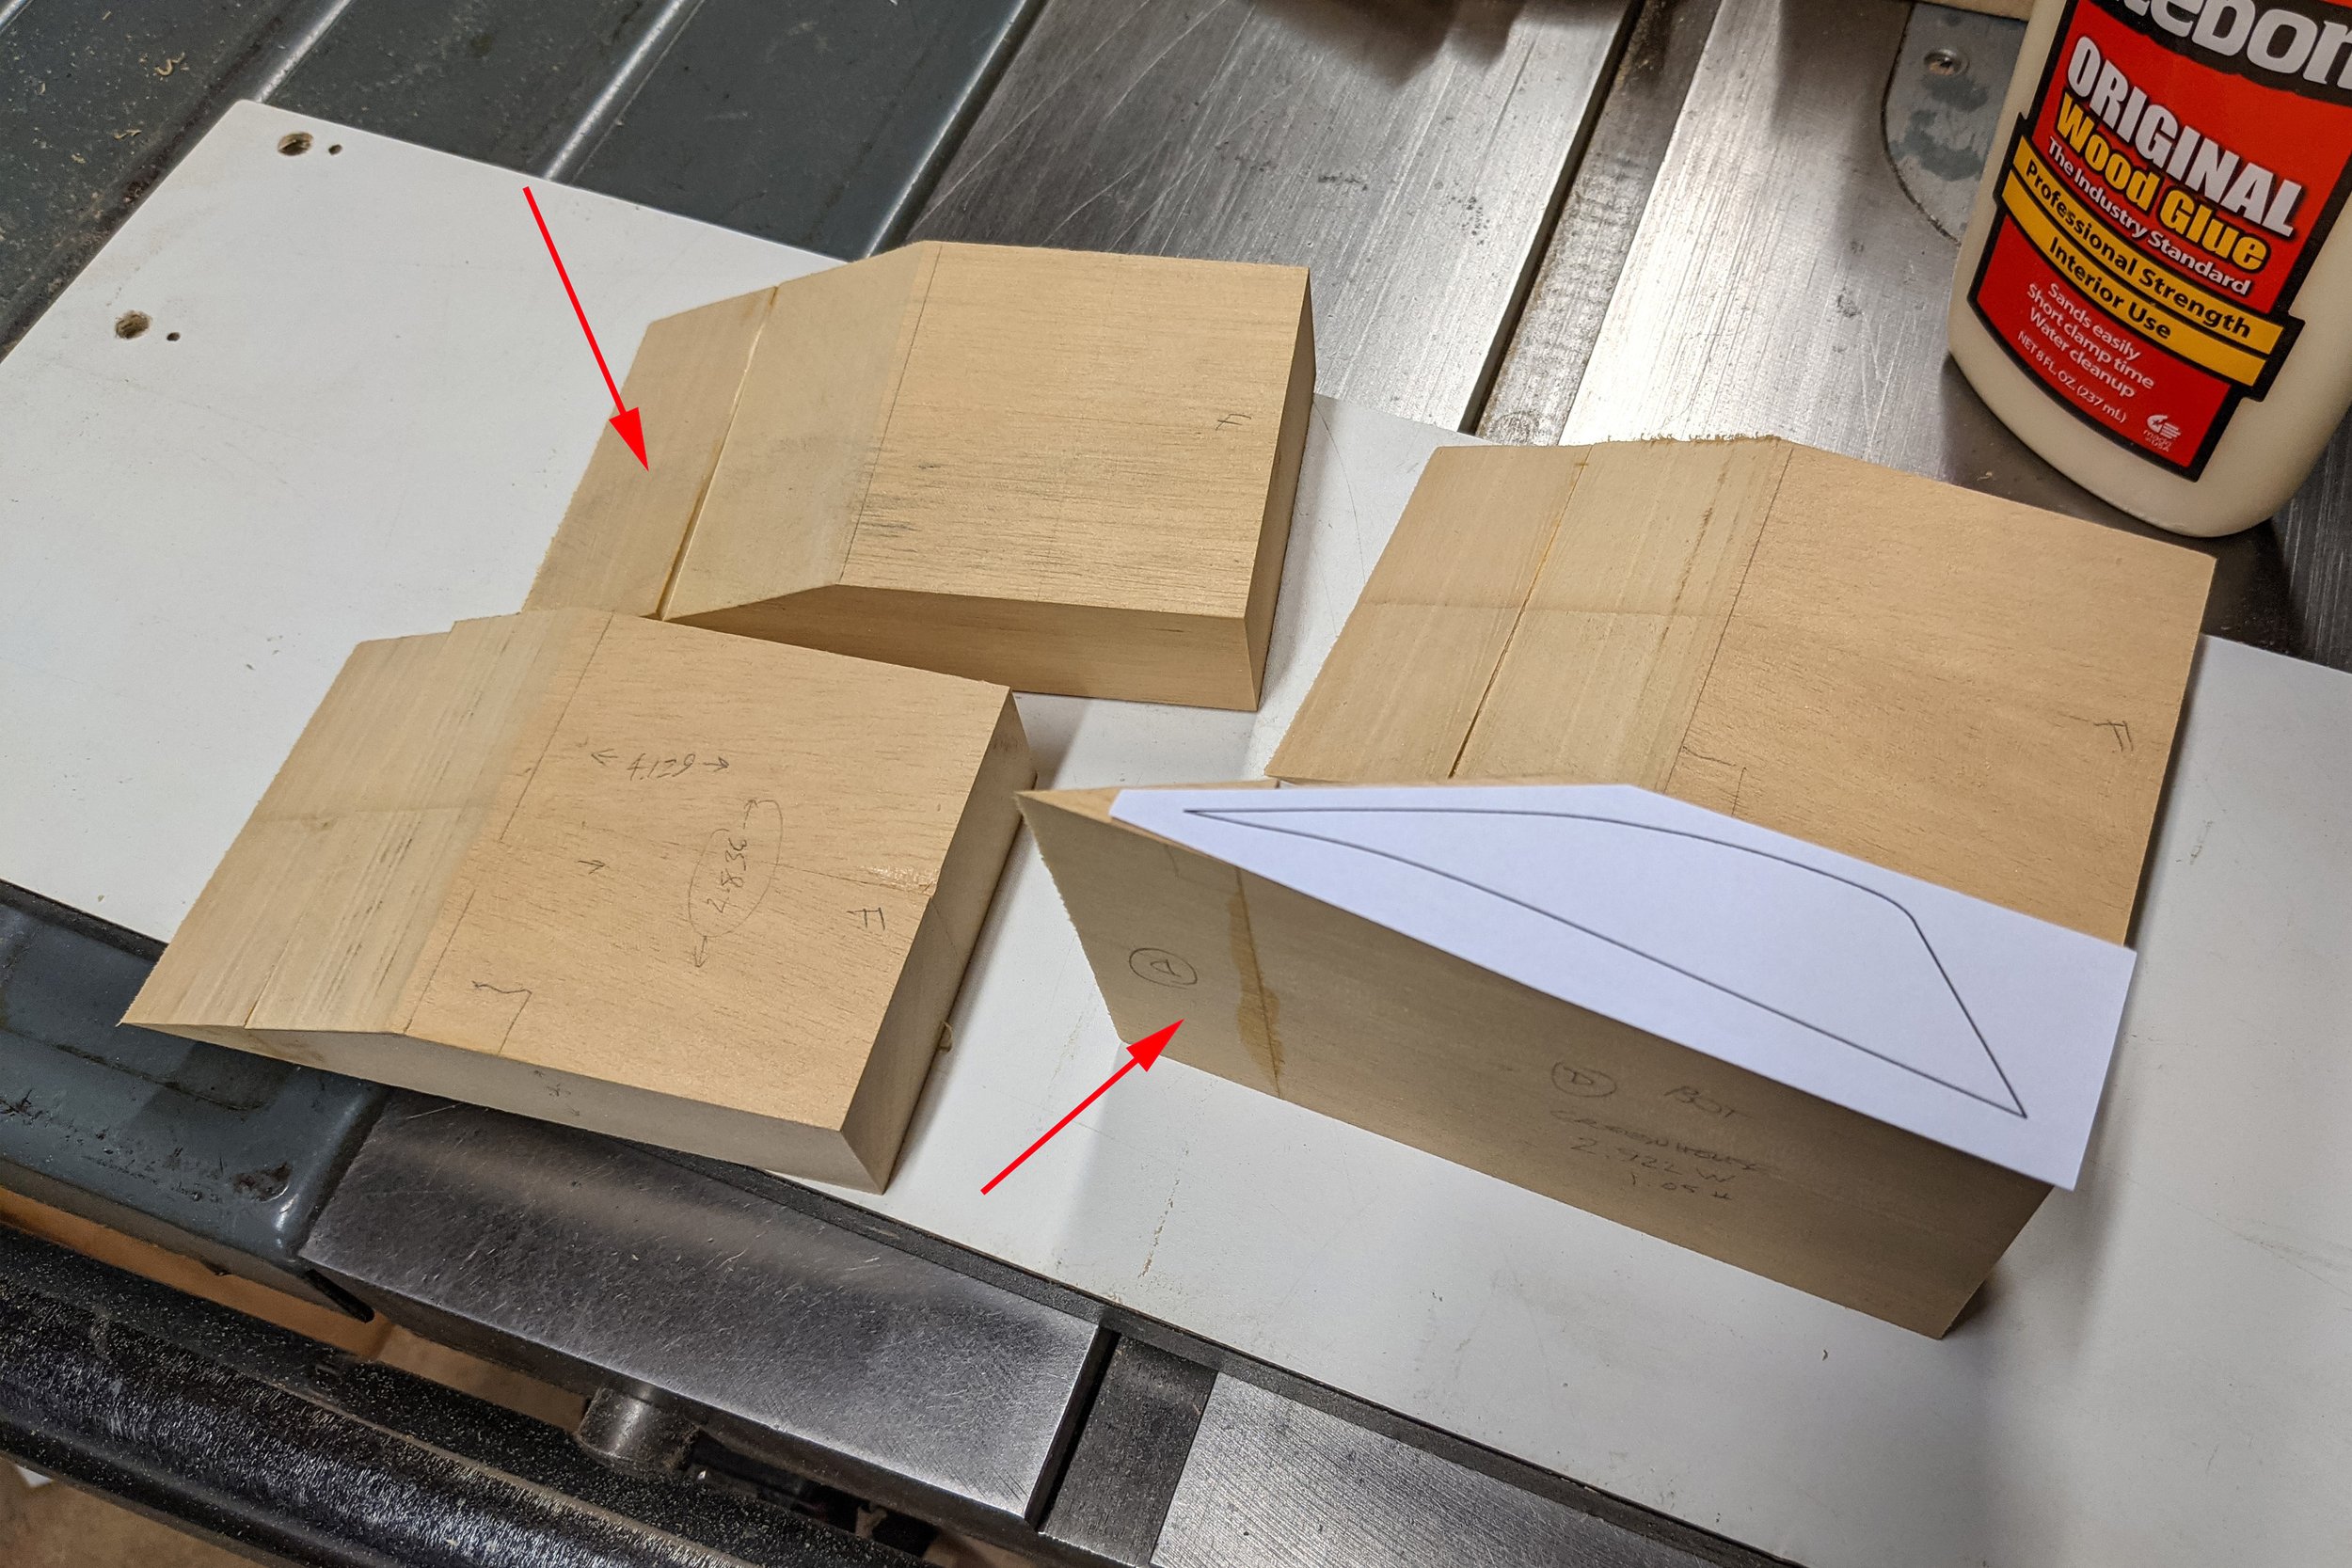
The top arrow points to my golden squaring block to which I attach the various blocks with double-faced tape. Performing the proper sequence of operations is important in order to have a square reference surface available as long as it's needed.

The bottom arrow points to the glue line where the tip was added.

Co-Hog Porsche 935 builds - next steps photo

The bottom profile was sanded close to the final line on a drum sander and then hand shaped for a final fit.

Someday I'll get an oscillating sander to make these inside curves easier.

Co-Hog Porsche 935 builds - next steps photo

The top profile was added using the large disc sander and then hand sanded.

I use a 12" sander to remove the big whacks and then a speed-controlled 5" sander for the finer bits.

Co-Hog Porsche 935 builds - next steps photo

The greenhouse tumblehome (the angled, always changing surface from the A pillar back to the tail) requires a template for guiding the top and bottom curves. They are projected onto a flat plane in CAD, but each curve (red arrows) is actually a different length in 3D.

I measured the real length of each segment of the top and bottom curves with a flexible ruler and then adjusted the templates using Photoshop to stretch each segment (green dots) by the proper amount.

The templates have slots cut in them to allow visual lining up of the template with the greenhouse centerline during template placement.

Co-Hog Porsche 935 builds - next steps photo

Templates are held in place with double-sided artist's adhesive. It comes in sheets and gives better coverage than tape on larger surfaces. It also helps keep the template edges in place.

Pencil hash marks are there to make sure that I sand to the correct lines since both the top and bottom curves are on each template.

Co-Hog Porsche 935 builds - next steps photo

Initial freehand shaping of the tumblehome surfaces was done on the big disc sander. I was able to get quite close on the top line while regularly checking the bottom line and keeping the overall surface flat.

Co-Hog Porsche 935 builds - next steps photo

The tricky part was to not sand off any of the top or bottom guide lines so that there was still material left to finish sand.

Co-Hog Porsche 935 builds - next steps photo

Finish sanding was done by hand with sanding blocks. A relief pocket was removed leaving a generous gluing border. That allowed me to get a better fit overall.

Co-Hog Porsche 935 builds - next steps photo

After final shaping the greenhouse was glued in place - ready for the main hood section to be added.

Next up - 006 – Hood-Fenders-Air Dam – Front end work on the Porsche G935s with the addition of the hood, front fender and air dam blocks.


Citroën 2CV


It helps to have great friends! My wife and I first met at the ad agency where we worked. Our trajectory towards marriage was aided by several close friends at the agency. Chief amongst them was Trish (Patricia) who was the agency's photographer extraordinaire. My clients and I spent many long hours in the studio with Trish.

When I left the agency to start Co-Hog Toys and make a dream come true, Trish's friendship led to her taking all of the early photos of Co-Hogs that I have - always with a smile and with incredible generosity.

As a small thank you for all of her creative efforts that helped us so much, I made this Citroen 2CV to remind her of her father back in France and his beloved flat orange 2CV. Fittingly for the time and place he had painted it with a brush without a thought. In our world of perfect everything (even in the 70's) this seemed wonderfully outrageous to me. It was a joy to make this tiny token of thanks.

It was about 6" / 15.2cm long and made entirely of simple yellow pine. I should remember, but don't, whether I, too,painted the whole thing with a brush or not. Either way, it was appreciated and our friendship remains after all these years.

Co-Hog F1 Racer & Teams


Information about the Co-Hog Formula One Racer, One F1 Racing Teams and Two F1 Racing Teams have been added to the Original Co-Hogs page.

Each race car and truck was made entirely by hand using clear pine and then later with poplar with maple tires. The paint evolved quickly from simple color washes to specific automotive color finishes. This is #32 of 60 in a deep metallic blue. Automotive Scotchcal tapes were used for the striping.

New information about the other marques in the Co-Hog series will be added as I develop the graphics from archived materials.

Porsche G935 - 004 - Engine Bay


Experience from making the 935 Artist's Proof led me to figure out a way to avoid having to hog out the entire engine bay with chisels. CAD preparation let me develop a way to surround the space instead.

The main body block is a bit like the monocoque in a race car. It's load bearing and everything else is built off of it. It runs from the base of the windshield to the rear fender edge. In order to leave space for the engine bay and still create the side profile, a small extension piece is needed.

002 12 c1.jpg

This is the extension from the main body that will carry the main body profile through to the rear fender edges.

003 10.jpg

Previously glued up butterfly stock was rough cut to thickness. The measurement gage block allows faster bandsaw set ups.

004 10 c1.jpg

The extensions have been thickness sanded and cut to nominal size, ready to be glued in place.

006 10.jpg

All glued up and sanding has been started. Since squareness is important, the blue tape allows me to do my preliminary sanding quite close to finished dimensions without taking off any needed material.

Careful incremental sanding gave indications on the tape that showed it was close enough to be finished sanded by hand.

007 12.jpg

Arghhh! CAD and reality did not match. My mind was elsewhere when I determined the position of the extensions. The good part is that I could add material in a more controlled way than I could have removed it.

New extension gap-fillers were made and then it was back to gluing and sanding. Measure as many times as it takes and cut once.

Once the correct dimensions were reached, I made and applied the side profile templates and then carefully added the main side profile.

Next up - 005 - Greenhouse - The Porsche G935 greenhouse is one of the most important pieces to be added since it determines the position and shape of so many other parts.


Porsche G935 - 003 - Building Blocks


I'm building the G935s from a bunch of blocks that are individually shaped, joined together and then shaped some more. To do that I need to plan out what blocks I'll need using the CAD geometry as a guide. Overall symmetry is necessary to look right so a method of alignment is needed. The jig plates are done and now the dowel pins will be added to use as the positioning guides for the entire construction.

Overall symmetry is necessary to look right so a method of alignment is needed. The jig plates are ready and now the dowel pins will be added to use as the positioning guides for the entire construction. Once the dowel pin locations are transferred and drilled into the main body block I can repeatedly put the growing construction of blocks back on the jig to ensure continuing symmetry. The key to that is that each centerline block must have an indelible line to match the scribed jig plate centerline. This method worked well on the 935 AP.

001 10.jpg

The main jelutong blocks (one is in the upper right) have been planed and are ready for divvying up into individual piece. Planning before cutting should save some extra work.

003 10.jpg

The main blocks are split on the bandsaw. One of each pair of split blocks is reversed to butterfly the grain and then they're glued up. The glue line gives the all-important construction centerline.

005 10.jpg

With the main blocks gathered together for the first time it looks more like a tank than a 935. That will gradually change.

007 10.jpg

Once the holes for the jig plate press-fit dowel pins have been marked and drilled, locating pins (the pointy bits) are put in. Then the block can be carefully positioned over them using the front face and the centerline. A gentle tap and the exact locations are transferred to the block.

008 10.jpg

The final result is that the main body block is centered on the jig plate. The ruler is a tiny tick off center - blame the photographer (me).

Next up – 004 – Engine Bay - The main body block is a bit like the monocoque in a race car. It's load bearing and everything else is built off it. In order to create space for the engine bay and still define the rear fender profile, a small extension piece is needed.


Porsche G935 - 002 - Concept Revision


Here's how all three versions compare.

Here's how all three versions compare.

It has been awhile. Did some fantastic traveling to see family. Then I've been dealing with Lyme disease and having to lay low for a good bit. Long term effects remain to be seen. But I've still made some progress in the shop.

The biggest advance has been a significant change in the overall character of the G935s for my sons. I finally realized that I was simply making incremental changes to the AP version and not really getting back to the original Co-Hog Toys’ goal of creating a smile with every glance.

So, they've been modified to riff on the early stocky, wide, pugnacious Co-Hog proportions. Wheels and tires will be close to the AP version because the play of detailed wheels on a properly stanced, but highly simplified body is still the key.

 Let me know what you think.

Since I learned a few things from building the AP version, I'm spending more time in CAD to refine my building process up front rather than so much building and fixing all along.

Since I learned a few things from building the AP version, I'm spending more time in CAD to refine my building process up front rather than so much building and fixing all along.

006.jpg

Finally bought a new drill press thickness planer to replace the 35 year old original. Sharpening the old rakers is just not working out and I can't figure out why not - yet. They're turned inward in the picture to protect the cutting edges.

All of the jig plates and main blocks for four G935s are cut and planed flat.

All of the jig plates and main body blocks for four G935s are cut and planed flat.

Next up - 003 – Building Blocks - The Porsche G935s are started by building up a variety of blocks that are individually shaped and then joined. More blocks are added, and more shaping is done to gradually define the overall profiles.